- REVIEWS
Camera Reviews 
More Reviews Mobile Reviews Photography Reviews - GALLERIES
- VIDEOS
- BUYER'S GUIDES
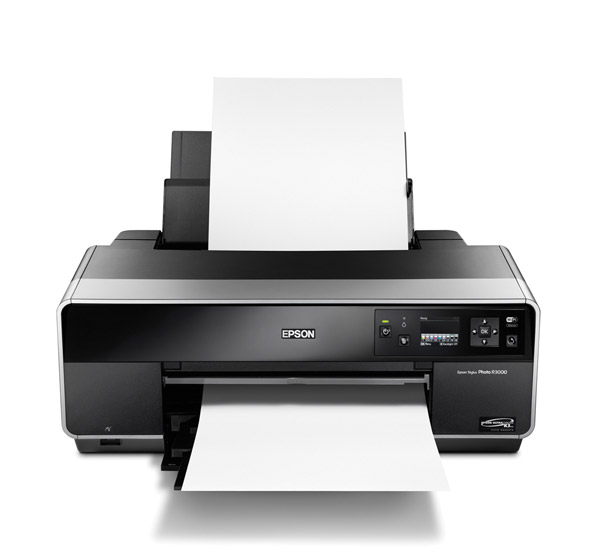
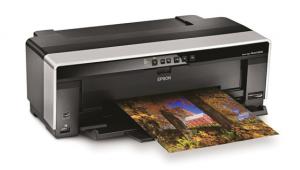
Epson Stylus Photo R3000: An Affordable, High-Quality Inkjet Printer
There are those who make prints often, and there are those who make prints occasionally. The split, you might think, is between amateur and pro, but that’s not always the case. Some “amateurs” print as much if not more than some pros, and some pros make their own prints only when they have time, usually for their personal portfolio, but certainly not on every job. That’s why pigeonholing the Epson R3000 in terms of intended audience, amateur or pro, is not so easy. It certainly delivers the quality you might expect from a higher-end Epson model, given its attributes, ink set, fine nozzles, and highly evolved print head, etc., but it’s by no means a volume/production printer, given its single sheet feed for “art” paper, albeit with larger capacity ink carts than some past 13x19” printers, and roll feed capability.


Pro-Like Specs
The printer could be said to span the pro/amateur ranking, much like some D-SLRs these days. The ink carts have a much higher capacity than the amateur Epson models (25.9 ml for the R3000) but are smaller than those available in pro models. There are nine inks in all, with Epson’s UltraChrome K3 ink technology, a leading pigment-ink offering. When you work with an Epson printer of this class you get to use Epson’s Advanced B&W mode and the Epson inks, to me one of the best combos in the business for making neutral, warm, or cool exhibition-quality prints. The printer offers two grays (light and “light, light”) and a matte and glossy black, making it a nice three-grayscale set for each surface. There is auto-switching of black inks with both matte and photo black on board; I timed a switch and it took about 9 minutes the first time I did it.
This 13” printer can handle all sorts of surfaces and weights, print on CDs, and even be set up to work wirelessly within your home or studio network. There is a front and stack load type feeder, although stacking is practically limited to those papers rated at or below about 240 gsm, or standard printing paper. You can load thicker stock there but you are tempting fate in terms of surface roughing and perhaps even jamming; for thicker stock, such as cotton rag and so-called “fine art” papers (like Epson’s Velvet Fine Art), you are limited to single feed work through the front.
One way around this is to work with rolls of such paper, which are easily loaded using the supplied roll feeders and which automatically set up the printer based on the paper you choose in the profile. Simply put, stack loads are run through a kind of tire tread feeder; front load and roll feed makes the rollers lift slightly, then gently close down on the paper for a smooth ride.


In Use
I worked with the R3000 for a few weeks off and on, and tried out both Epson and “third-party” papers, including Ilford’s new Prestige Smooth High Gloss and an Innova 335 gsm cotton gloss; for the Epson papers I worked mainly with Velvet Fine Art and Ultra Premium Luster. Frankly, when using a printer that can output such quality, working with low-quality stock is a waste of money. I used both Epson and custom profiles supplied by the makers, as well as Epson’s Advanced B&W mode on all paper surfaces. I worked with both the stack loader and the sheet feeder.
Setup and prepping the printer is easy, as is loading the inks and drivers. Epson does supply a Quick Start guide as well as a Basics booklet, plus they have videos online in the support section of their site—just google “Epson R3000 video support” and you’ll find them. (Scroll down to the Epson site’s video technical support link on the first page of the search results.) More nuanced information is also available in the extensive instructions found on the supplied CD. You might not even need that, though, as operation is fairly straightforward, except for a few tricks you might need to employ.
That operating methodology is also aided by the LCD screen on the printer itself, which unfortunately is located not atop the printer but on its face, making you stoop over (unless you have the printer high on a shelf) or slide your chair over to peer into it to see what’s up. The screen is also quite small, though legible, and while the guidance there is evident and efficient, it was one feature that I found rather poorly designed on the unit. (In the spirit of full disclosure I am probably taller than your average printmaker but nevertheless I imagine others will find the screen size and placement a bit awkward.)
I started out with a very lightweight paper, a 215 gsm film-based media from Ilford, and found that the combination of that very high gloss media and the inks and fine print head of the R3000 produced what I can only describe as prints with startling clarity and color. However, due to the very thin weight of the paper, and the near electrostatic cling between the stacked sheets, the printer had a tendency to pull in more than one sheet at a time. This I ascribed to the paper characteristics and air conditions, but I mention it to make you aware that even though you can stack load medium to lightweight paper you need to be aware that you may have to run some stock singly through the stack loader anyway. I did run a batch of Epson’s Ultra Premium Luster using the stack loader (a 10 mil, 240 gsm stock) with no problem.


© George Schaub
Also, the Ilford stock is an “RC” support and is of the “instant drying” type, not something I recommend you use with a pigment printer due to the possibility of gloss differential on the surface, something I noticed only on images with very large blocks of black adjacent to lighter tones. A gloss optimizer might help here, but Epson chose not to include same.
The front loader is simple enough to use, though this is where the throughput slows up and you find yourself making fewer prints in a session than you might with a faster tray throughput system, like with the more expensive Stylus Pro models. When I’m really cooking I like to process numerous images for printing in a row and keep working while the printer does its thing, setting up a printing queue. In the case of the R3000 I had to break that rhythm to get up and load another sheet of paper for each print.
In any case, to load the front loader you first close the stack loader tray (if you had been using it), raise the holder in the far back of the printer, then push the ribbed tab on the front loader to open it, which then springs down to receive the sheet. You then line up the paper with a line on the lip of the front loader tray, and push the OK on the front control panel. This is where the design gets clever, because front loaders of the not-too-distant past pushed the paper through out the back on a straight path, meaning you had to have a good deal of space between the back of the printer and the wall behind it. Here the paper feeds through and up into the back vertical tray at about a 45-degree angle, and eliminates the need to keep the printer far away from a wall.

© George Schaub
After the paper feeds, you then push the front loader tab in and that drops the rollers (gently I’m told) onto the paper and you’re ready to go. This becomes a routine procedure quickly enough, although I did have some skew issues early on until I learned how to exactly shimmy the paper against the right side of the loader tray (at the base and the back) and then there was no issue.
The driver is simple enough to master, and if you’ve printed with any Epson in the past few years it will be simple enough. I worked with a MacBook Pro (v6.2) and USB 2 cable with Photoshop CS5 and CS6. When you go to the File>Print dialog box you set the color management first (Photoshop or Printer) then go into the setup.
If you want to have Photoshop manage color then make that choice first, then go into the dialog box and pick the paper size, etc. If you want to use Epson’s Advanced B&W mode you need to set Printer as the color management first; if you don’t, the Epson Advanced B&W options are grayed out, a kind of fail-safe against double color management and all its ills, I am told. You then go into the Print Setup drop-down menu and choose Color Matching and choose Epson controls, then you can get into Advanced B&W mode. A bit of gymnastics, but I am told by Epson folks that it has been imposed by Mac and Adobe on Epson. Frankly, I think it’s more confusing than helpful, but there’s no fighting city hall I guess.
Another possible snag is when you pick the paper and the paper size (for example, I used Epson Velvet Fine Art>13x19 Fine Art). This sets up the printer for the paper and sheet feed. This is where lots of folks get jammed up, so paying attention to setting paper path and type here avoids a miscommunication that will cause the printer to stop and dialog you that there is a paper mismatch. Other than that printing is easy and quick.
The rewards of using Epson Advanced B&W mode with this printer are many, and although I have been a fan since it began it seems to keep getting better, except of course for the interface which still shows a mock image and not a live view of what your print will look like, unlike what many plug-ins do when choosing their presets. Seems a bit archaic, but in the end it works, with some experience, so it’s hard to complain too much.

© George Schaub
It is always difficult to gauge print number throughput per cart, as the inks I use in my images will differ from yours. I probably went through about 50 to 60 prints (all 13x19”) from the initial setup ink loading, but you have to keep in mind that that was on various paper surfaces and also included the initial priming. The carts ($31.50 each at the Epson store online) are easy enough to load with only one misread during my testing that was quickly fixed by reinserting the cart into its slot. Speaking of prices, I have seen ranges for the printer from about $620 up to about $750, with various specials in play at times, so shop around.
Conclusion
For those who are not too concerned with making lots of prints in a kind of rapid-fire throughput, but who still want to make as good quality 13x19” prints as many (more expensive) pro-style printers, the R3000 will do the job nicely. Like I said, it’s a printer with pro-quality capabilities. For those who like to mosey through their printing and don’t mind single loading, it might be just the ticket. For those who are more production oriented, it probably would be better to go up a few steps and get a printer that can feed sheets through in more rapid fashion.
For more information, contact Epson at: www.epson.com.


![]()
Get the Latest Photo Tips, News & Reviews from Shutterbug!
| Camera Reviews Other Reviews | Mobile Reviews Photography Reviews Columns | News | Features | How-To | Resources |
 © 2025 Shutterbug
AVTech Media Americas Inc., USA
All rights reserved