'm quite glad to have seen this blog, thank you so much for all the great information on cameras and wonderful pictures, I will be sure to pass the url on to my more artistic family and friends....
car insurance rates
- REVIEWS
Camera Reviews 
More Reviews Mobile Reviews Photography Reviews - GALLERIES
- VIDEOS
- BUYER'S GUIDES
Epson Stylus Pro 4900: Sheet Or Roll, For Fine Art, Commercial, And Studio Photographers
I took on this review assignment because I’ve had considerable history with printing, both silver and digital, and printing with Epson printers. Over the past few years this interest has led me on an odyssey through various printers, profiling, and a considerable amount of (early) frustration. My emphasis has been on monochrome printing and those who share in this interest and who have attempted black-and-white printing in the past understand the numerous obstacles it can present. Those include, but are not limited to, unwanted color casts, gloss differential in deep black areas and some tonal borders, poor deep black reproduction (accompanied by equally poor highlight repro), a lot of poor paper surfaces, and the hassle and waste of switching from matte black to photo glossy inks. Color printers face these as well, plus the challenges of color balance, casts, skin tone reproduction, highlight bias, green shadows, and more. Of late I have printed with the Epson Stylus Pro 3800, 3880, and 4800 models, the 3800 being my studio workhorse for years and the 3880 the model that many photo schools and workshops at which I’ve taught use as a mainstay student and production printer.

Courtesy Epson America, Inc.
For those who might have worked with earlier printers I need not enumerate the problems faced; for those who have not, suffice it to say that certain paper feed issues, color wandering, greenish casts on monochrome images (and color image shadows), and laborious ink switches (or better said, calisthenics) have all been addressed in this new medium to wide format printer. Once set up, the Epson Stylus Pro 4900 makes printmaking a pleasure, one that encourages you to dig back into your files and approach all your images in a new way. It is the ease of use overall that lends to this creative atmosphere; knowing that less hassles await you certainly is an encouragement. All, of course, is not roses, but there are very few thorns among the bouquet.
The first challenge is getting the thing from delivery truck to doorstep to a spot in your lab or studio or home workspace. Weighing in somewhere around 115 lbs and measuring 34x16x30” (deep), it requires two sturdy types to budge it, at the least, especially when the delivery driver insists that “it’s curbside only, buddy.” You need to place it on a very steady and solid workbench; while it does not rock less steady tables as much as some large printers, you don’t want to place it on the ping-pong table either. Unpacking and assembly is no problem, as long as you are careful to remove the tape from doors and heads; loading inks could not be simpler. Not only are ink slots color-coded, you simply cannot place the wrong ink cart into the wrong slot because the ink cart won’t go all the way in. Don’t force it, just accept the fact that the cart is mismatched to the slot and read the instruction book to find the correct one.
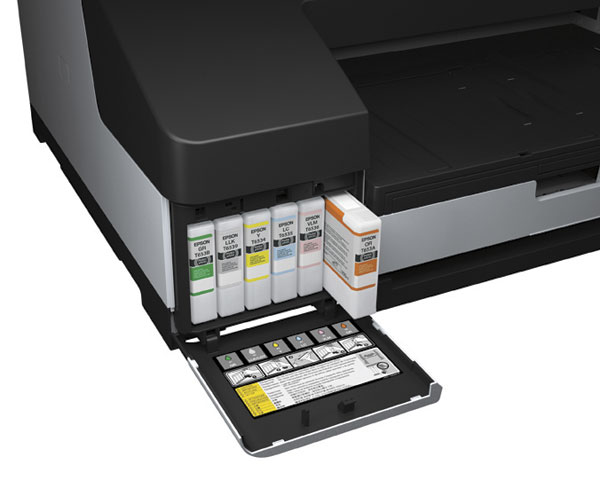
The 200ml ink carts fit easily into the front of the printer. If the cart doesn’t fit don’t force it, as each cart has a unique set-in slot making loading foolproof.
The ink carts supplied (11 in all) with the printer have about 80ml of ink, while the standard carts ($99 each) have 200ml. The supplied carts are regarded as starters, though I got a few hundred feet of prints out of them. The initial charging takes up considerable ink, as you might imagine, so be prepared to shell out another grand for a backup set when you get to serious print runs. It should be noted that when working cartridges rarely run out as evenly as a set, so most users can purchase on an as needed basis.
This is where the true costs of printers like this sit, in addition to not-inexpensive papers, and that’s why you have to think hard about justifying the expense and, for some, what the return on investment, with continuing costs, might be. There has always been a question about switching from matte to photo black (for working with appropriate papers) and how much ink that consumes. According to Epson tech, it’s around 2ml for going from photo to matte black and 3ml from matte to photo black. A full round trip is around 5ml of ink, assuming that the auto-nozzle check which runs after a black ink switch shows all nozzles firing as expected. For those with the luxury of being able to batch lots of work for one surface or another this is less of an issue than for those who might have to swap back and forth between surfaces.
While the price of this printer seems relatively inexpensive for what you get—after all, this is an amazing custom print machine—the ink is where your payback comes into play. How many prints per cart? To me, that’s a near-impossible equation and will be something different for each photographer or studio. I happen to print lots of monochrome with some duotone and low-sat color work, so my replacements will be more in the black inks (matte black, photo black, light light black, and light black) though yellow and cyan come into play. Yours may be color portraits, or color landscapes, or graphic HDR posters, so that’s another mix.
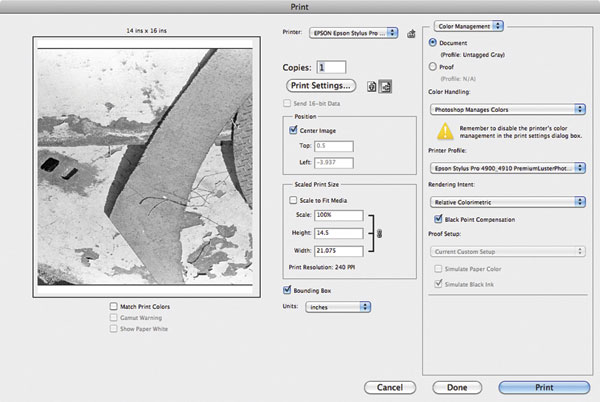

When you choose File>Print in Mac OS X 10.6 the dialog box looks familiar, but here the first step is choosing Color Handling. This determines what you can and cannot do in Printer Settings. Here I’ve chosen Photoshop Manages Color (top). Now, when I go to Printer Settings I get to choose the page setup (here Roll Paper) and any custom size templates I have set up (here a 16x14” “cut” from the roll) for each print (above). Note, however, that the dialog box now grays out the Print Mode and the Color Mode, since the program wants to be sure I don’t “double profile” or create cross-talk between the printer and Photoshop systems. In others words, there’s no “no color management” box to check.
I am sure that Epson has all sorts of charts and graphs on this, but if I were a guessing man I’d say your cost for a 16x20” print, including paper, would be, on average, in the $7-$10 range, give or take a few cents if you work with roll rather than the more expensive cut sheet. Average out the ink costs and it’s 50 cents a milliliter, but predicting how many ml of cyan or light light black you might use in the course of your work is beyond my ken, and besides that’s 50 cents per ml per ink cart, not total ink. (Another tip: when the ink light on a cart is blinking you still have, according to Epson tech, about 7-10 percent ink remaining so don’t swap it out immediately and see how far you can get with it. It is a good time to get one on order though. There is a built-in “job monitor” you can access from the menu LCD and that shows, for my typical 8x10” color portrait print, about 0.7ml of ink used. So, if the ink cart light blinks you can theoretically, and I do mean possibly, get another 10 similar prints or so out of it.)
Speaking of papers, you can work with cut sheet up to 17x24” and rolls from 8” wide to 17” wide. Having been a cut-sheet man for most of my printing life I can honestly say that the 4900 has nearly convinced me of the ease of working with rolls. The only drawback with rolls is that you are of course constrained from working with thick media (although roll canvas is certainly available). On rolls you can work with papers up to 19.7 mil thick and on cut sheet as much as 59 mil thick. The very smooth paper cassette function works with many types of common media while you can use the rear manual feed slot for particularly thick media (be sure to leave room on the setup table where you place the printer). I’d advise the cassette for cut-sheet paper up to 13x19”.
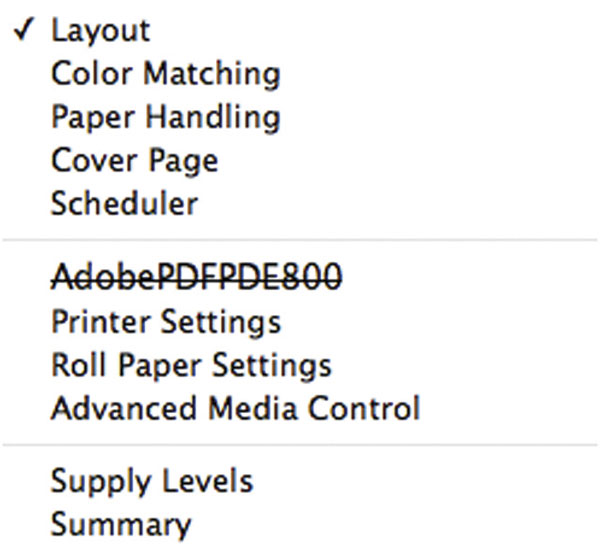
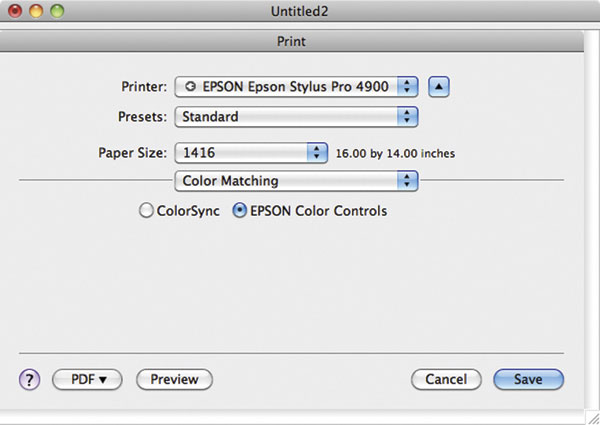
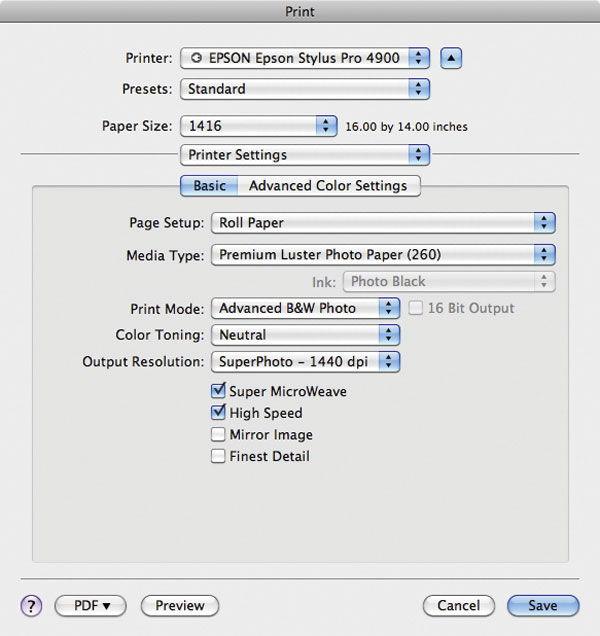
When you choose Printer as the color handler you open the door to working with the Epson Advanced Black and White mode, which to me is the only reason to allow this printer to handle color. Once you do that you go to Printer settings and choose Color Matching from the drop-down menu (top) and select Epson Color Controls (center). You then get the option to select Advanced B&W Photo mode from the Print Mode (above). If you want the toning, etc. options this mode affords just click on the Advanced Color Settings bar. All this might sound complicated but after a few setups it’s easily done.
The roll paper is easily loaded onto a core that fits into a rear top compartment. Feeding the paper in, a fearful task for some in the past, is more than easy and is guided by a single button and readout on the printer LCD. In fact, the LCD seems to be set up much like the body and menu logic of a D-SLR. The most common commands are readily available through push buttons and it’s only when you perform setup tasks that you might do once and not have to repeat again for quite a while that you resort to the “deeper” menu items layered in the LCD.
The roll paper setup allows you to print continuously or to cut after each print. There is a new rotary cutter in the unit—used with the paper supports for “thin” papers, this cutter is outside the carriage and prevents flakes from rough-grained or textured papers from falling into the printer itself, an ingenious setup and device. You can also set margins around the print, select and save custom print sizes from the roll (I set up one for 16x20” and 16x24” paper size, for example), and even select the width of paper allowed between each cut. The cutter is fast and smooth, but be sure to have the print tray pulled out far enough or a basket “catcher” ready because once the print gets cut it definitely gets moved along by gravity and comes spilling out of the printer. You don’t want a fresh print out of the printer sliding across the floor.
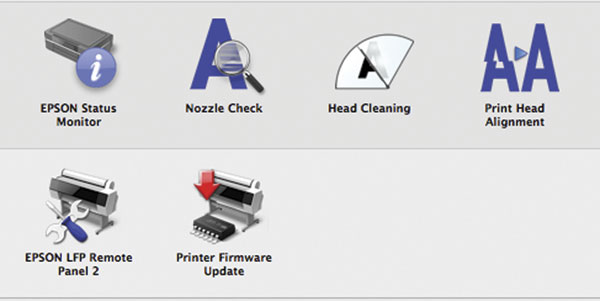
The printer utility is a key ingredient in maintaining the quality of your printer output. Check it often for firmware updates and more, as well as an easy way to control nozzle checks, etc. from your workstation. Many of the control setups are available from the printer LCD as well, so explore the menus and you’ll see how easy it is to maintain, follow ink and job counts, and even print throughputs right from the LCD and keypad.
I used the roll setup for both 16x20” and 16x24” paper (I print in about a half inch from the image border) and one 10”x4’ panorama, which the printer handled with ease. In some cases I had to upsize my image files to go to the larger print so used onOne’s Perfect Resize plug-in (a.k.a. Genuine Fractals) to do so. The loading of the roll, the feed of the paper, and the fact that I didn’t have to load sheet by sheet or worry about running low on sheet paper in the carriage made for a much more pleasant printing experience. By the way, you can have roll and sheet paper loaded at the same time, something that’s new to this class from Epson.
Once you have the paper loaded and the printer set you load the drivers for your OS. The setup instruction book is quite good and comprehensive, and as usual for gear as sophisticated as this you must take the time to read the instructions to get the most out of it. Also, check the Epson website for driver, etc. updates and never, with any gear these days, assume the supplied CD has the proper or most up-to-date setups. Updates are there to fix bugs, not to, as it might seem, slow you down whenever you want to start working.

When shooting weddings and other special events you will hopefully sell numerous prints of a group shot such as this. Having a production printer like the 4900 and working from roll paper makes it a breeze, and helps pay off the investment in ink and paper quickly.
© George Schaub
© George Schaub
One thing you should be very clear about is the system requirements for this machine. I started out with a Mac G5 and 10.4.4 OS and while the driver showed up, when I went to print it would not show all the controls, the result being a very poor printing experience. My fault, as reading the instructions in the book reveal that 10.5 is minimum, so if you have an “older” machine, check the Mac or PC minimum requirements and don’t think you can bypass them.
Similarly, do not assume that the order of march in the print driver is the same as you might have used in the past. Using 10.6 and CS5 with the printer revealed some quite different paths, but once you get a feel for it you will breeze through and get some great results. For example, you need to set up Color Handling first as this will determine what areas you can control. If you choose Photoshop Manages Color the Print Mode and Color Mode will be grayed out. It’s Adobe’s way of stopping you from doing “double profiling,” or having both printer and software fight for color management. If your prints come out magenta or skin tones bright orange you probably are in this fix. Then you go to Printer Settings in the main dialog box and choose the paper (and profile), etc. there.
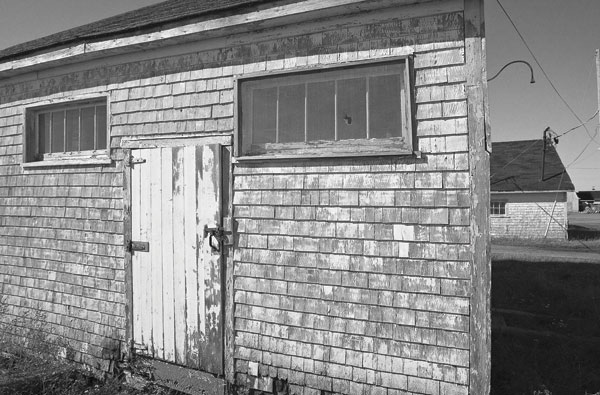
While it might not show in magazine repro, this photo made in Nova Scotia requires a very deft handling of tones in the printer. The white door must maintain texture while the deep shadow to the right has to maintain some detail, not an easy balance to maintain. The 4900 delivered the goods in a 14x23” print.
© George Schaub
© George Schaub
If you choose Printer Manages Color then you go back to Page Setup and go to Color Matching and choose the Epson option then you can get to the Advanced Black and White mode. It’s a bit of gymnastics that can be infuriating if you don’t know your way around, and it’s not made especially clear in the instruction book. Things change very quickly in this business so always go to the Epson site to check on updates and watch for their promised Color Management paper to help straighten this all out. Manufacturers seem to always have to play catch-up with the OS and software guys, and vice versa, and we always seem to be caught in the middle.
One good reason to read the instruction book or keep an open line to Epson tech is that you need to maintain your printer to protect your investment. This is a machine intended for high throughput shops as well as studio and individuals, so you might have to raise your awareness of what it takes to keep the 4900 humming. This is aided greatly by the LCD menu and by downloading the full complement of tools from the accompanying CD. These allow you to check the state of the nozzles and make nozzle checks and, if necessary, clean the heads. (The heads can be cleaned in pairs rather than all at once, which certainly saves on ink wastage when cleaning.)

One of the great advantages of a roll paper feed is the ability to print panoramas to whatever length you desire. This photo of clouds along the horizon in Northern New Mexico was printed out to a 4-foot image length. The color, continuous tone, and faithfulness to the screen image were the best I’ve seen in a print. Perfect Resize from onOne Software (a.k.a. Genuine Fractals) allowed me to upsize this and other images considerably with little or no loss in quality.
© George Schaub
© George Schaub
(Tip: When shutting down the printer, always do so from the power off button and not by pulling the plug, so to speak. The print head has to properly sit on its capping station to avoid the head from drying out and clogging; powering off from the machine lets this proper shutdown happen. Also, if you don’t print for a few weeks always do a nozzle check, which expends very little ink; if you don’t print for months you will most certainly have to do a full clean of all heads. Use the auto-nozzle check as the best course since you don’t even have to print to see if you need a clean.) Job stats are also readily available from the LCD panel as are a myriad of management and maintenance tasks.
There are many custom settings, speed controls, queue management, and other printer command and control tools available that can be very useful for studios and print shops that I will not go into here. This is a pro machine in every respect so get to know the menu, work through the LCD screen and you’ll get the most you can from the 4900. My philosophy is that a printer should be like a toaster—you turn it on, drop in the bread, choose light or dark, and hit the Print button. The 4900 does what you tell it to do and in that sense is a perfect printer, but unlike amateur-oriented printers you have to assume responsibility of maintaining it to make it run right. This takes more effort, to be sure, but the payoff is speed, printing efficiency, and large, custom-made prints almost every time. That goes for color calibration and profiling as well, and all I can say is that if your prints don’t come out the way you want them to look it’s on you and not on this amazing printer. Get it right in the computer, make sure the computer monitor and printer agree and you’ll be rewarded with the best prints you’ve ever made.
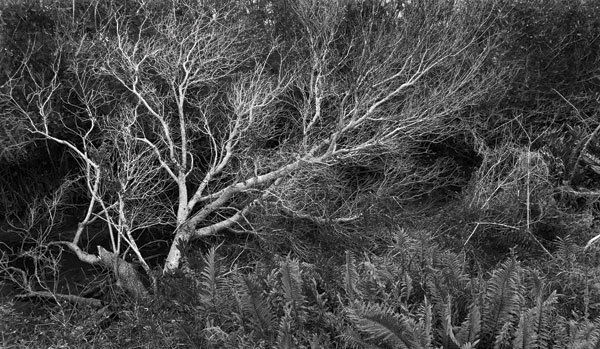
I am a fan of Epson’s Advanced Black and White Print mode, and in fact is the only time I will use printer color handling in my setups. This image requires a very deep black for the shadows and a textural highlight white, with a range of mid tones in the ferns, all of which was delivered by using the Neutral setting in the Advanced Black and White mode.
© George Schaub
© George Schaub
There are various plateaus one finds in this craft, where the upward climb of technology, both accomplishments and future challenges, can take a rest, a breather to both consider how far we’ve come and what we now have as state-of-the-art tools and techniques. There may be more that can be accomplished in the medium to large format inkjet printing realm, but certainly the new Epson Stylus Pro 4900 could be regarded as one of those plateau products, one that can be counted on for years to come to be considered as a workhorse printer for pros, for those who want to print their own fine art work, and for well-heeled photographers who want to keep as many printing options as possible open to create their work.
Coming in at about $2495 (though I have seen promotions and sales prices 10-20 percent lower than the MSRP) it’s not cheap, and ink is in what could be called the “Chanel realm,” but the quality of prints produced, the longevity of the ink supply, and the relative simplicity of operation can justify the expense in short order for those who have a commercial (and even developing commercial) outlet for their print images. For fine art, studio work, or just for the pure pleasure of making beautiful photographic inkjet prints, the 4900 is one helluva machine.
For more information and specs, visit Epson America, Inc.’s website at: www.proimaging.epson.com.
- Log in or register to post comments

'm quite glad to have seen
Submitted by Susan Collins on December 16, 2013 - 7:12am
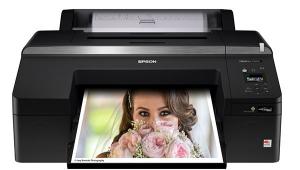


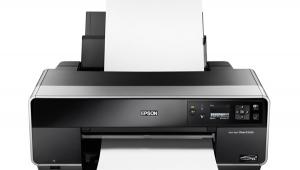

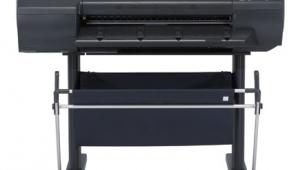
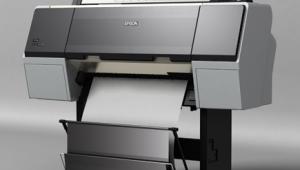


PHOTO OF THE DAY

Today’s photo is black rose by Mike Stevens
eNEWSLETTER SIGNUP
![]()
Get the Latest Photo Tips, News & Reviews from Shutterbug!
| Camera Reviews Other Reviews | Mobile Reviews Photography Reviews Columns | News | Features | How-To | Resources |
 © 2024 Shutterbug
AVTech Media Americas Inc., USA
All rights reserved