- REVIEWS
Camera Reviews 
More Reviews Mobile Reviews Photography Reviews - GALLERIES
- VIDEOS
- BUYER'S GUIDES
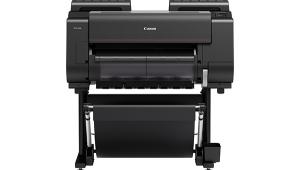
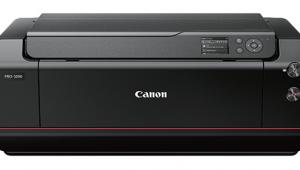
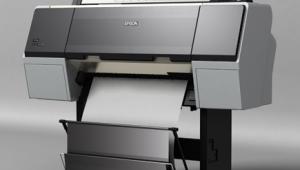
Canon’s imagePROGRAF iPF6350/6300; Large Format 24-Inch Printers
Canon’s latest entrants in the 24” segment are the iPF6350/iPF6300 imagePROGRAF printers, essentially the same except for the addition of an 80GB hard drive on the iPF6350 that can store information on jobs and images themselves and is $300 more than the $3695 price tag for the iPF6300. Both come with a 90ml ink set. The printers use new Canon LUCIA EX (pigment) inks, and take 12 ink carts ($79 each for 130ml) that Canon says delivers a 20 percent greater color gamut than previous inks, fine gradations in shadow areas, enhanced monochrome images as well as an encapsulation technology for smoother lay down and more scratch resistance on the paper.
 |
According to a Canon report, Wilhelm Imaging Research (WIR) has done preliminary tests on the inks and has stated, “A review of preliminary data from the still ongoing tests indicates that prints made with LUCIA EX pigment inks and select photo and fine art papers will achieve WIR Display Permanence Ratings in excess of 75 years for color images and well beyond 200 years for black-and-white images. In addition, LUCIA EX pigment inks exhibit excellent short-term color drift (‘dry-down’) behavior, which is critically important for color-managed workflows and in proofing applications. The new LUCIA EX inks also achieved WIR’s highest rating for resistance to damage from atmospheric ozone, a particular concern in urban environments in situations where prints might be displayed unframed and exposed to ambient indoor air.”
The printer itself is built on a quite rigid frame, eliminating the shakes that seem to plague other printers, which logically should help create better accuracy in printing. Loading of paper is easily accomplished via a core (2 or 3”) for roll paper and back and front loading for cut sheet, the latter being advisable for thicker media. Loading is not complicated and wastes virtually no paper off the roll. Canon has numerous branded papers, and accompanying profiles in the printer driver, but this does not preclude the use of so-called “third-party papers” (an odd term from Canon as they certainly are not in the paper coating business) whose profiles can be easily added to the driver setup when using the Photoshop plug-in.
Canon claims that the new inks with their papers have seriously reduced “metamerism” and bronzing, the former being the shift of colors in the print under different light sources and the latter being the differential in surface of different ink densities on the print. In our tests we found that this is highly paper dependent and lack of use of proper profiling can raise the possibility of both banes to a printer’s existence. When profile and print surface are matched and paper quality is high, I can say that neither problem raised its ugly head.
Perhaps the most convenient feature of the iPF6350 and iPF6300 printers for photographers is the print plug-in for Photoshop and Canon’s Digital Photo Professional (DPP) software. We tested using the Photoshop plug-in, as those using this printer are certainly not limited to shooting only with Canon cameras. To access this, when you have the image open in Photoshop, you go to File>Export. The menu atop the dialog box can walk you through the steps, starting from Main through Support. In the Main page you get to see the layout of the image on the paper size you have selected, and then you choose the media type. When using Canon papers you will have the options immediately available; for other brands choose an emulation media and then fine-tune it in the output profile section.
The next stage is output resolution (#1), and choosing High Accuracy is your best bet for photos, especially those having fine detail. Next, if you have edited and are working in 16-bit, choose that option, and then fine-tune the profile by choosing a loaded profile. The Matching Method is your call; we generally use Relative Colormetric. So far this is quite familiar to those printing using the Photoshop menu itself.
 |
|
|
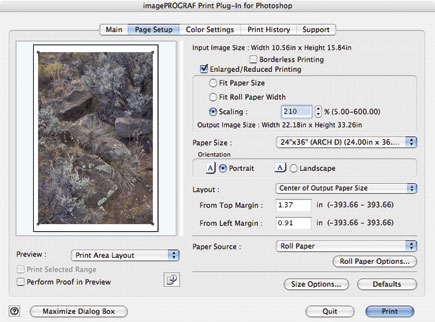
Page Setup (#2), the next button on the menu bar, shows you the input size and allows you to change or accept that as you work. This is where a debate could be had over whether it is better to re-size in Photoshop or in this program, but if you re-size using scaling in the print dialog box in Photoshop rather than using Image>Size, then you will be quite comfortable with the Canon dialog box here. The exact interpolation system for the Canon program is not something Canon folks would divulge, but you can choose among “nearest neighbor” and bicubic, which we assume means that the resampling done is quite similar to Photoshop, though we can only assume that and do not know for sure. All we can say is that going up 200 percent using the Canon method was a match, as far as we could see, with Adobe bicubic. The folks at Canon claim you can go to 600 percent, but we regard that as just the outer limits of the system and something we would certainly not advise. Like any print from any file, original file resolution usually calls the tune. We did not test against Genuine Fractals.
 |
|
|
You can print borderless or have white borders on the paper, and you can choose how to have the print sit on the page and even the size of the borders themselves. In the example shown here (#2) the original image size, as processed, was about 10x15”, which we resampled up 210 percent to 22x33” and centered on the 24x36” sheet off the roll. The print area layout screen is live and very helpful in determining how the image will sit on the paper.
In short, you can process images in Photoshop to the desired print size (as most will probably do) or you can count on the scaling features and layout options in the program to accomplish this task for you. As with Photoshop printing, I have found that scaling at the print stage is just as good as Image>Size in the processing stage, although those doing fine-tune sharpening will certainly want to re-size in Photoshop first prior to sharpening.
The paper we finally chose for our work, among those offered by test from Canon, was the Satin Gloss. We printed both color and monochrome and found that color was, as advertised, subtle and true to the screen image, and monochrome was especially good when we chose the Monochrome mode, though Color mode was excellent as well.
Work efficiency was familiar and smooth using the plug-in, and exploration will reveal some extra nuances, such as options for high precision text vs. photo selections. There aren’t many “gotchas” and the live preview helps with unwanted sizing and image positioning. Print time for a 22x33” color image was about 6 minutes; Canon’s timing of 250 square feet/hour might be a useful figure for you, but that’s not how we work.
One advantage is that once the image is spooled it prints “in the background” (in other words, the printer has the info) and you can move onto the next image and have it ready to print once you hear the built-in cutter slice the print from the roll into the catcher basket beneath. The control panel on the printer itself is readable and easily navigated, and the profiles are actual words and not indecipherable codes, something those who use Epson printers will understand and appreciate.
If you find yourself working with a certain paper consistently, especially if it is somewhat specific to you and a certain task, you can set up an MED file using the Canon media configuration tool, which presets media weight and thickness, ink drying time, borderless printing, vacuum strength, and even print head height. Most folks will not have to use this tool but it’s there if you need it.
While not inexpensive, the Canons are in the ballpark for 24” roll printers, and with the Photoshop plug-in they have been made more accessible than ever before. Yes, you can use third-party RIPs, but for the majority of fine art, portrait, and event photographers to whom this machine will appeal, the plug-in is probably the way to go. In terms of quality, the resultant Satin Gloss prints we made had a very uniform surface, a good spread of subtle colors, very deep blacks, a nice grayscale range in monochrome, and all were easy to resample and position on the paper surface.
Given that this is a 24” wide printer, it is neither lightweight nor compact (about 146 lbs and, with stand, about 45x75x38”) but that’s not the issue here. If you are making large format prints (and you can go 24” wide to almost 5 feet long, plus print on paper up to 59 mil thick using the front-load manual feeder) and can sell them on a fairly consistent basis, the iPF6350 or the iPF6300 might just make sense.
For more information, contact Canon U.S.A., Inc. at: www.usa.canon.com.
- Log in or register to post comments


![]()
Get the Latest Photo Tips, News & Reviews from Shutterbug!
| Camera Reviews Other Reviews | Mobile Reviews Photography Reviews Columns | News | Features | How-To | Resources |
 © 2024 Shutterbug
AVTech Media Americas Inc., USA
All rights reserved