I own a photography business and currently in search of good printers. I think this one is a good choice. I need to print a lot of quality shots. i ordered 2 printer units and i cannot wait for it to be delivered.. Your blog post help me decide on what printer to get.. thank you so much, but i have a question about its ink.. can it use this kind of ink , got a friend working there so i will be able to get discounts through him..
- REVIEWS
Camera Reviews 
More Reviews Mobile Reviews Photography Reviews - GALLERIES
- VIDEOS
- BUYER'S GUIDES
Canon PIXMA PRO-1: A New 12 Pigment-Ink, 13x19” Printer
The new Canon PIXMA PRO-1 is a 13x19” pigment-ink printer that makes fine quality prints in a price range that could be considered quite fair for what you get ($999). Aimed at avid photographers and enthusiast printmakers, as well as pros choosing to do their own mid-size prints, the PIXMA PRO-1 fills a void left by HP’s abandonment of the category and directly challenges Epson. The printer offers ease of use, solid performance, 12 ink cartridges, and all in all seems to improve upon 13” printers of the past. Our tests were aimed at determining if the PIXMA PRO-1 could be a solid contender in its class and if there were upgrades or new workflow techniques that would differentiate it from the competition.
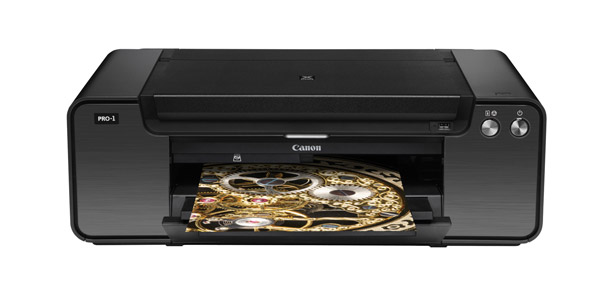
Courtesy of Canon U.S.A., Inc.
First, some specs. The PIXMA PRO-1 has a completely new ink system with 11 inks and one “conditioner” (Cyan, Magenta, Yellow, Red, Photo Cyan, Photo Magenta, Photo Black, Matte Black, Gray, Dark Gray, and Light Gray, plus their Chroma Optimizer). This might seem like overkill, but note the abundance of black and gray inks, something that pays great dividends when making monochrome images. The Chroma Optimizer, according to Canon, has been included to “increase the color gamut and further increase the black density when printing on glossy media types for a deeper, darker black.” Canon says, “After the ink is laid down on the media, the printer applies the Chroma Optimizer to help eliminate the bumps between droplets that at times can reflect light irregularly, resulting in a more uniform and aesthetically pleasing print.” The inks come in 12 separate cartridges that are easy to load in the side-mounted slots, and because of the cart configurations simply can’t be slid into the wrong slot.
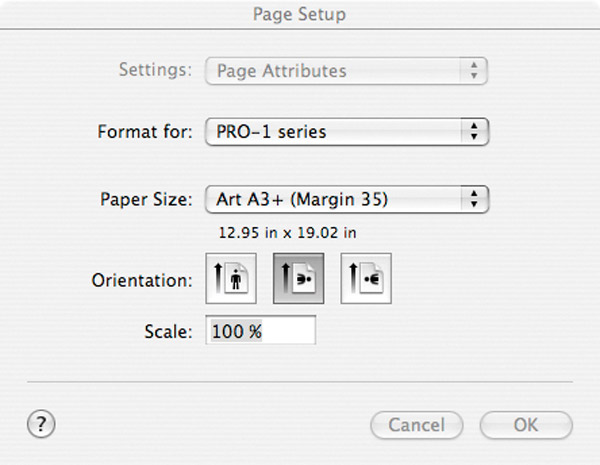
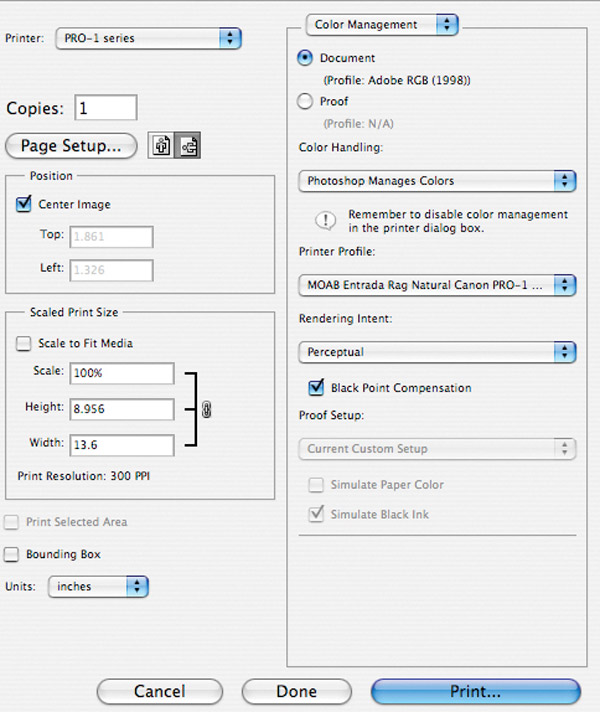
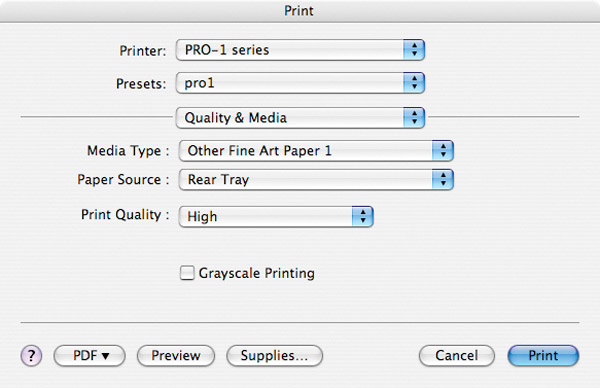
Workflow in general is fairly straightforward (see text) but one bit of a curve to watch for is when working with matte surface papers. In Photoshop, you start the setup in the Print>Page Setup option where you choose (for 13x19” matte) the Art A3+ (Margin 35) option in Paper Size. The rest of the print dialog box should have Photoshop Manage Colors and the proper profile for the paper, here Moab’s Entrada Rag Natural (downloaded from the Moab site). You then click print and in the next dialog box choose Other Fine Art Paper 1 in the media setting. Do this and you’ll get rich matte prints—don’t and you’ll get flat matte for sure.
That said, one of the headlines for this printer is that you do not have to swap out inks when going from glossy to matte surface. There is no long delay between ink set changes; if it’s a half a minute it’s a lot. There’s also no loss of ink during the swap. The design of the ink delivery system from carts to head via tubes makes that happen, and amen to that.
The carts themselves hold 36ml of ink each, a fairly nice amount that will forestall having to change out ink constantly. Each cart runs just under $40 with shipping, etc. Yes, that’s close to four Franklins for a full load of ink, the usual Chanel-like pricing for pigment ink these days, but as with most of these printers, and depending on the kind of prints you make, having to change all the inks at the same rate and time is improbable.
You do get a full set of inks for the $999 printer price, although I was told by Canon that up to 1/4 of the volume is used in initial charging. That might explain why I felt the first run of inks on the printer tests were used up quicker than I had expected. Interestingly, to me, the Chroma Optimizer was the first to give out, so keep that in mind when ordering backup supplies.
The issue of ink usage is always subjective, and while I suppose one could measure the inks used in a set run of prints it really wouldn’t apply to other users, unless they ran the same prints. That said, I ran about 50 full-size prints with the first ink set when the Chroma Optimizer slot called for more and stopped the job (keep in mind that a quarter of the ink was used for initial, out of the box setup).
One thing Canon has done absolutely right with this fine addition to the 13x19” pigment market is their homework. Not only do they have profiles for all their own papers, but have worked with many of the top paper companies before they released the printer to ensure that profiles would be ready when the printer began shipping. In fact, at the trade show where the printer was introduced nearly every paper company there had a Canon PIXMA PRO-1 in their booth working away.
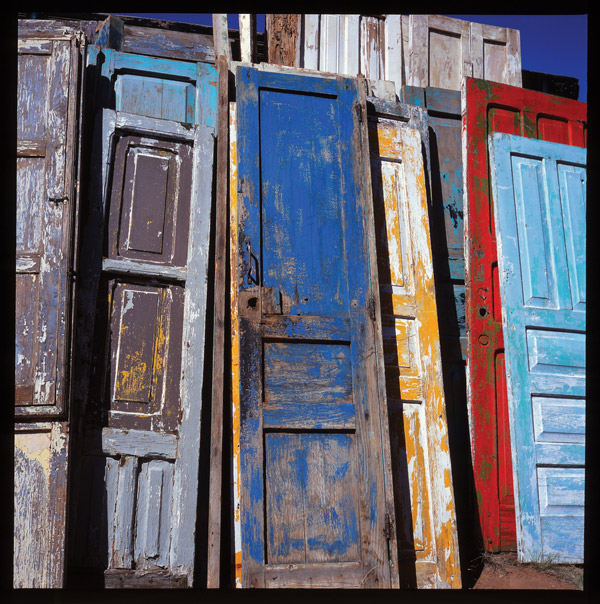
Made on Museo’s Silver Rag Gloss, this print was made from a scan of a medium format Velvia (Version 1) transparency. It shows off all the deep, rich color of the original and the excellent reproduction quality of the Canon Lucia inks. The Chroma Optimizer ensures that colors are brilliant, though true, throughout.
All Photos © George Schaub
All Photos © George Schaub
For example, Moab, Ilford, and Museo all had profiles ready on their sites on the day I got the printer for test, which was about a week after it was announced. Yes, Canon does have their own papers, but they have been both smart and somewhat modest in doing it this way. Smart in that they have engaged all the major paper makers in their new system, and modest in that they are not only pushing their own papers for use with it, knowing that those who use a printer with these specs will have their favorites or will be eager to explore new surfaces once they get to work. But even though this was impressive I still encourage checking back at the sites occasionally and uploading the latest profiles, as these do change. (If the initial driver on the CD had those paper profiles already loaded I would have been even more impressed, and if Canon would make as many profiles available as they can on their website or even embed those profiles in firmware upgrades, I would be even more so. One can always hope.)
Getting to work, the printer arrives in a large box that probably would test most folks; the UPS lady, however, shrugged it off and got it to the door and I followed suit, trundling the cumbersome box upstairs to the studio. The unit itself weighs in at about 61 lbs without associated gear and packing, so add about 10-15 lbs for that on arrival. As to size (27.4x18.2x9.5”), I placed it side by side with an Epson Stylus Pro 3800 and size-wise they could have been twins.
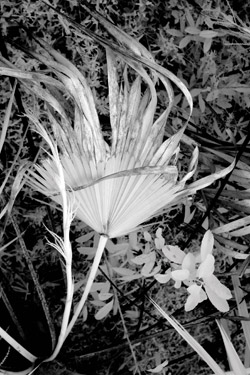
For those who want a truly rich black choose a luster or glossy surface, such as this IR photo printed on Moab’s Slickrock Metallic Pearl. Be sure to download the proper profiles from each paper company’s website to get the most from every print.
Setup is easy by following the accompanying quick start guide, but that’s where the printed instructions stop. You’d think for a grand they’d throw in an instruction book, but the accompanying CD manual does have much (but not all, it turns out) of what you need to know, and of course you’re free to print it out. One complaint is that the CD instruction guide concentrates a lot of its energy on Canon’s supplied printing software, which most folks who buy this printer will probably not use, opting for Photoshop, Lightroom, or similar printing workflow.
In essence, setup involves loading the software, putting in the ink carts, placing the print head (carefully) in its holder, and then running a head alignment sheet. This is all standard stuff and when taken step by step is a breeze. There’s nothing mysterious about the overall printing workflow here, and it’s actually seamless when going from say an Epson to a Canon, although I want to share some setup tricks later in this article. And if you are printing out of Photoshop or similar you won’t notice anything too different.
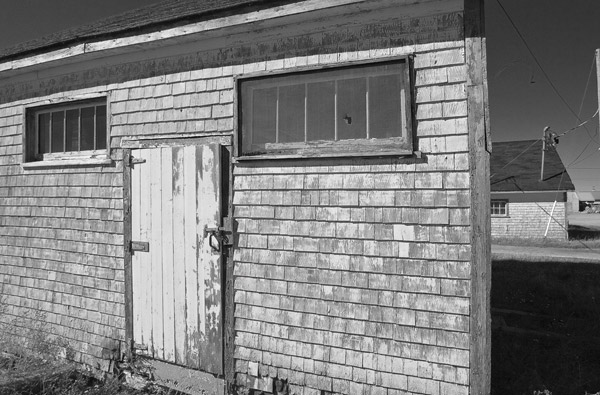
The gray ink sets offered in the printer (Photo Black, Matte Black, Gray, Dark Gray, and Light Gray) are a true temptation for the monochrome printer, and they do not disappoint. The print, made on Moab’s Entrada Natural, shows excellent texture and tone in the white door, through the middle grays of the siding to the deep black of the shadows.
The first thing you must do, however, is load profiles from the website of the company of your paper of choice. Each site I checked—Ilford, Moab, and Museo—had profiles up and ready. You can print from Canon profile “similars” (glossy for a third-party gloss stock, for example) but this is a lazy way to work and I can assure you that having tested both the “similar” Canon profile against the paper company profile that you lose something, however subtle, when you choose the generic profile course, so load those profiles.
I used papers I thought befitting the printer, including cotton rag, exhibition-quality semimatte and matte, and even glossy. I did some work with RC-type surfaces and the printer did just fine. My feeling is that if you are going to spend a grand for a printer you shouldn’t skimp on paper quality.
I worked with Adobe Photoshop 4 and 5, and am happy to report that you can use this printer with Mac OS X 10.4 and up and Windows Vista, XP, and up. This was good to see, considering I recently worked with printers that required more current OS compatibility, putting buyers into the usual upgrade bind, sometimes without them being aware of it prior to making the purchase.

When you have confidence that your screen image will match your print you can begin to play with different levels of tone, tint, and contrast and match those choices with the proper paper for the image. Canon’s PIXMA PRO-1 has the flexibility to allow you to make numerous choices on one image, such as in this backlit, natural light portrait of Emma, made first on glossy stock and then finally on matte. Not having to lose time or ink when switching from Photo to Matte Black gives you more freedom to experiment as you work.
The paper feed is very good with this printer and eliminates any “touchiness” found in, for example, the otherwise excellent workhorse Epson 3800 I have used for years. I stacked a dozen large 13x19” sheets in the rear feed tray and each one, down to the very last one, passed through with ease, and this applied to both stiffer semigloss and limper rag matte papers. You can also load thicker stock into the single-sheet back tray, and there’s no need to have a foot of space behind the printer for it to feed. This also eliminates the need to raise and lower the platen to accommodate thicker stock. I also stacked thin glossy paper with thicker rag matte, and somewhat amazingly when going from one to the other, and switching profiles, there was absolutely no problem with paper transport.
Printing time is quite reasonable, but of course this will depend on your printing choices. Canon says print time is about three to four minutes for 13x19” prints, but I printed using the High print quality (see illustration) and that doubled the time. If you want faster times don’t use High print quality, but then again why would you want to do that? I found that I could queue up print jobs easily, so as one print was in the process I’d get the next one ready to go, and the printer took them through one at a time just fine without me having to wait for the previous print to finish so I could push the print button.
I did print black-and-white images using both the standard and Canon “grayscale” option and while the grayscale prints were fine I found that the normal (color) black-and-white prints had more fidelity. That’s usually the case with any printer I’ve used, except when working with Epson’s B&W mode, which Canon does not match here. In that sense the Epson driver has it over the Canon for fans of what can be done in Epson’s Advanced B&W mode.
Most of the monochrome prints I made were as neutral as I had them on the screen, with no color shifts later (to green or magenta) and no appreciable dry down effect. Any color variation had more to do with the paper tint than anything, and that’s where your taste and testing come into play.
For example, Moab’s Lasal was quite neutral and Museo’s Silver Rag was warmer—both good prints but different looks, for sure. As mentioned, I tested numerous papers with “generic” and specific ICC profiles, and the specific profiles got my vote every time.
I printed both black and white and color, though must admit that the presence of five “gray” inks made me concentrate more on monochrome printing. Prints made on glossy, semigloss, pearl, satin, etc. surfaces were excellent; in other words, all papers that take Photo Black ink. I wasn’t as enthused at first about the matte surface results. Although certainly passable, the results seemed a bit chalky, and I found I had to boost contrast more than I’d like to get a deep black.
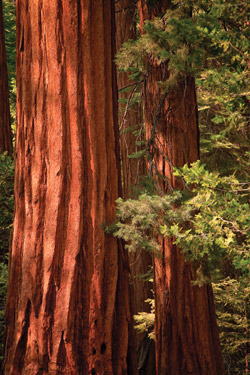
There’s no doubt that glossy and luster surfaces in the printer dazzle, but what about matte? This photo made in Yellowstone of sunset light on bark convinced me that this printer is at home with matte as well as glossy surfaces, and there’s no long switch time between inks or loss of ink in the switch. Made on Moab’s Entrada Rag Natural.
Maybe the trick to setting up matte was buried deep in the CD instructions, but I didn’t see it, so I contacted Canon and they clued me in on how to get the most from matte, and it is something to follow even though you might think you have the correct profile loaded and ready to go.
For matte papers, when you do your page setup using Photoshop for 13x19” printing, choose the Art A3+ (Margin 35) drop-down choice. (For photo black or glossy-type surfaces, including exhibition luster-type papers choose A3+ 13x19”.) Next, have Photoshop Manage Colors and make sure the right profile is there. (I use Perceptual rendering intent; that seems to be a judgment call that everyone makes on their own.) Once you click on the print button choose Quality & Media from the drop-down menu and then choose “Other Fine Art Paper 1” and “High” print quality. Check that color options are set at None; it seemed to be the default so I checked it once and never again.
I worked this setup on various matte surface brands and was able to achieve a look that would inspire me to use the PIXMA PRO-1 with matte surface papers. I must say that the monochrome images were snappier on gloss or exhibition luster surfaces, but that’s to be expected, and the matte surface certainly has a charm with color as well. Indeed, I would probably print color using the matte surface as much as monochrome, and the combination of these inks with, for example, Moab’s Entrada Natural is quite beautiful.
The Canon PIXMA PRO-1 feels like a product that was designed after the engineers sat down with enthusiast printer focus groups. I don’t mean that disparagingly, as one might when making comments about a politician’s stance, but as a matter of praise of how the printer deals with matters such as transport, ink swap for different surfaces, quietness, ease of setup, quality output, ease of workflow, and its ability to play nice with a wide variety of papers and surfaces. In short order I was able to make screen-matched prints and play with looks depending on the surface and weight of the many papers I put through it.
The flexibility and freedom of being able to switch inks for matte and photo black surfaces with no effort or wasted time cannot be underestimated as a very positive development. You can swap out papers and try different looks with a new ease that is surprisingly liberating, in a creative sense, for printmakers. In short, with the PIXMA PRO-1, Canon seems to have gotten it right.
For more information, contact Canon U.S.A., Inc. at: www.usa.canon.com.
- Log in or register to post comments

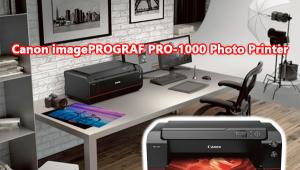


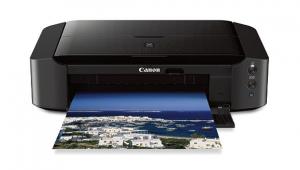


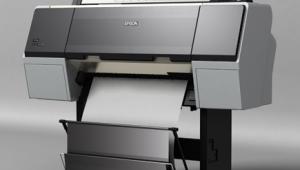


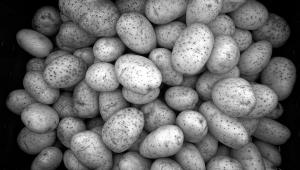


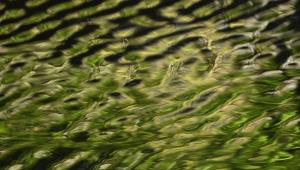


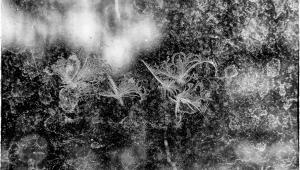


PHOTO OF THE DAY

Today’s photo is My Fair 'Lady' by Hans B. Epp
eNEWSLETTER SIGNUP
![]()
Get the Latest Photo Tips, News & Reviews from Shutterbug!
| Camera Reviews Other Reviews | Mobile Reviews Photography Reviews Columns | News | Features | How-To | Resources |
 © 2024 Shutterbug
AVTech Media Americas Inc., USA
All rights reserved