- REVIEWS
Camera Reviews 
More Reviews Mobile Reviews Photography Reviews - GALLERIES
- VIDEOS
- BUYER'S GUIDES
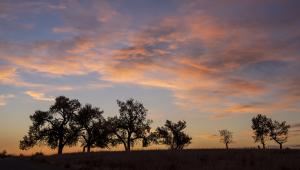
Colin Smith’s 10 Drone Photography Tips to Take Your Imagery to New Heights

Colin Smith may be known to many readers for his instructional videos and workshops, with a focus not only on Photoshop but also Lightroom. Aside from still photography, he also shoots video. But he had never pursued drone photography until about four years ago.
One day, Adobe Creative Director Russell Brown approached him about conducting the video side of a drone photography workshop—the first one ever given. Brown would be covering the still side. Not one to let a challenge slip by so easily, Smith picked up the gauntlet, investing in a drone and action camera—the original DJI Phantom and a GoPro—and went from newbie to drone master in a matter of months. (He switched to DJI cameras when they were introduced in later-generation drones.)

Popularly known as drones, quadcopters, or UAVs (Unmanned Aerial Vehicles), these flying eggbeaters have literally elevated the art of both video and still photography. But all too often what we see captured from on high are just mundane images.

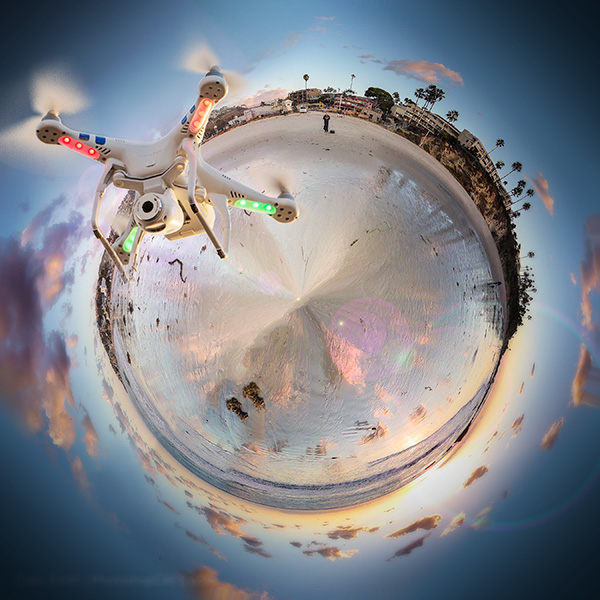
Smith’s eye for composition and design has given him a unique perspective, raising the use of drones in photography to new heights. To spice things up even further, he adds HDR (High Dynamic Range) imaging and panoramic stitching to the mix as further evidence of that vision.
We recently interviewed Smith about his experience with capturing aerial images with drones and he provided the following 10 tips to help you get started.
1. Don’t Be Cheap
When purchasing a quadcopter, don’t cheap out. Remember, you get what you pay for. The things to look for are the quality of the camera the drone can carry, stability, and reliability. Smith works exclusively with DJI drones. Citing the professional quality of images captured, he restricts himself these days to the cameras that come with the drones, instead of rigging heavy DSLRs for flight. Another advantage to working with these drones is that they don’t exceed the FAA weight limit, which means you won’t need to worry about getting a pilot’s license.
2. Consider Transport Options
When bringing your drone on a plane, carry the drone batteries separately with you in personal luggage in the event the drone case won’t fit in the overhead and it has to be stowed elsewhere on the plane. By the way, Smith never takes more than one drone when he flies, but may take several when driving to a destination.
3. Know the Rules
Keep in mind that the “line of sight” regulation for drones means that you have to be able to see it with the naked eye, not with binoculars or a long zoom.
4. Bracket Exposures
“I bracket everything when I shoot now,” Smith notes. “I don’t necessarily develop the series of images as an HDR, but in case I need them, the added exposures are there.”
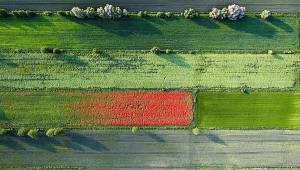
5. Experiment with Altitude
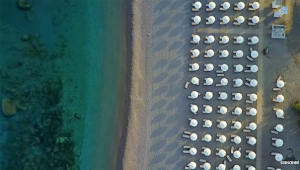
The altitude your drone is at will make a huge difference in your composition, along with noting the relative foreground and background in the shot. “In drone photography, there’s no excuse for having conflicting lines and a cluttered foreground and background because you have complete control over it.”
6. Look for Reflections
“With drones, you can control reflections in a way that you couldn’t do before,” Smith notes.
7. Use Good Light
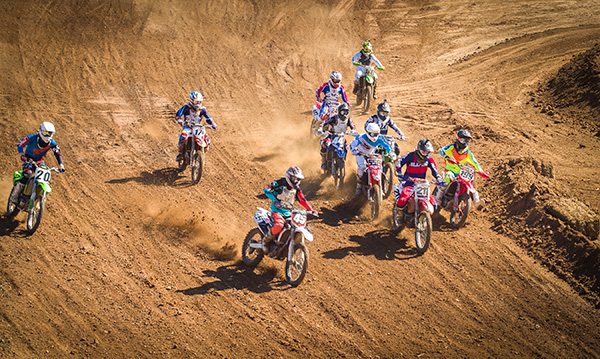
Just as you would in your everyday landscape photography, always look for beautifully lit scenes when shooting with a drone. “I’m usually out about 30 minutes before sunrise, at twilight,” Smith explains, “and then also maybe an hour after sunrise. Around sunset, I don’t start shooting before 45 minutes prior to the sun going down. Before that, there’s no color; it’s not very interesting. If I’m shooting auto racing or things like that, that’s obviously different—you can’t control when to shoot.”
8. Change Memory Cards
“I always change the card between every single shoot,” Smith explains. “And when I change the battery, I change the card. So in case something does happen, I’m not going to lose my whole day’s shooting.”
9. Safety First and Last
Watch for high winds and gusts, especially at the heights the drone will be flying. “If there’s any doubt about weather conditions, just don’t fly.”
10. Have Fun
Drone photography can be a challenge and there will, no doubt, be a few quadcopter crashes if you’re just getting started but it’s all part of the experience. Live, learn, and enjoy.
Colin Smith operates out of Irvine, California. To see more of his work, view his tutorials, and learn about his workshops, books, and DVDs, visit photoshopcafe.com, or see his work on Instagram: @photoshopcafe.
Colin Smith’s Favorite Gear
“I love the quality of the images and the small footprint of the DJI Phantom 4 Pro+. It’s a drone that I can take anywhere and get really high-quality 20MP images and 4K video, thanks to the one-inch sensor and mechanical shutter with adjustable aperture. The Plus version has a very bright and sharp screen attached to the controller and makes setup fast and easy.”
What’s in Colin Smith’s Gear Bag
• GPC cases
• DJI Phantom 4 Pro+
• DJI Inspire 1 Pro
• DJI Mavic Pro
• Apple iPad Air 2
• X-Rite ColorChecker Video
• Lexar microSD cards
• Freewell ND and polarizing filters
• Extra batteries
- Log in or register to post comments


![]()
Get the Latest Photo Tips, News & Reviews from Shutterbug!
| Camera Reviews Other Reviews | Mobile Reviews Photography Reviews Columns | News | Features | How-To | Resources |
 © 2024 Shutterbug
AVTech Media Americas Inc., USA
All rights reserved