- REVIEWS
Camera Reviews 
More Reviews Mobile Reviews Photography Reviews - GALLERIES
- VIDEOS
- BUYER'S GUIDES
Dust Never Sleeps: Here’s How I Keep My Images Clean & Safe When Shooting In Gritty Locales

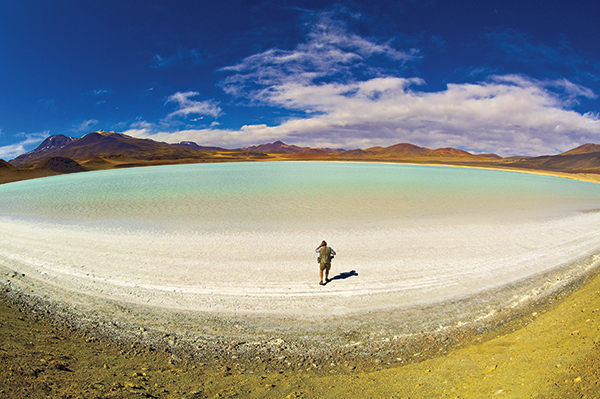
All Photos © Blaine Harrington
On a recent trip to Jordan I was going through my nightly routine of cleaning the cameras’ sensors and backing up the day’s shoot when it came to me that these two exercises in what you might call preventive maintenance—keeping dust off the sensors and making sure my pictures are safe—are among the things that concern me most as a professional travel photographer.
Reason enough, I thought, to talk with you about them.

Sensor Sensibility
I used to have a massive problem with dust because I often found myself in harsh environments and never went through a day of shooting without changing among the four, sometimes five lenses I usually carry. The dust problem led to a huge post-processing problem: sitting at the computer for hours retouching images to eliminate dust spots.
I tried various brushes that just seemed to move dust around, and squeeze-bulb blowers that blew it around, often from edges and corners onto the sensor.
Not long ago I bought the Arctic Butterfly sensor brush, from VisibleDust. It’s a powered, antistatic device I’ve found so effective that I use it to clean my cameras’ sensors each night so I know I’m ready for the next day’s shoot.
Details of the Butterfly’s operation can be found at the company’s website, visibledust.com, along with a video. Essentially you turn the device on three times, for five seconds each, then wipe the soft brush across the sensor, and repeat if necessary. An added bonus of the Butterfly is a built-in light that’s extremely helpful.
I also carry a VisibleDust EZ sensor cleaning kit for those relatively few times I have to deal with oily dust, welded dust, or some unidentified goop on the sensor. If you decide to get a swab-cleaning kit for your camera, make sure you get a swab that’s the same width as your sensor. And read up on all the precautions—this is one do-it-yourself maintenance job you want to do correctly so you don’t harm the sensor or affect its alignment. For me, the thing is that I’m often miles from anyone who can help me with camera cleaning, so I have to do it myself.
My nightly routine, by the way, includes cleaning my lenses and filters with lens cleaning fluid and a poly-fiber cloth.


Field Check
After a lens change on location, I’ll run a little dust exposure test to make sure all is well. I’ll shoot a frame of blank blue sky, underexposing by one stop because it makes dust, if it’s there, easier to see. Then I’ll bring into play my Hoodman three-inch LCD loupe. I hold it over the camera’s LCD and enlarge sections of the test frame and move the image around to check for dust spots. If I find any, I’ll also find a protected space to use the Butterfly to remove them.
The only problem is that often after switching lenses, I’m so involved in getting images, I forget to do the test. But I’m getting better at it, and I always test my prime and backup camera before every trip.
The backup camera plays a part in fighting dust, too, because when I’m carrying it, it always has a different lens than the prime camera, and that can cut down on lens changes.
Speaking of lens changes, I’ve seen people take off their lenses and hold their cameras with the opening straight up in the air as they look for another lens to put on. I change lenses with my camera pointing down, shielding it as best I can. I make the change quickly with the replacement lens at the ready. In windy conditions I’ll wait it out, duck inside, or retreat to the car.

Copy That
I reuse my 8-gigabyte CF and 16- and 32-gig SD cards, erasing them every night after backing up my images to two Western Digital 1-terabyte portable external hard drives.
I use an Apple PowerBook G4 laptop as the go-between machine for the transfer of images from the memory cards, which are in a Lexar Professional USB 3.0 Dual-Slot card reader, to the portable hard drives. I also carry a Jobo Giga One Ultra 120-gig data storage device for transfer of the images from the cards to the hard drives in case there’s a problem with the laptop.
I understand that my anti-dust and backup methods might be more extreme than you’ll find necessary, but remember, my livelihood depends on capturing and delivering high-quality images. I also understand that your images are no less important to you, so perhaps my keep ’em clean, keep ’em safe methods will be worth copying, or at least adapting.
Blaine Harrington’s clean and safe images are at his website, blaineharrington.com.


![]()
Get the Latest Photo Tips, News & Reviews from Shutterbug!
| Camera Reviews Other Reviews | Mobile Reviews Photography Reviews Columns | News | Features | How-To | Resources |
 © 2025 Shutterbug
AVTech Media Americas Inc., USA
All rights reserved