- REVIEWS
Camera Reviews 
More Reviews Mobile Reviews Photography Reviews - GALLERIES
- VIDEOS
- BUYER'S GUIDES
Posing & Lighting; Flattering Your Subject
The impact and success of a studio portrait is often the combined result of
lighting, composition, body language, lens choice, camera angle, clothing, color,
texture, and even luck. With a few portrait techniques under your belt, however,
your luck will improve dramatically. There are many portrait-making methods
that can help you develop your own style over time and ultimately make your
work unique.
In most cases, a portrait client is simply looking for a photographer who can
render a better-looking photo than they themselves could take with a compact
camera permanently set to AUTO. Many of your subjects may claim they don't
photograph well. But you should see that as a good thing. Because after you
prove them wrong and create beautiful, custom portraits for them, you will have
won them over.
If you make beautiful portraits of a fashion model, however, she or he may not
be as impressed. After all, photos of models tend to look good even if they're
shot with the compact camera permanently set to AUTO. But to make someone look
good who typically doesn't photograph so well requires a little more effort
on your part.
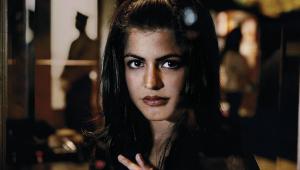
Facial Analysis
With practice, you can train your eye to look for what does or does not flatter
your subject. By doing a facial analysis prior to jumping into the photo session,
you allow your subject the chance to get used to the environment and develop
trust in your technique. I tell my clients I am looking for their best side,
but I am equally concentrating on what constitutes their less-than-best side.
When determining features that can be minimized or accentuated, it's best
to do so under flat lighting conditions.
Facial Analysis With Your Main Light
Once you're on the set, take your main/key light and move it from the
left side of your subject to the right to see which is more flattering. Continue
with this analysis as you adjust the height of the light. Then have your subject
slowly turn their face toward the main light to observe the effects of the facial
shadows.
Observe the effect of the light on the nose--sometimes one side will create
a straight shadow line on the nose, while the other will create a crooked shadow
line, giving the appearance of a crooked nose.
Look for scars, pimples, or similar facial imperfections that are accentuated
or minimized by your lighting treatment. A scar or pimple on the opposite side
of the face from the main light may cast a shadow, thus exaggerating the imperfection.
If the scar or pimple is on the same side as the main light, the light will
most likely not cast a shadow, making it less noticeable.
Watch for the cheek shadow on the opposite side of the main light, as raising
the light can often define and slim the face. A higher main light angle will
often improve the facial appearance--particularly for men--but watch
out for those with dark circles under their eyes, as this feature may become
exaggerated. In such cases, using a reflector underneath to bounce light into
the shadows will help minimize the circles. With high main light angles, however,
watch out for the eyes.
Deep-set eyes often require a lower light angle for adequate illumination.
Double Chins
This technique works best with a telephoto (portrait) lens. For this example,
I asked my daughter to exaggerate a double chin for comparative purposes (#1).
 |
|
|
Next, I asked her to effectively hinge her head from the base of the neck, rather than at the top of the neck, pulling the chin forward, toward the lens (#2).
 |
|
|
Notice how the chin is angled a little down, along with being stretched forward
toward the lens. This, combined with narrow lighting (which will be discussed
in a subsequent article), is one of the best weight reduction techniques in
portraiture.
Note that this technique won't work as well with a normal lens shooting
full-length.
To see this effect in person, try looking in a mirror and close one eye. When
you view the "projected chin" effect with one eye, the neck does
not look distorted like it does with the three-dimensional view afforded by
two eyes. The effect is further enhanced with a telephoto (portrait) lens, which
helps compress the subject matter.
The Eyes Have It
Here are some key eye issues to look out for:
· One eye is lower than the other. If you have your subject tilt their
head down on the same side as the lower eye, the unevenness will be exaggerated.
Have them tilt it the other way to make it less noticeable.
· One eye is narrower than the other. If the head is
turned so that the narrower eye is closest to the camera lens, the wider eye
will appear relatively narrower, as it is farther from the lens. Another method
is to allow a bit of shadow to cover the larger eye.
· Deep-set eyes. As mentioned previously, lower lighting
angles help to keep the eye sockets out of shadow.
· Crossed or one eye wandering. This may take experimentation
depending on the individual. Try turning the weak eye away from the lens. In
some cases, ask the subject to close their eyes and then take the shot just
as they open them.
· For profile. A general rule of thumb is to let the
eyes follow the nose. However in many profiles, this may cause too much of the
white of the eye to be visible, and not enough of the iris. In such cases, it
actually looks more natural to have the subject look slightly toward the camera.
But remember--just slightly.
Tip: Create a circle with your thumb and index finger and position this circle
where you want your subject to look. Then ask them to look through the hole
and keep looking in that direction when you remove your hand.


![]()
Get the Latest Photo Tips, News & Reviews from Shutterbug!
| Camera Reviews Other Reviews | Mobile Reviews Photography Reviews Columns | News | Features | How-To | Resources |
 © 2025 Shutterbug
AVTech Media Americas Inc., USA
All rights reserved