Lesson Of The Month
Add A Stylist To Your Shoot Team

Lesson Of The Month

Figure 1.

Our objective for this shot was to illustrate how to shoot with a large softbox for the Photoflex product catalog. In this photo shoot we used an inexperienced local model.

When working with a model, especially an inexperienced one, it is important to have a makeup artist and stylist on the set. Three major secrets of great portrait and fashion photography are makeup, hair styling, and wardrobe. A person who works well in these areas can be a tremendous help in producing a quality photograph. Among other things, a stylist helps to determine what hairstyle works with the clothes and the model. As the photo shoot takes place, the stylist is on the set watching to see that nothing is out of place, particularly things you might miss because you are concentrating on other elements of the photo. Also, they can adjust and fix things in a professional and detached manner, which helps the model to be more comfortable. While stylists attend to details, it is important for you to watch through the camera lens to see the effect. This will save time and assure better results. If you think you cannot afford someone like this, and wouldn't know where to find this person even if you could, read on.

Figure 2.

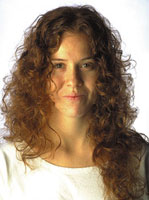
We have been working with our stylist for five years. We met her by placing an ad in the local newspaper and explaining exactly what we were doing and what we wanted. She is a professional makeup and hair stylist. She works for local TV stations on commercials, for national networks when they are in the area, for professional photographers on commercial shoots, and does makeup for brides and attendants at weddings (Figure 1).

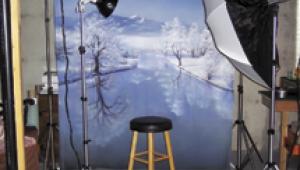
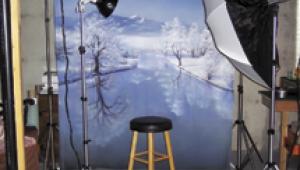
In order for her to get work, she needs high quality images for her portfolio to show what she can do, just as a photographer does for potential clients. In her presentation, she often includes before and after shots to illustrate her worth (Figures 2 and 3).

Our stylist often works with us in exchange for photos for her portfolio and web site. Her aim is to get more work in TV, video, and film. We always preplan to shoot these for her so that she can use them to promote her business. Here are some other places that you may be able to find a willing collaborator on fashion and portraits.

Figure 3.

Hair Salons. These people are obviously trained to work with hair, but many of them also do makeup and are available for weddings. This is a great place to look. Take your portfolio and show them what you have done and explain what it is that you want to do. Chances are they can use the before and after shots for their salon, and their portfolio if they are looking for wedding work. You may be able to do a trade if you supply them the photos.

High-End Department Store Makeup Counters. These makeup artists have been trained to put makeup on every type of customer, and to make them feel comfortable in the process. We've found that these people have a good sense of fashion since they work with and around clothes daily. They may not be as experienced working with hair though.

Figure 4.

Theater Groups. Community theater, high school, and university. These groups always have makeup and wardrobe people, and oftentimes they are the same person. They have a good sense of style, can adapt to sudden or unexpected changes without getting stressed, and know how to work fast.

Our stylist found this model for us, and although she was relatively inexperienced, she possessed qualities of grace and tastefulness.

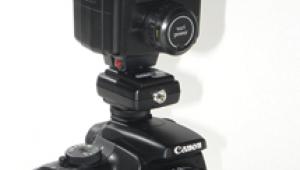
We all sat down to go over our pre-shoot plan so that everyone knew what the objective was, and also to get comments or suggestions from the group before we started. Models always appreciate this, especially if you ask them if they have any ideas. They feel more a part of the team and we notice that they relax faster when they are included in the planning. It is good to let your team know that all ideas are welcome, even during the photo shoot. A group effort helps tremendously with the final outcome. We have made the mistake of not having a pre-shoot meeting and the shoot has always been more stressful and less successful. Once everything has been discussed, we all can go about our jobs (Figures 4 and 5).
Figure 5.

While the model was getting literally transformed with hair and makeup, we set up a roll of textured seamless paper. Where do you get this fantastic stuff? Well, we are based in Santa Cruz, California, where it's foggy during part of the year. We took a plain roll of seamless paper to a house on the beach and put it in the garage with the side door open. We unrolled it, then rolled it back up loosely so that the foggy air could get inside the roll evenly. After a few days the paper had developed a wavy texture, as you can see here. Photographers are always trying something new (Figure 6).

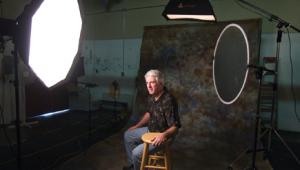
For our main light, we set up a large softbox to the left of the set based on our discussion with the stylist of how the hair was going to be styled in our pre-shoot meeting. If the model had turned the other way, her hair would have been too much in her face. After a meter reading, we took our first shot (Figure 7).

Figure 6.

Next, we positioned a LiteDisc off to the right to bounce light from the main light onto the model. In most cases a white reflector would work well, but we planned to double-diffuse the main light, and this might make the white too weak (Figure 8).

We placed a 39x72" translucent LitePanel in front of the softbox (Figures 9 and 10).

We took another meter reading from the main light, because the diffusion panel cut the exposure from the main light, and we then reset our f/stop on the camera to compensate. After we took another Polaroid, we saw how soft the main and fill lights were working together, and decided not to use the white side of the reflector (Figure 11). We turned the reflector to use its silver side.

Figure 7.

When working with a team, it is important to show the results as they develop, and nothing helps more than to take test shots, or Polaroids, that everyone can pass around and discuss. Looking at the results at this point in the shoot, nobody on the team felt that it was fully working. The stylist offered that the brown dress just wasn't right for the model. She thought that she had another one that would work much better. Everyone agreed that we should give it a try.

After a short break, the model came back out onto the set, and without changing the lighting setup, we took another shot. After viewing the Polaroid, everyone agreed that this dress made the difference (Figure 12).

Figure 8.

We put the film magazine on the camera and exposed a roll of film. Since we were all setup, we decided to shoot another roll without the silver reflector for a more dramatic look. It's always good to shoot different variations of the same set (Figure 13). Once we got the film back, it was a tossup as to which version people liked best. But the good thing was that we had a choice, and depending on where it ended up, one shot might work better than the other.

Once again, our stylist proved an important and integral part of the team, and we certainly wouldn't have achieved these results without her.

Figure 9.

This lesson will be posted in the free public section of the Web Photo School at: www.webphotoschool.com You will be able to enlarge the photos from thumbnails. If you would like to continue your digital step by step education lessons on editing, printing, and e-mailing your photos it will be on the private section of the Web Photo School. Shutterbug has negotiated with WPS to offer our readers a special 33 percent discount rate of $30 per year. To enroll at this discount just go to: http://shutterbug.webphotoschool.com and fill out the Shutterbug questionnaire which will help us to publish lessons for you in the future.

Figure 10.

Technical Equipment
Camera: Mamiya RZ67 with 100-200mm lens
Film: Kodak Ektachrome 100
Camera: Nikon 8008 with AF80-200mm lens (for setup shots)
Film: Kodak Ektachrome 200
Meter: Sekonic L-408
Polaroid: Type 55
Tripod: Bogen No. 3036
Lighting: Photoflex large (36x44") LiteDome Q39; Paul Buff Ultra 1200 flash; Photoflex silver-white oval LiteDisc; Photoflex LiteDisc holder; Photoflex LitePanel 39x72" aluminum frame; Photoflex LitePanel 39x72" translucent fabric; Photoflex LiteStands (3) LS-2218 light stands
Background: 9' Savage seamless paper (modified)

Figure 11.
Figure 12.

Figure 13.

X