
For amateur photographers, this tips is a useful idea to start with a good photography works. - Andrew Stolper
- REVIEWS
Camera Reviews 
More Reviews Mobile Reviews Photography Reviews - GALLERIES
- VIDEOS
- BUYER'S GUIDES
Easy Portrait Tips
You don't need a studio or fancy equipment to shoot fascinating portraits. Here are 10 tips to help you make better photos of family and friends, whether you shoot with film or digital cameras.  1. Avoid Midday Sunlight
  2. Move Away from That Wall
  3. Vary the Framing
  4. Use Open Shade for Large Groups
 FEATURED VIDEO


 © 2025 Shutterbug
AVTech Media Americas Inc., USA
All rights reserved
1. Avoid Midday Sunlight Midday sun is too harsh, and comes from too high an angle, to produce a flattering portrait. It causes subjects to squint, and their eyes become lost in deep pockets of shadow. You can solve both problems by shooting early or late in the day, when the sun is low in the sky: the light is less harsh, and comes from a more pleasing angle (here, the subject was turned so the low-angle sun comes from one side, emphasizing his muscles). Try a few shots of a friend at noon and in the late afternoon, and see what a difference the sun angle makes. (If you must shoot a portrait outdoors at high noon, you can soften the light by placing a translucent scrim between the sun and the subject—or you can have the subject wear sunglasses to hide the squinting and eye shadows!)
Photo by Mary Mcgrath
2. Move Away from That Wall If you use a built-in flash unit indoors, move the subjects away from the wall to avoid an unattractive shadow. Built-in flash is not the most artistic lighting, but it's convenient and doesn't produce strange shadows on faces. Hint: To minimize red-eye with built-in flash, use the camera's red-eye-reduction feature. (The only way to eliminate red-eye in flash pictures is to move the flash unit off-camera, something you can't do with a built-in flash.)
Photo by Mary Mcgrath
3. Vary the Framing Most people think of a portrait as a fairly tight headshot, but it's really a picture that shows something about the subject—be it merely what the subject looks like, or something more. Try varying your framing, by changing focal lengths and camera-to-subject distance, keeping in mind that the most natural perspective appears in photos made from 4-5 feet away. If you shoot a tight headshot with a wide-angle lens, you have to move very close to the subject to get a good head size, and the subject's features will be expanded. Conversely, if you shoot from far away with a long lens, the subject's features will be compressed—not so bad in a full-length shot, but not very attractive in a tight headshot.
Photo by Jay Jorgensen
4. Use Open Shade for Large Groups One simple way to evenly light a large group is to make the shot in open shade—an area lit only by open sky. The soft illumination from this huge light source produces pleasant lighting on everyone in the shot—no one will cast a harsh shadow on the person behind or next to him/her, and the soft light is quite flattering. Hint: Skylight is a bit bluish. This can be corrected when a color negative is printed, but if you're shooting color slides, you might want to place a yellow No. 81A or B filter over the lens to eliminate the bluish cast.
Photo by Lynn Eodice
NEXT: Page 2 »
|
| |||||||||
- Log in or register to post comments


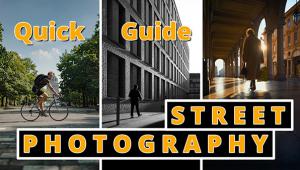


PHOTO OF THE DAY
Today’s photo is Lit Lemonade by Greg Urbano
eNEWSLETTER SIGNUP
![]()
Get the Latest Photo Tips, News & Reviews from Shutterbug!
| Camera Reviews Other Reviews | Mobile Reviews Photography Reviews Columns | News | Features | How-To | Resources |
© 2025 ShutterbugAVTech Media Americas Inc., USA
All rights reserved