Sigma SD9
Digital SLR With Unique CMOS Chip
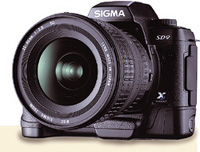
The long-awaited Sigma SD9 Digital SLR arrived in our offices and although we had a brief hands-on shoot with it during photokina last September this was our first opportunity to put it through its paces. First off, the SD9 is the one and only digital camera thus far to sport the Foveon X3 sensor. The sensor works with a unique three-layer capture area that differs from the more common checkerboard "filter" setup used in most other sensors. We have covered this in depth previously, so we won't go over this territory again. Although the chip architecture is unique, the proof is in the images and not in the explanation of how the image is formed. But how the image is formed is so integral to making decisions about this camera that it is worth close inspection. The files it produces are proprietary, and there's no option other than shooting in its RAW format. But before we get to that let's take a look at the physical setup of the camera and what it offers. |
|||
The SD9 Experience |
|||
Sigma RAW Mode |
|||
For those used to having a choice between JPEG, TIFF, and RAW, or at least JPEG and RAW, having only RAW output might seem like an omission, as you must work through the Sigma Pro software to convert to these other formats. Because this is a proprietary format you also must view images through the Sigma software, which can be used with both Mac and PC. Happily, you can download both from the camera (with USB and FireWire) and using a CompactFlash card reader, like the SanDisk 6-in-1 we use. And you can download to any folder and reopen the images later in the Sigma software, or on the road to a CD using a walk-up kiosk, although that kiosk cannot display the files it has downloaded, as it does with TIFF and JPEG formats. If the Sigma software is loaded, clicking on any X3 file format in your hard drive will evoke it. |
|||
Exposure And Image Options |
|||
The camera back offers a host
of buttons that allow you to control the camera and the digital file setup.
One thing missing, however, are the menu items that allow you to control
contrast, saturation, and sharpness. This is all done later in the software
when massaging the RAW images. So, the time you might save having to peruse
menus and make such settings is taken up with post-processing later. We'll
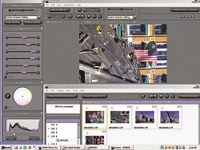
get to the software momentarily. Image Quality Sigma Pro Software The Sigma Pro software is a
great place to add these attributes, and the controls are accessible,
fairly fast, and show a preview as you work. In some cases the image right
out of the camera required little or no tweaking and going right to a
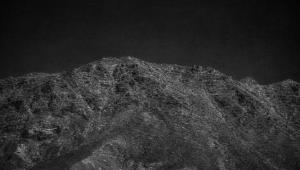
TIFF save made sense. We were especially impressed with the way the image
delivered highlight and shadow detail in fairly high contrast conditions.
The sensor seems to dig into the shadows while retaining highlight texture
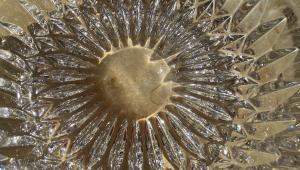
in scenes that would drive other digital sensors a bit mad. And the colors
were bright and lustrous, not unlike the current taste for vivid color
and sharp tonal edges. Indeed, there was a character to the images quite
unlike what we've seen before, in that the original file was not
as "flat" and "soft" as we've noticed in
other direct from camera file output in some other SLR systems. So, right
out of the box the Sigma image has a leg up, we feel, and should satisfy
those photographers who usually shoot chrome film. In many cases any tweaking
we did was for taste, and not to fix a deficiency in the delivered RAW
file. |
|||
Making The Choice |
|||
SPECS |
- Log in or register to post comments
