- REVIEWS
Camera Reviews 
More Reviews Mobile Reviews Photography Reviews - GALLERIES
- VIDEOS
- BUYER'S GUIDES
A Monolight Buyer’s Guide; Find A Versatile Strobe That’s Right For You
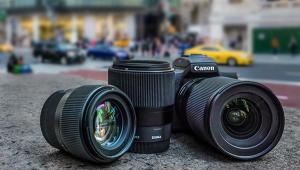
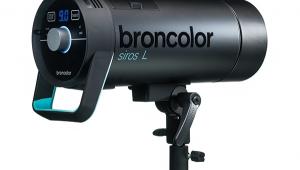
A monolight (or monobloc, in some circles) is a self-contained strobe--and possibly the best way to get started in studio lighting. Self-contained means it does not require an external power pack to control its various functions with all the controls housed in the body. Most monolights plug into an AC outlet, although a few are driven by a separate, external battery pack. You can think of a monolight as a shoe-mount flash that's been supersized, with a few extras thrown in, most notably a modeling light. As with any flash head, a monolight requires a light stand.
Key Components
The front end of the monolight consists of three key components: flash tube, modeling lamp, and reflector. Monolights are largely designed with user-replaceable flash tubes. The flash tube supplied may be UV (color)-corrected to neutralize color balance--this type of flash tube may also be an optional replacement. Color temperature of the flash tube may range from 5000-6000K and still be considered "daylight-balanced."
Many economical monolights only use a 60 or 100w modeling lamp, very often a household incandescent bulb, which does a poor job in bright ambient light. Halogen is more efficient. Ideally the modeling lamp should track the output of the flash to give you a truer sense of the lighting and contrast. That's called proportional modeling, or tracking. The modeling light normally dims or quenches momentarily when the flash pops so that it doesn't affect exposure or color balance (a low-wattage lamp should not be a concern).
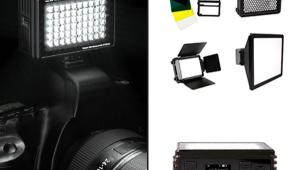
While a select few monolights come with a permanently attached reflector, most are sold with a removable dish. The basic reflector usually accommodates the shaft of an umbrella. There are other options, especially useful when employing multiple lights. For instance, you might want to use a background reflector (to throw a graduated wash of light on a backdrop) or a conical snoot (for spotlighting or as a hairlight). When using a typical reflector, you usually have the option of adding a honeycomb grid (for a different degree of spotlighting) or barn doors (which control spill or concentrate the light over a specific area of the set). Many pros prefer to use black wrap (pliable metal sheets commercially sold under the name Cinefoil) in place of a snoot or barn doors or even as an adjunct, to further control the light. It wraps around the metal reflector and is held in place with gaffer's tape. Other options include a softbox, which requires an adapter ("speed") ring. Keep in mind that popular third-party softbox manufacturers may not support every monolight out there and you may have to choose from a limited selection. If you anticipate using fancy accessories, choose a monolight accordingly.
Key Controls
The back panel is where the AC cord usually plugs in and where the controls are often found (rarely on a side panel). The most critical function is the power variator, which adjusts flash output. Better, more robust units provide light ratio control that is continuous (stepless) or incremental in 1/10 stops, within a five-stop range, or better still six stops (down to 1/32 power) or more. Also note that, with rare exception, lowering flash output affects color balance, producing a cooler (bluer) light. However, reducing power also dramatically shortens flash duration and recycling times, which more than makes up for any color shift.
Now, here's where modern technology steps in. We are increasingly seeing digital circuitry replacing mechanical parts. Microprocessor circuitry often translates into more reliably repeatable output from shot to shot. Of equal importance, normally when powering down to a lower output level, you have to manually pop the strobe to "dump" the accumulated charge built up by the capacitors. Digital units should dump that excess charge automatically. This way you won't accidentally overexpose the next shot--which might be the one with the best facial expression in a portrait shoot.
Ancillary Controls
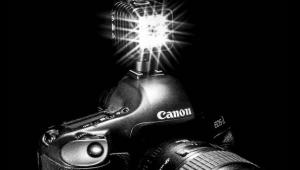
Many monolights support a 6v (or less) triggering voltage (verify before purchase), making them safe to use with any popular D-SLR via the camera's X-sync terminal (where applicable)--using the supplied sync cord. Some cameras also support higher voltages. That said, an easy way around sync voltage concerns--and one increasingly employed, especially when there is no X-sync terminal on the camera to begin with--is to remotely trigger the strobe. A camera's built-in flash can be used to trigger a monolight (via a built-in photocell). While doubtful that this tiny flash will affect exposure, you might want to watch for undue reflections off the subject. And of course the camera must be set to a suitable flash X-sync setting and set to Manual Exposure mode (use a flash meter or the camera histogram and/or evaluate the image on a computer monitor).
Even if you use a sync cable between the camera and monolight, the addition of other monolights makes the use of additional wiring impractical. Either way, the monolights may provide alternative choices to hard wiring. Besides photocell activation, the monolight may offer infrared or radio remote triggering. Even where the infrared or radio receiver is built-in, the transmitter is still an optional component. Of course, you can always buy a transmitter and receiver set separately.
Other Features To Look For
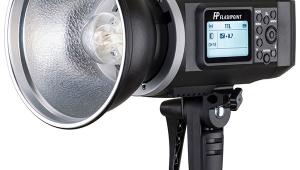
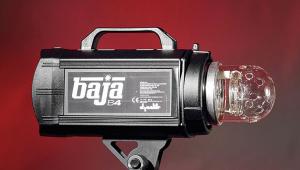
Size and weight are often an issue and directly related to output (within a product line). Hence, think twice before splurging on a 1000 ws monolight, and consider all that heft when packaged in a two- or three-light kit. For a home studio, I've found that a 300 ws unit is surprisingly versatile. The ws (watt-second) rating (or joules) defines the stored energy available to a studio flash unit, regardless of the attached reflector, umbrella, softbox, or other light modifier, just as a 60w incandescent bulb is 60 watts regardless of the fixture used, in contrast to a guide number, which is affected by all these factors.
While it makes little or no difference what the monolight's housing is made of (metal or plastic), fan cooling is often expected in heavy-duty and higher-powered units. If you don't expect to run the lights mercilessly, air-cooled units should be fine. For that matter, overheat protection is a worthwhile safety feature. And there are too many other subtleties that set one monolight apart from another for us to discuss here--ask your photo dealer about these.
Clearly, the more expensive units are more robust and more versatile, with a broader range of high-tech features and high-powered accessories. But you don't need to spend a lot to achieve good results. Consider what you'll be shooting and how often, and how demanding each photo shoot will be--and then invest wisely in a monolight system that will go the distance with you.
How Many Monolights Does It Take To Make A Picture?
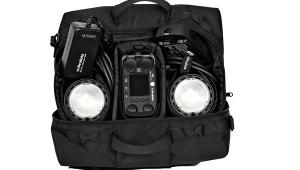
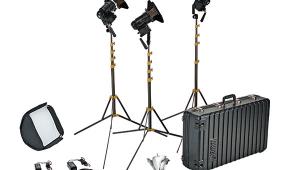
You can do an awful lot with just one monolight, provided you accessorize it properly. However, for economy and added flexibility, consider buying a kit. Kits are more economical, and many kits come with two or three monolights, along with light stands, an umbrella and/or 2-foot-square softbox (suitable for a head-and-shoulders portrait or small tabletop), and possibly a snoot, honeycomb grid, and barn doors--all neatly packaged in a sturdy, foam-lined (preferably wheeled) case. For starters, use one light as your key light, then add the second light as a background, hair (or accent), or fill light. If the kit comes with three lights, dedicate one of these as a background light, with the third one as fill or hairlight.
View .pdf Chart 770KB


![]()
Get the Latest Photo Tips, News & Reviews from Shutterbug!
| Camera Reviews Other Reviews | Mobile Reviews Photography Reviews Columns | News | Features | How-To | Resources |
 © 2025 Shutterbug
AVTech Media Americas Inc., USA
All rights reserved