Howard Millard

Howard Millard  |  Apr 01, 2006  |  0 comments

Just when you thought that there really wasn't much more that Adobe could possibly cram into Photoshop, Version CS2, part of the Creative Suite, was released last year. Whether you're a seasoned digital pro or a newcomer, how do all these new features work and how can they improve your workflow and shorten the time you spend in postproduction? Check out the valuable...

Howard Millard  |  Feb 01, 2006  |  0 comments

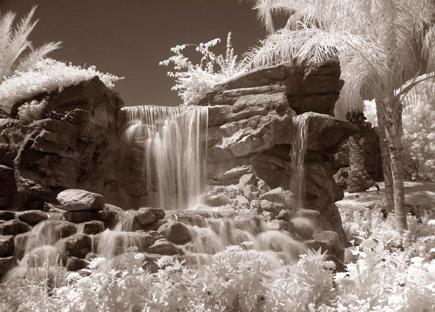
Mysterious, evocative, otherworldly--these are all terms that describe the powerful emotional and visual responses to black and white infrared (IR) photography. For landscapes, this approach yields striking, contrasty images where healthy green foliage, which strongly reflects IR radiation, appears to glow in snowy white tones, while blue skies and water darken dramatically.

Howard Millard  |  Jan 31, 2006  |  2 comments


The fast, streamlined Minolta DiMAGE Scan Elite 5400 scans...

Howard Millard  |  Jan 31, 2006  |  0 comments

Xenofex 2 Special
Effects Plug-Ins

Electrify And Enliven
Your Photos

<...>

Howard Millard  |  Nov 28, 2005  |  0 comments

Sometimes all it takes to lift your photo from the ordinary to the extraordinary
is a striking edge or border. Would a soft-edged vignette or a unique pattern
border take your image to the next level of dramatic impact? While there are
myriad software programs and plug-ins designed to add special effect edges,
borders and frames, you probably already have quite an array of possibilities
built into your current image-editing software. To get you started, here are
some effects that I created with Adobe Photoshop. You can use Elements for these,
as well. Earlier versions of these as well as other image-editing programs offer
many of the same effects. Now let's give some photos a new leading edge...

...

Howard Millard  |  Nov 01, 2005  |  0 comments

Recently, I attended several excellent Photoshop seminars presented by Software-Cinema.com. These were held in a large meeting room of a city hotel with some 200 people in attendance. Photographic images from the presenter's laptop were projected on an enormous screen, with great clarity and color saturation. They must be using a very expensive projector, I assumed. After...

Howard Millard  |  Oct 25, 2005  |  0 comments

Could your portraits be enhanced
by the mysterious, otherworldly glow of a black and white infrared (IR) effect?
In the past, pre-digital darkroom, the only way you could get the IR look was
shooting special IR film, quite a challenge to expose, process, and print correctly.
Working digitally you can avoid many of the pitfalls and gain much more control
in the bargain. Here's how to emulate that exotic infrared look digitally:


You can start with a scan of any color slide, print, or negative you've
shot with your film camera or, even easier, with a color file from your digital
camera. If you're starting with a print, negative, or slide, scan it in
RGB color mode. Once you've got the digital file, open it in Adobe Photoshop
CS (or some earlier versions) to follow the steps outlined here. You can also
achieve the effect with Adobe Elements 2 or other advanced image-editing programs,
but the names of some tools or dialog boxes may be slightly different. Always
work on a copy to preserve your original scan. In fact, with this technique,
it is a good idea to make two or three copies in order to try different settings
in search of the effect you like best. Just follow these steps and you'll
be on your way to easy IR.

1.
I began with this original color file shot in Raw mode with a
Canon Digital Rebel 6-megapixel digital SLR with a Canon 18-55mm
lens at 55mm (equivalent to a 90mm lens in 35mm format). File
size: 18MB. (Model: Riley Messina.)

...

Howard Millard  |  Sep 27, 2005  |  0 comments


To
achieve the eerie, glowing effect of infrared black and
white film, I applied several techniques in Adobe Photoshop.

Photos © 2001, Howard Millard, All Rights Reserved

Are you attracted to the
mysterious, otherworldly glow of black and white infrared film? But
you've heard that it's a bit of a hassle to shoot and print.
Well, here's how to emulate that exotic infrared (IR) look digitally
starting with any color original.


Why not shoot IR film to begin with? Kodak High Speed Infrared film
is a challenge. First, to avoid fogging, it should be stored in the
refrigerator and must be loaded and unloaded in the darkroom or a changing
bag. Then, for the best effect, you must shoot with a deep red or opaque
filter over your lens. Once you've focused, you must re-focus
the lens manually to the infrared focus point. Since your camera meter
doesn't measure IR light, it's advisable to bracket exposures
widely. In the field, you must load and reload your camera in a light-tight
changing bag. After the film has been processed, the negatives are extremely
contrasty and often require extensive dodging and burning to get a good
print.


I
started with this original color 35mm slide shot on Fuji Sensia
II and scanned it on a Polaroid Sprintscan 35 Plus scanner
at 2700dpi for a 26MB file.

...

Howard Millard  |  Sep 27, 2005  |  0 comments


1

Photos © 2003, Howard Millard, All Rights Reserved

Adding a reflection of your
subject can double the impact of your digital photo, transforming an
ordinary shot into something memorable and striking. Using tools in
Adobe Photoshop, Elements, and other image-editing programs, it's
not too difficult to double your pixel power. Just follow these nine
steps. I used Photoshop, and the procedure is similar in Elements or
other programs.


2

...

Pages

X