- REVIEWS
Camera Reviews 
More Reviews Mobile Reviews Photography Reviews - GALLERIES
- VIDEOS
- BUYER'S GUIDES
Winter: The BEST Time for High-Key Nature & Travel Photos: Here’s How (VIDEO)

Winter is a great time to capture beautiful outdoor images, but snow-covered landscapes can be difficult to get right in the camera. Fortunately there’s a way to make images that look as good as they did in the viewfinder, with a little help from Photoshop.
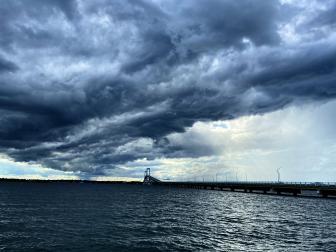
A fresh blanket of snow can make winter scenes quite enthralling but it also presents a big challenge. That’s because the meter in you camera is calibrated for18% gray, and without the proper amount of exposure compensation the pristine white snow will be rendered a dirty gray. Moreover, winter scenes shot on cloudy days often have an unappealing blue cast.

As you may have guessed by now, there’s a simple way to fix the above problems in Photoshop to create stunning, high-key images with accurate white snow and the proper amount of brightness. German photographer Christian Mohrle demonstrates how easy this is to do in the seven-minute tutorial below.
The video begins with a nicely composed minimalist scene with barren trees and a snow-covered foreground fading into the misty background. The image looks quite good as it is, until you compare Mohrle’s before/after shots.
Mohrle’s goal is to give the trees more impact, correct the blue tones, and brighten up the overall appearance with his quick high-key editing technique. And while this particular demonstration involves a landscape shot, you can use this easy method with all kinds of photos from portraits to product and macro shots.
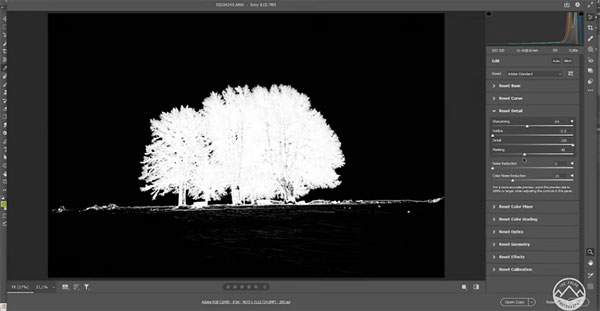
The first step is to make a few basic global adjustments to get the image closer to what Mohrle envisions. He begins with a quick crop to make the photo more balanced by placing the trees dead center. Then he changes the camera profile to Adobe Standard, works on white balance and contrast, and gets rid of the colorcast.
Now it’s time for a few local adjustments to specific portions of the image, using a linear gradient for the sky, some subtle split toning, and a white vignette around the borders of the shot. All that’s left is a quick cleanup, and the job is compete.
You can find more helpful shooting and editing tips on Mohrle’s YouTube channel, so be sure and take a look. And check out another tutorial we posted a while back, demonstrating a better way to fixed dark images in Lightroom.


![]()
Get the Latest Photo Tips, News & Reviews from Shutterbug!
| Camera Reviews Other Reviews | Mobile Reviews Photography Reviews Columns | News | Features | How-To | Resources |
 © 2025 Shutterbug
AVTech Media Americas Inc., USA
All rights reserved