- REVIEWS
Camera Reviews 
More Reviews Mobile Reviews Photography Reviews - GALLERIES
- VIDEOS
- BUYER'S GUIDES
Manual Mode & Auto ISO: Max Control of Exposure in Your Photos (VIDEO)
Last week we brought you an enlightening tutorial from Hamed Photography that described the many benefits of shooting action photos in Shutter Priority mode with Auto ISO. Today he's following that up with this video demonstrating how combining Manual mode with Auto ISO provides full creative control over exposure without slowing you down.
Hamed explains why this approach strikes a perfect balance between control and efficiency for shooters of all skill levels, and he puts it like this: "This setup can be a total gamechanger whether you're shooting fast action, street scenes, weddings or cinematic video."
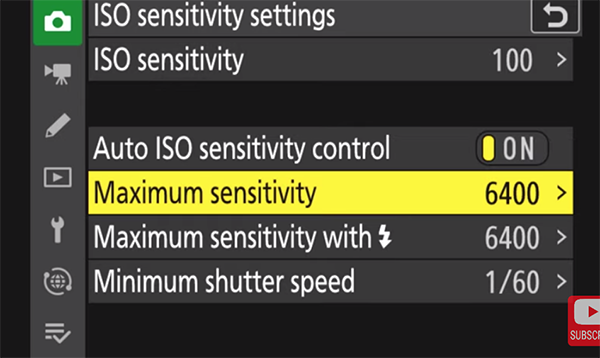
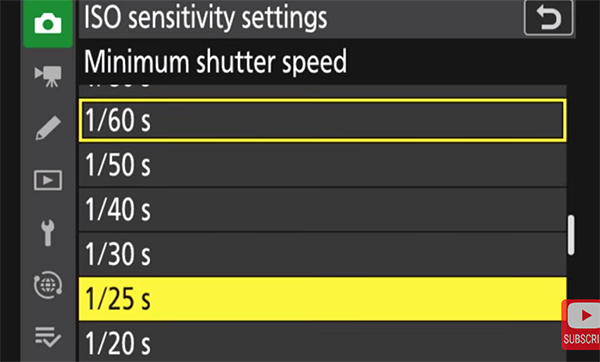
Switching the camera's mode dial to "M" enables you to set both shutter speed and aperture to manage motion blur, depth of field, and exposure time. By enabling Auto ISO the camera adjusts sensitivity automatically to maintain a balanced exposure as lighting conditions change, "so you don't have to ride the ISO dial constantly."
This technique provides creative consistency across multiple images and is great choice for sports and wildlife photography under everchanging light. It also works well for shooting concerts and other events with mixed indoor/outdoor lighting. And Hamed explains how to specify minimum and maximum ISO values when using the Auto mode to avoid excessive noise or underexposed shots.
Conversely, there are times when this technique isn't your best bet, such as when shooting in a controlled lighting environment where "full manual ISO may give you cleaner, more consistent results." The same goes for long-exposure and astrophotography where a fixed ISO is critical.
Hamed walks you through various scenarios in barely 11 minutes so that you understand how all this works. There's much more of interest on his instructional YouTube channel.
And don't miss the tutorial mentioned above in which Hamed demonstrates how to speed up your workflow and avoid missing a special moment with a combination of Shutter Priority and Auto ISO.


![]()
Get the Latest Photo Tips, News & Reviews from Shutterbug!
| Camera Reviews Other Reviews | Mobile Reviews Photography Reviews Columns | News | Features | How-To | Resources |
 © 2025 Shutterbug
AVTech Media Americas Inc., USA
All rights reserved