- REVIEWS
Camera Reviews 
More Reviews Mobile Reviews Photography Reviews - GALLERIES
- VIDEOS
- BUYER'S GUIDES
Master Class
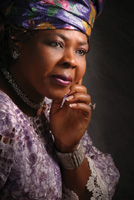
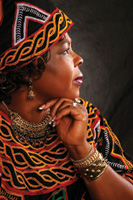
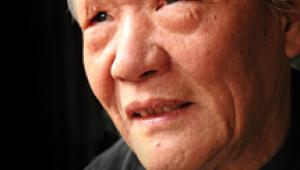
Photographing People Of Color
Shooting digitally has made
it easier for me to photograph black people. I can see what I'm
doing as I'm creating each image and make adjustments accordingly.
Detail is what I'm looking for...detail everywhere. It's
not that difficult to achieve. |
|||||
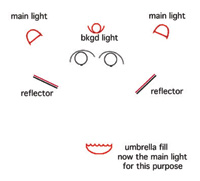
Lighting Diagram For
Couple's Portrait |
|||||
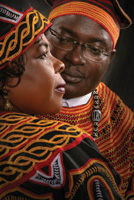
Then, her
husband got in front of my camera. His statement that he had never really
seen his face in a picture was right up my alley. I knew exactly how to
handle the situation. I put my two main lights both in profile position,
and blocked the lights from my lens with reflectors (that also bounced
some of the light back onto his face). A quick look at the image on the
back of my camera told me that I needed to give him one more f/stop to
pick up detail in his face. It worked perfectly. |


- Log in or register to post comments


![]()
Get the Latest Photo Tips, News & Reviews from Shutterbug!
| Camera Reviews Other Reviews | Mobile Reviews Photography Reviews Columns | News | Features | How-To | Resources |
 © 2025 Shutterbug
AVTech Media Americas Inc., USA
All rights reserved