- REVIEWS
Camera Reviews 
More Reviews Mobile Reviews Photography Reviews - GALLERIES
- VIDEOS
- BUYER'S GUIDES
Kick It Up
Accent Lights Add Pizzazz To Portraits
When portrait photographers get together, they talk about light, lighting, and lighting equipment. Right after money and cameras, it's a major topic. Especially the "big four," because most photographers use a four light setup in their studio. Let me explain the basics so you can see that a "kicker" or accent light has a unique function that is not covered by the other lights. The first thing most photographers concern themselves with is the "main" or "key" light. It's the primary light that determines the lighting pattern on your subjects while the others play a supporting role. I most often use a 24x36" softbox for my main light. I move it constantly to create the pattern I think is most favorable on my subject. My exposure is based on this light. The "fill" light does just what it says--it "fills" in the shadows. If you want deep shadows, set it several stops less than your main light. Three f/stops will give you pretty deep shadows with most color negative films. If you want very light shadows, set your fill intensity very close to the main light, maybe just half a stop less. Like anything, test and test some more. Fill lights are usually stationary, often mounted on a wall or ceiling. |
|||
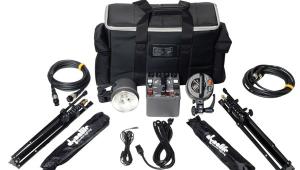
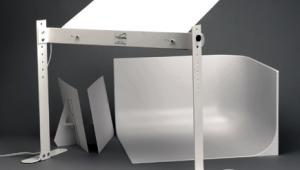
The next one to look at is the "background" light. Since your subject is usually a few feet away from the background, and light falls off geometrically, in most cases you're going to need to light it separately. These lights are tricky and require a lot of testing for proper usage. The intensity will vary depending upon the background color, distance from the light, reflector shape, gels used, if you light it directly or at an angle, etc. You can choose not to use a background light in order to achieve dark effect or use two lights to evenly illuminate a seamless. The fourth one has a couple of names. It was called a "hairlight" in the old days. Then photographers gradually shifted from a rather unnatural looking spotlight on the head to one or more broader and softer lights. They not only kept the hair from going too dark, but also outlined the entire subject, thus earning the name "separation" light. It's common practice nowadays to use small softboxes or strip lights for this purpose. Some photographers even bounce a small light onto the ceiling, being careful to block off a section of the ceiling with black cardboard so the light doesn't go too far forward. This effect looks nice on hair but not on noses. You might be asking yourself what do we need other lights for, it sounds like we've got everything pretty well covered. Well, we do. But there are times when we want a little extra punch in our portraits. And that's what "kicker" lights are for. You may also hear the term accent light which is the same thing. You see, the function of the kicker is to add shape and dimension to the subject or call attention to it by highlighting it. In the studio, these lights are usually small, hard, not diffused and have plenty of punch to them. By definition, this means it doesn't have to be a very expensive light--it can even be a mirror catching light from one of your other sources and kicking it back into the photo in a much harder form. They can be very inexpensive portable flash units. I use Vivitar 283s all the time. Here's how. |
|||
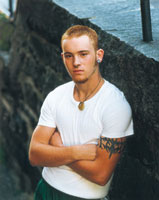
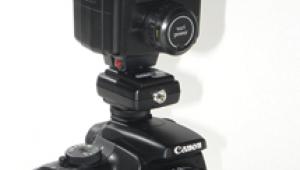
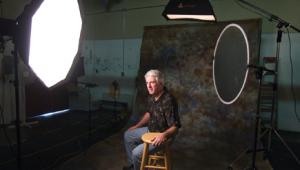
Just stick a "slave" of some type to your flash unit, mount it on a stand, and you're ready to go. Kickers are usually placed behind and at an angle to the subject for maximum effect. Make sure you "flag" your lens. This means placing a "gobo," or dark object like cardboard between your lens and the kicker light. Since the light is aimed toward the lens in many cases, care must be taken that it doesn't strike the lens, otherwise you've got flare city. Be warned. The intensity of the kicker light is not usually critical. I'd recommend about one stop more than the main, but it depends on the effect you are going for and if you need detail in the area. Even at the same intensity as the main light it will have a dramatic effect since the source is hard and at this angle the reflected light is bouncing directly at the lens. Again, experiment, especially with transparency films. Using a kicker light can add drama to your portraits and create a much more three-dimensional look. It's not very difficult or expensive. With a little practice, it can be one more arrow in your quiver that separates you from the competition. Your clients won't know why your work looks better, just that it does. Lining Up The Kicker Light
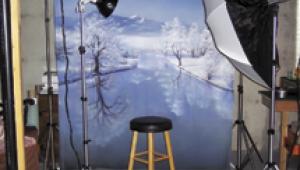
In The Studio Set up your shot and then put all the other lights off so it's totally dark in the studio. Looking through the camera, have an assistant fire the kicker light while you watch where it's hitting. Keep doing it until you have the effect you want. Then nail it down, put the other lights on and start shooting. Using a flash meter, start with the same intensity as the main light, see how that looks to you and take it from there. How Do You Get A Kicker
Outside? How about the hairlight? Do you really need it? Inside, your main light is coming from the softbox aimed at a 45 angle to your subject. The hair isn't lit. Outside, the same soft light on your subject's face is also lighting their hair. You probably don't need that light either. So where's the kicker? Easy. It's the direct sunlight behind your subject. The face has indirect light on it, the sun is the kicker. Piece of cake, I use it every day. What about window light? Get a mirror or silver reflector. Start trying it--now. |


![]()
Get the Latest Photo Tips, News & Reviews from Shutterbug!
| Camera Reviews Other Reviews | Mobile Reviews Photography Reviews Columns | News | Features | How-To | Resources |
 © 2025 Shutterbug
AVTech Media Americas Inc., USA
All rights reserved