- REVIEWS
Camera Reviews 
More Reviews Mobile Reviews Photography Reviews - GALLERIES
- VIDEOS
- BUYER'S GUIDES
JTL Digit-eBox: A Self-Contained Tabletop Studio
You have lots of stuff ready for sale or that needs to be catalogued, such as jewelry, watches, pottery, tableware, glassware, figurines, coins, or maybe even an old camera. So how do you photograph these items quickly and affordably, while making them look their best?
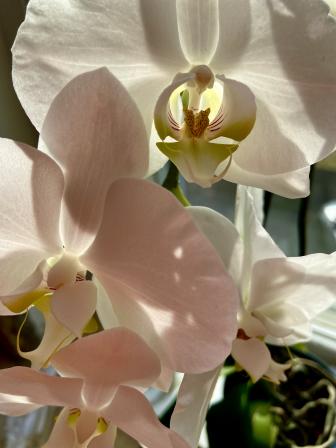
All Photos © Jack Neubart
For starters, we often need soft, largely even, and, for the most part, shadowless illumination to bring out all the salient features in the item. While a light tent or other diffusion enclosure can be used, getting lighting ratios just right can prove time-consuming. Using household lighting is often unsatisfactory if you want to make the item sparkle so that it beats out any competitive offerings online, and especially if you want the pictures to reflect an air of professionalism. Besides, color balance is often an issue, made even more difficult when available fluorescent lighting is used. And if you use flash, you’ll need more than one strobe, which becomes a costly and often time-consuming proposition.
You may also need a surface that permits under-lighting the subject, to eliminate shadows or bring out the clarity of the object. A sweep table is ideal for this, but, again, costly. But there’s a simpler solution: the JTL Digit-eBox.
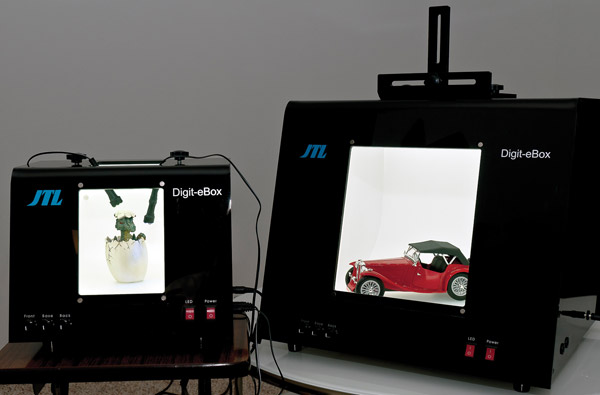
The JTL Digit-eBox: On The Outside
The JTL Digit-eBox has an unimposing look to it, with an appealing glossy black finish and sloping front, matched with a solid feel. The two sizes I tested—the mini (model 2954) and large (2952)—fit comfortably on a coffee table or breakfast nook, and would be equally at home on a desktop or kitchen table. I sat the large one down on my coffee table and the mini on a stool-sized side table. The boxes are light enough to move with little or no effort and store readily in a closet.
The front of each unit features a removable rectangular panel that is secured in place by magnets, making it easy to move around. To allay any fears, I did not observe any deleterious effects on any camera gear that was in close proximity to these magnets, which are situated on both the removable panel and opening. This doorway is relatively small on the mini, just large enough for my 60mm macro lens with lens shade to fit through, but grows in size as box size increases, becoming quite roomy in the large enclosure.
The top of the box features a square (non-magnetic) removable panel around which is situated the included modular camera bracket. This opening is the same size on both models.

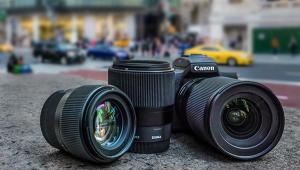
Recommended Gear
JTL says the camera bracket will hold any D-SLR, but a sturdy tripod will ultimately prove beneficial. If you use the top portal with a pro-sized D-SLR, use a tripod with an articulated center post—à la the Benbo and its ilk. One more point: the tripod socket on the camera should be fairly centered under the lens for improved balance.
As for the lens, make sure the girth (including lens shade) will fit the opening—not more than 3.5” for the top window on either box; same goes for the front aperture on the mini. I managed to squeeze a 60mm macro through the opening on the mini Digit-eBox. The lens I used when employing the front portal on the large enclosure was an 18-200mm zoom, keeping the camera farther back while photographing larger items. Ordinarily, you’ll want to shoot stopped down well below maximum aperture for depth of field, unless shooting flat objects, such as coins, from the overhead portal.
Dual Light Sources
The on/off switch on the front of the box controls all the lighting. The illumination is fluorescent (flicker-free, with a CRI rating >= 88). JTL says the CFL tubes have an effective life of 6000 hours before you begin to see a color shift. Full life is 10,000 hours.
Three dials (rheostats) control intensity of the front, base, and back CFLs. These lights cannot be switched off individually. The base light helps to minimize or eliminate shadows, while providing fill. Frontal lighting flanks the front portal, left and right.
There is no lighting from the sides, but the highly reflective white surfaces that soften the transmitted fluorescent light also do a good job of bouncing light where needed for fairly even illumination. Play with the lighting ratios to achieve the desired effect. While you can’t go entirely wrong with all the lights at full power, you might find that the base and back lights tend to overwhelm the front lights or produce noticeably hot reflections and need to be turned down a bit.
A secondary switch turns on a supporting row of diffused white LED lights located in the unit’s ceiling, at the front. CRI (Color Rendering Index, which defines the purity of the light) for these lights is 95 or greater. Intensity of the LEDs does not change with the rheostat controls. Effective life of the LEDs is 60,000 hours; 100,000 hours total. (By the way, light replacement must be done by JTL.) And I should note that, for those of you who like a challenge, using remotely triggered shoe-mount flash or macro flash is always an option, possibly in combination with the interior lighting in a relatively long exposure.
While white balance for the permanent lights is stated at 5500K daylight, shooting in AWB did produce a slight greenish color cast, which I easily corrected. You can effectively white balance off the back interior surface, but a better option is to use a neutral gray target. I opted to gray balance off a SpyderCube as an alternative to white balancing.
The milk-white interior forms a perfect backdrop for practically anything but clear crystal or clear glass. The backdrop sweeps toward the rear, much like a product shooting table. Where suitable, you can add color accents with the blue and green LEDs (supplied with each unit), which connect on the outside.

Setting Up
Fluorescents require a warm-up period to reach full operating capacity. When switching the unit on, set all rheostats to full (all the way to the right—they may be in that state when you receive the unit). Allow about three minutes after switching on power (LEDs off). The LED strip does not require a warm-up period. By the way, with all lights on and at maximum, heat buildup was measured as negligible.
The best way to proceed is to first turn the unit on and then add items to be photographed and set up the camera. This way no time is wasted as the lights warm up. However, if you turn down one of the dials, then readjust it, allow about a half-minute before shooting.
Sample Meter Readings
The following readings were made with the large Digit-eBox. With a SpyderCube positioned at the front edge of the sweep and centered, with front, base, and back lights on full and warmed up, illumination reads 10 EV at ISO 100 (based on a gray surface reading). Move the SpyderCube toward the center of the box and illumination falls off by 0.3 EV. The overhead LED strip adds 1 EV to the overall exposure. Sample incident readings read f/8 at 1/25 sec (ISO 100), with all fluorescent lights at maximum and LEDs switched on. Take away the LEDs and the reading drops to 1/13 sec. Use only two fluorescent lights and you get 1/8 sec. (Readings were made with a Sekonic L-558R and may vary ever slightly depending on subject placement.)

The Results
The JTL Digit-eBox is not the first self-contained lighting enclosure, but I found that this tabletop box does a more convincing job than the ones I previously worked with. And it costs considerably less.
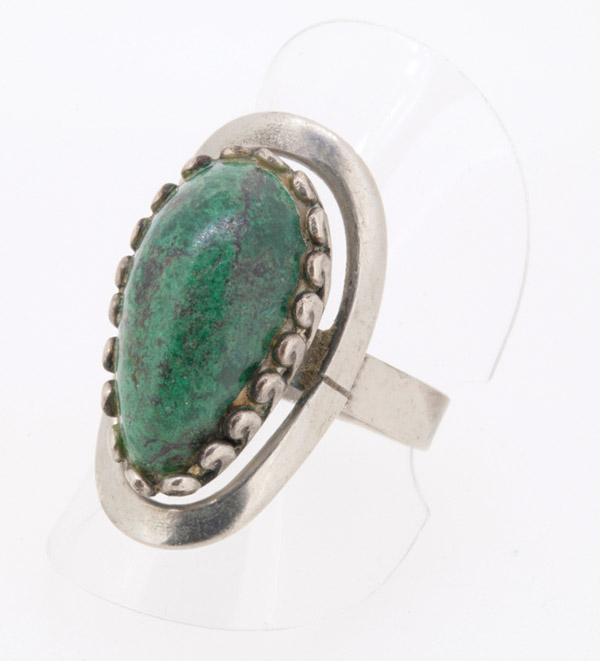
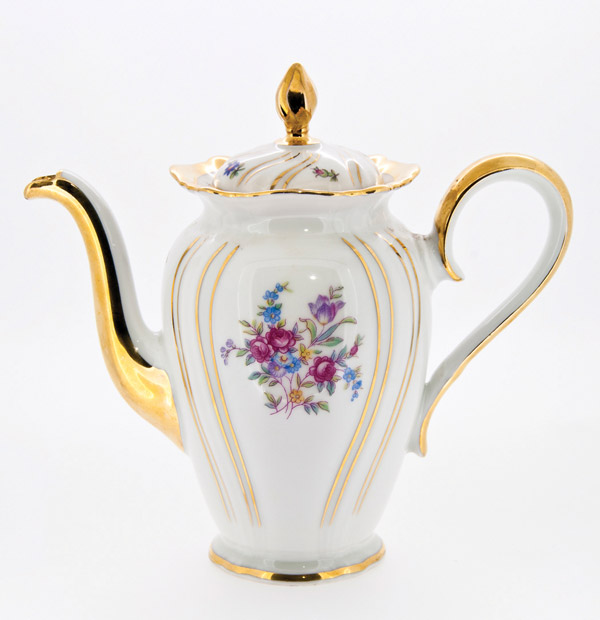
I wasn’t necessarily looking for artistic expression when using the Digit-eBox. I just wanted results, without complicating my life. I didn’t want to bother with setting up lights or a backdrop. And when I shot rings and a crystal bauble in the mini, and a jewelry box, porcelain tableware, a vintage camera, and even a 1:18 scale model car in the large Digit-eBox, I was in and out in minutes.
The only added accessory I needed was a tripod. And instead of a remote release, I used the self-timer, which gave me time to play with adding accent lights (via the supplied blue and green LEDs or my own LED penlight). Make the exposures longer and you can do some neat lightpainting.
In the final analysis, the JTL Digit-eBox may not be the ultimate answer to all your tabletop needs, but it does the job quickly and effectively. One point we can’t overlook: you can close the box with everything inside and not worry about stuff collecting dust, or children or pets getting at the contents. And the lighting is environmentally friendly and economically sound. So, if you want to turn inventory around efficiently and painlessly, the JTL Digit-eBox is a good place to start.
Technical Specifications
Mini (2954)
Exterior: 10x9x9”
Interior: 7.5x6x6”
Street Price: $199
Small (2950)
Exterior: 12x9.5x9”
Interior: 9.5x7.5x7”
Street Price: $249
Medium (2951)
Exterior: 14x12x11”
Interior: 11x10x9”
Street Price: $299
Large (2952)
Exterior: 16x14x13”
Interior: 13.4x12x11”
Street Price: $399
Extra Large (2953)
Exterior: 24x20x20”
Interior: 21x17x17”
Street Price: $699
For more information, visit JTL’s website at: www.jtlcorp.com.


![]()
Get the Latest Photo Tips, News & Reviews from Shutterbug!
| Camera Reviews Other Reviews | Mobile Reviews Photography Reviews Columns | News | Features | How-To | Resources |
 © 2025 Shutterbug
AVTech Media Americas Inc., USA
All rights reserved