- REVIEWS
Camera Reviews 
More Reviews Mobile Reviews Photography Reviews - GALLERIES
- VIDEOS
- BUYER'S GUIDES
The Digital Darkroom
A Gallery Of Filters; Something For Everyone In Photoshop CS
The new Photoshop CS has a greatly expanded Filter section. One of the new filter options is called Filter Gallery. The Filter Gallery is so extensive it just boggles the mind! In order to give you a little introduction into this feature-rich area of Photoshop, I've put together this little exercise that will turn an outdoor scenic picture into a canvas oil painting. This exercise uses four of the six sections in the Filter Gallery. Start with a nice outdoor
scenic photo. I'm using a shot taken at St. Lucia by my daughter
during one of her recent trips there (#1). |
|||||||
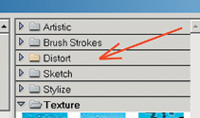
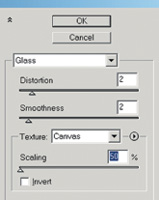
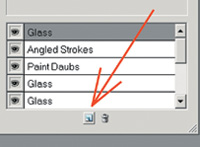
Next, go to Filter to Filter Gallery (#4). In the Filter Gallery, click on Distort (#5). And then click on the thumbnail image called Glass (#6). That will bring up a dialog box (#7) where I set Distortion at 2; Smoothness at 2; Texture at Canvas; and Scaling at 50 percent. There's lots of room here for making your own choices on all of these settings. Feel free to experiment. After that, we need to call
up a New Effect Layer by going to the bottom of the dialog box and clicking
on the New Effect Layer icon (#8). |
|||||||
We will now call up a third
New Effect Layer by going to the bottom of the dialog box and clicking
on the New Effect Layer icon. Finally, we are going to call
up the fourth and last New Effect Layer by once again going to the bottom
of the dialog box and clicking on the New Effect Layer icon (#8). |
|||||||
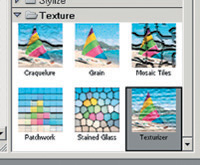
Next, click on Texture and
in the Texture window click on the Texturizer icon (#14). In the Texturizer
dialog box (#15) I have set Texture at Canvas; Scaling at 90 percent;
Relief at 5; and Light at Top Left. You can now go to the top of the window
and click on "OK" to apply all four of these effects (#15). |
|||||||
|
|
||||||
|
|
||||||
|
|
||||||
|
|
||||||
|
|
||||||
|
|
||||||
|
|
||||||
|
|
||||||
|
|||||||


![]()
Get the Latest Photo Tips, News & Reviews from Shutterbug!
| Camera Reviews Other Reviews | Mobile Reviews Photography Reviews Columns | News | Features | How-To | Resources |
 © 2025 Shutterbug
AVTech Media Americas Inc., USA
All rights reserved