Black And White In Digital
Learning About Gray Scale

This portrait is one of a series of photographs made while I was still working in Hollywood. The intention for the series was to recreate the black and white portrait style that was synonymous with the glamour era of Hollywood in the 1930s and '40s, but using contemporary electronic flash and medium format SLR cameras. However one set of portraits in the series was done closer in method, equipment, and materials to the original Hollywood glamour style used by some photographers when I assisted one of the old timers still practicing there in the '50s. This image of my long-time friend and a favorite model, Bonwitt St. Claire, was made on 8x10 Agfa Professional black and white film processed in Rodinal. The camera was a bit unusual for the purpose, a Toyo 8x10 field camera with a 350mm Fujinon lens. The lighting was authentic motion picture-type,
Mole-Richardson tungsten Fresnel spots and a huge soft light. The only prints made at the time were contacts as I did not then have personal access to an 8x10 enlarger. Not long ago I took the opportunity to scan this set of 8x10 negatives when I was testing a LinoColor Saphir flat-bed scanner with a built-in transparency light source in the scanner lid. Originally one of the portrait negatives of St. Claire was retouched by the old-fashioned lead (graphite) pencil method, so this was also an opportunity to see how traditional portrait retouching compares to what can be accomplished once an image is digitized and in Adobe Photoshop. When the computer retouching was done, and much easier than the pencil method by the way, the image was converted from gray scale to RGB color. A little shift off of neutral gray was made in Photoshop to add some color to the tone of the test print I then made with an Epson Stylus Photo 1200 printer on 11x17" paper. It was very satisfying to see this portrait finally reproduced in an enlarged print, and one that really showed off the advantages of photographing a beautiful subject on 8x10 film.

Photos © 1999, David B. Brooks, All Rights Reserved

To photographers black and white has an historic significance, for many an aesthetic advantage, and it is a unique way to photograph. Distinguished altogether from color by different films, papers, and processes. When photography is digitized, black and white becomes gray scale, a subset of color using essentially the same technologies and processes. In addition to the paradigm shift in mindset that digitization requires because a computer processes gray scale and color in essentially the same manner. A photographer has to think about photographs from a different perspective whether color or black and white when an image is translated from film to digital. Classically, a photographic image was inextricably bound to the physical medium with which it was created, a photograph was a physical object, an artifact on film or paper. The process of reproduction was also one of physical means and attributes, and by which manipulation only a limited degree of interpretive alteration could be achieved. Ansel Adams likened photographic printing to music by describing a photo negative as being similar to a musical score, and a print created from that negative like a performance of that composition.

When a photograph is created digitally, or an image on film or paper is scanned to create a digital file, that file is no longer bound by anything physical. The information can be edited, altered, transformed, and combined with other information freely, and without limitation. The fact that a digital photograph is no longer an artifact tied to its physical association with a piece of film or paper, but is now just computer information, has instigated political, artistic, and philosophical concerns and controversy. Aside from that, in the digital darkroom that is a desktop computer, I'll only deal with the practical ramifications to support an effective understanding of the advantages and disadvantages of working with a photograph digitally, keeping the image within the context of what would be recognized as a photograph.

Digitization: Scanning Black And White Photographs. Because there are many more images on film or paper than will be made by digital cameras for some time to come, and nearly all of those will be in color, I'll just deal with existing film or paper images here. And, because a print is a second generation image and one which is on a medium with a limited density range, I recommend that you always scan from film if available. Only scan from a print if that is all you have.

The choice of a scanner is as important to black and white as it is to color scanning, but choosing in consideration of black and white may make a difference as to which scanner is the best. The reason for this is that film scanners are designed to scan an image formed by relatively transparent color dyes, not the more opaque densities of silver-based black and white films. With some scanners the type and design of the optical light path may result in some highlight blocking, particularly when scanning denser fine-grained black and white negatives. The reason is that some scanners' light path is more like that of a condenser enlarger, while others have a light source and optical path more like a cold light or diffusion enlarger. And if you have darkroom experience with both types, I am sure you have realized condenser enlargers print with higher contrast. The association is that flat-bed scanners with a transparency adapter have a fluorescent tube light source, and 35mm film scanners using a similar light source, have less of a problem scanning black and white silver-based film. Fortunately these tend to be the more affordable scanners, while the high-end, especially professional drum scanners tend to utilize an optical light path that is more collimated and will possibly scan with a greater tendency toward blocked highlights from silver-based black and white negatives. This is however, compensated for with the highest performance models by the fact that these scanners also have a higher dynamic range. And, for what it is worth, related to this limitation of many scanners, chromogenic black and white film like Ilford XP, because it produces a dye image, scans exceptionally well with just about any scanner.

This scene of a bridge over a waterfall is on a popular sightseeing road in the Mount Rainier area not far from Seattle, Washington. The image was taken with a 6x4.5cm SLR on Verichrome Pan film, developed in Agfa Rodinal. The resulting negative was scanned with an Epson Expression 800 scanner resulting in an approximate 8x10 size image at 300dpi.

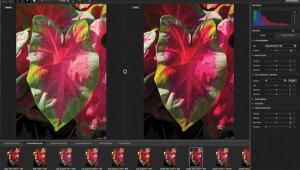
The other part of a scanner's capability that is too often given inadequate consideration is the software driver. To scan black and white successfully, good manual control which will support setting the range of the scan precisely in relationship to an accurate, readable histogram, is key. As important as an easily controllable tone curve tool. With the curve manipulation you can adjust the local areas of density in an image to assure you have good detail and tone separation, particularly in highlights and shadows. There is an alternative. If a scanner's software supports outputting image data at the scanner's input bit depth, either 12 or 14 bits for gray scale, then you can open this high-bit data file in Adobe Photoshop, Corel PhotoPaint, Lasersoft SilverFast Ai HDR, or Picture Window. The adjustment tools in these image editors may be used to equalize the range of the image and adjust the curve characteristics before converting to the computer's 8-bit gray scale format for printing or other output.
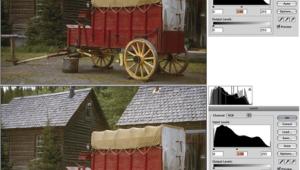
There are two other considerations which can apply to scanning black and white film. First of all, grain in a silver image can be more distinct than in a color image made up of dye "clouds." This is the case with some film brands and developer combinations, particularly with older, faster films like Kodak Tri-X, and the use of developers like Agfa Rodinal as compared to D-76. A problem arises when a black and white negative is scanned at a particular resolution that just happens to coincide with the film's grain pattern. This can cause an exaggerated pseudo grain effect. If available, the best solution is to scan at a substantially higher resolution. If not, then try a lower resolution and re-size the image up if necessary using bicubic interpolation. Finally, with less expensive, lower resolution scanners there may be some image quality advantage in scanning a black and white film image as if it is a color negative. This will often produce a strangely tinted image, so you'll need to desaturate the file so all three channels are identical. With higher resolution scanners I have not found any advantage in this technique, but scanning black and white at the highest possible resolution assures the best quality even if the image is going to require downsizing for printing or other output.

This 35mm studio shot almost had a short life exiled to the waste basket. The flash tube in my fill light failed without my noticing, causing the images to be underexposed, and the background to be unevenly lit. I kept it because I liked the line and gesture of the shot, and finally decided to scan it to see if I could save the image. Once digital and in Photoshop, I was able to even out the background after scanning, but sadly my repairs were all too obvious. In my wet darkroom days I'd have dug out one of my Mortensen texture screens to see if the pattern would hide the obvious. Instead I used some of Photoshop's filters: Notepaper, WaterColor, and Paint Daubs applied to three low resolution copies of the image, I then copied each one on top of each other with the two top layers with reduced transparency. After merging the three layers, I opened the Levels dialog and equalized the gamut spreading it out to fill the space described by the histogram. Then after a mild application of Unsharp Masking to accentuate the texture, I re-sized up and made a test print. I'm glad I kept the film now.

Converting Color To Black And White. Once a color image is digitized, it is deceptively easy to make it black and white, by just changing the Mode to gray scale, which is black and white in computer jargon. But, easy may not always produce the best possible result. A picture that is striking for its color may be dull in gray scale because there is too little distinction between gray tones in areas of local contrast. With the computer, you can do the same thing as a black and white photographer does using different color filters over the camera lens. A yellow or red filter will darken blues skies a little or a lot. You can do the same thing with a color image before converting to gray scale. Just use either the Levels or Curves dialog in Photoshop for instance, and to darken a sky click on the blue channel and darken it by moving the center slider in Levels, or pull down from the center of the curve straight line to make it a concave shape. 
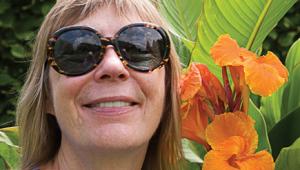
Or, lets say you took a picture of a teen-age boy in color and his zits are like bright red traffic signals--he hates the picture. This time go to the red channel and lighten it before converting the image to gray scale. The zits will blend into the tone of his skin in black and white.

Printing Black And White With A Color Ink Jet. It wasn't long ago that the first affordable color ink jets made printing photo-realistic images from a personal computer satisfying for photographers. I'm sure the ink jet printer industry has been so caught up in the success of these printers, the fact they have limitations printing straight gray scale, has been overlooked. But like many things in the computer world, there is what is called a work-around, a specially created method to support obtaining the full capability of color ink jets printing black and white photographs.

There is a problem because a gray scale image, printed as gray scale, using just the black ink of a color ink jet does not have the tone depth comparable to a color image made with the same printer. The reason is quite simple, gray scale doesn't apply as much ink to achieve print tones with the same depth as dark tones in a color image reproduced with several colors of ink plus black.

The option many digital darkroom photographers choose for scanning if supported by their scanner driver, is to output a high 12 or 14-bit raw file of everything the scanner's CCD senses, to a TIF file to archive. This can then be opened in 48-bit Mode with Photoshop and other image editors which support high-bit files. You can then make all of the adjustments to optimize the image for any particular use, and save the result as another standard 24-bit image file. The high-bit method also provides the advantage of doing your scan adjustments with the familiar tools of your image editor. Here the two primary tools to adjust a 48-bit gray scale file in Photoshop are the levels, and Curve dialogs. The histogram revealed the file image information was only using a part of the file space, so the gamut was tightened up by moving the left adjustment arrow in to where an indication of image data begins. With this shot of a pier and houseboat in fog it was necessary to open up the foreground by lightening the shadow values and then doing the converse to the light tones to obtain more detail in the houseboat in the distance.

So how do you get more ink, more depth in prints of black and white images? The logical and obvious solution would be to print the image as if it were color clicking on color rather than gray scale in the print driver dialog. If you've tried that you have likely experienced the fact the print isn't neutral black and shade of grays, but it will have an undesirable coloration, a putrid green tint or hideous lavender. So, what is the work-around?

One solution is to first convert your gray scale file to RGB color. Then there will be three channels, and each red, green, and blue will be identical. If you print this with color turned on in the printer driver, you'll very probably get some unpredictable color tint that is not at all pleasing. The reason is there is enough variation in the system and printer that achieving an exact neutral gray is almost impossible in printed output. The solution is to add just a little bit of coloration to the image file that would look pleasant and appear like a silver photographic print. My approach to this was based on the fact that most of my fine, silver-based prints were made on chloro-bromide warm-tone papers, and for archival purposes I also applied a very mild selenium toner. So using the Color Balance dialog in Photoshop I added just a few points of yellow to the highlights, even fewer of red to the mid tones, and just a little magenta to the shadows. I printed the file, and you know it looks like a lightly selenium toned print made on Agfa Portriga Rapid paper. The highlights are a bit warm, the mid tones a little rusty, and the dark tones have a bit of burgundy.

The two scanning tools which are crucial to black and white (gray scale) film scanning are the histogram to set the limits of the image gamut, and the Gradation Curve to balance the relationship and level of tones in the image. Here using Lasersoft SilverFast Ai for PhotoCD, with software functions exactly like a scanner driver, showing a preview of the raw YCC image data in the PhotoCD file, and providing the tools to adjust the "scan" of that data to input the desired adjustment of image values. Different models of scanners provide different appearing driver control interfaces with most including at least these two crucial manual controls necessary to acquire well adjusted black and white/gray scale scans. With this candid natural light portrait the image data took up only 80 percent or so of the histogram space, so the right arrow adjustment was moved left to equalize the gamut for output to a 24-bit image file. This adjustment darkened the values in the image, which were then adjusted with the sliders and curve graph to provide an appropriate level and balance of tones for the subject.

Of course you might like a different tonality applied to your ink jet black and white prints. How might this be achieved? I'd suggest making a "test strip" print. Open a black and white gray scale file of a subject in an image editor like Photoshop, an image that has a distribution of a full range of tones, and then convert it to RGB mode. Then using the rectangle selection tool select a narrow, one to two inch, band across the full width of the print. Use the Color balance dialog to shift the highlight, mid tone, and shadow colors just a little. You might for instance mix two percent red and two percent green which would produce a neutral brownish hue, then add a little yellow to the highlights and a little blue to the shadows, for one strip. You will notice subtle color changes on screen which will give you some indication of what the printed tone may look like. Take notes of what colors you've added to each strip. Close that selection and do another next to it trying a different combination of added color. And then another strip until the entire image is strips with different variations. Now print the entire test strip image selecting color in the printer driver. From the resulting test strip print let's hope you find a print tone which is pleasing. If you find all of these trials have too much color, then after adding colors with Color balance, open the Hue/Saturation dialog and reduce the overall saturation.

Third Party Black And White Inks For Epson Printers.
Independent suppliers have made monochrome (black) ink sets (cartridges and bulk refills) available for four and six color Epson model ink jet printers. These black and white inks essentially replace the normal color inks with dilute black ink and a cartridge that is normally black is 100 percent black density. This allows the printing of a gray scale image using the color output turned on in the printer driver resulting in a print image with the same full depth of tone in just black that you would obtain printing in color. In addition these inks are archival, and if used with archival grade fine arts papers will provide a very long image life compared to standard ink jet prints.

This option should only be considered by serious black and white digital darkroom enthusiasts and professionals, first because the ink cartridges are somewhat expensive, as are fine arts ink jet papers if archival durability is required. In addition, a user cannot readily switch back and forth between color and black and white. Because to use the all black ink cartridges, the printer must be purged of all color ink before prints can be made, and the same process would have to be undergone to switch back to color.

Full, detailed information on these inks and their use, prices and the availability of black monochrome "Quadtone" inks for various model Epson printers is available from MIS Supply by going to their web site at: www.missupply.com.

X