- REVIEWS
Camera Reviews 
More Reviews Mobile Reviews Photography Reviews - GALLERIES
- VIDEOS
- BUYER'S GUIDES
Unique Looks for Your Photos: Build Custom Creative Effect Plug-in Filters With Topaz Studio 2
Topaz Studio 2 provides the most creative fun you can have editing digital images for under $100, hands down. Experiment, build, adjust, edit and create your own personalized “Looks” for your photos, and save them for future use. Each Look functions as a customized filter for Photoshop within the Studio 2 plug-in. Topaz Studio 2 offers so many possibilities, you’ll never run out of creative options. And it’s soooo EASY. Here are the step-by-step instructions.
It’s been a very long time since I’ve been this excited about a software application. Topaz Studio 2 provides dozens and dozens (I lost count) of Preset Looks that can be adjusted, combined and repeated. Plus you can create and save your own Looks, which is what we’re doing today. Topaz calls the various preset filter effects “Looks” so that’s the language we’re using.
In addition to applying Preset Looks, you can perform traditional and advanced image editing operations (Sharpen, HSL Color Tuning, Curves, etc.) and/or apply any of several creative Filters. Combine Filters and Looks? You bet. Over and over again.
All edits are nondestructive (Studio 2 even warns if you lazily forgot to create a duplicate layer to manipulate) and you do not have to create a catalog or redundant copy of your image files.
Before we get started, download Studio 2 from Topaz Labs website. You can try it free, or buy it for $99. The software functions as a plug-in for Adobe products and can also be used as a standalone application.

1. Select an Image
Open an image using your favorite image browser. I use Adobe Bridge.
In the beginning, when you’re itching to try all of the new options, start with a fairly low resolution image. Processing speed correlates directly to file size; with small files you can zip through more choices quickly.
2. Apply Basic and Advanced Edits
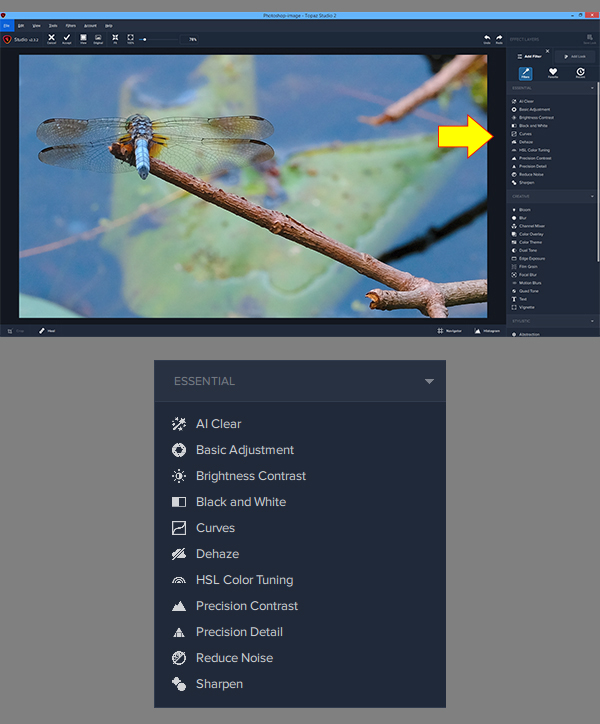
After creating a new Layer, edit the image in Photoshop (or Lightroom) if desired and then select Topaz Studio 2 from the Filters drop-down menu. In the Studio2 interface, click the Add Filter box (top right) and scroll down to Essential. Select and perform your choice of editing operations, or skip altogether.
Click anywhere on the image to toggle back to see the Original. Check your progress often.
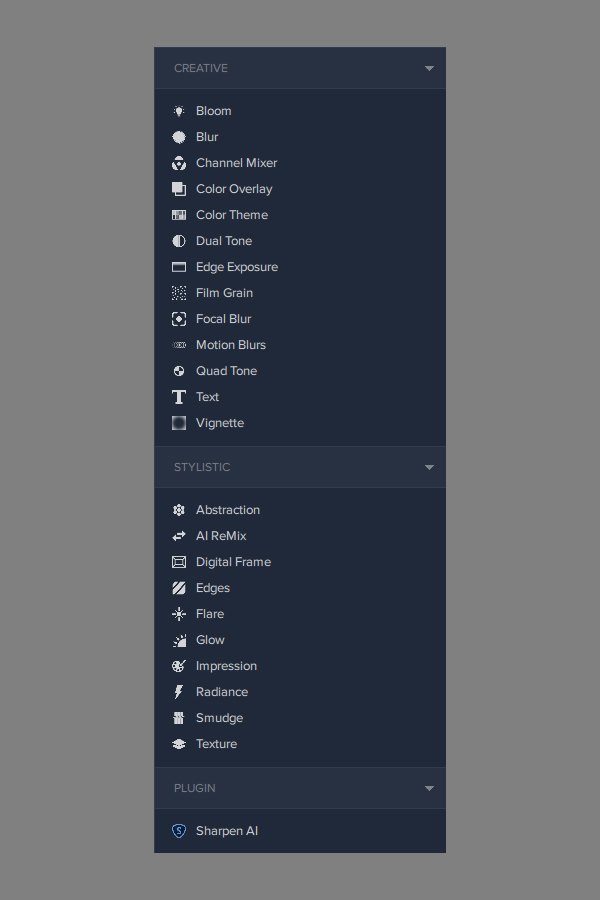
Once basic edits have been made, scroll down to the Creative and Stylistic headings and experiment with different combinations. There are many, many choices and options here, so take your time and experiment.
You can return to the Filter menu later, to add or undo options, even after you have applied a Look to your image.
If you own other Topaz Labs applications, they appear in the same column at the bottom, and can be used anytime throughout this process. In my case you see Topaz Sharpen AI which we reviewed recently (link here). Other über-useful applications from Topaz Labs include Gigapixel AI, DeNoise AI (also available as a bundle) and Video Enhance AI.

3. Check Your Work
If you really like what you’ve achieved using only the Filters, you can stop now. You can save the edits you’ve made as a Preset Look by clicking the Save Look button at the very top right.
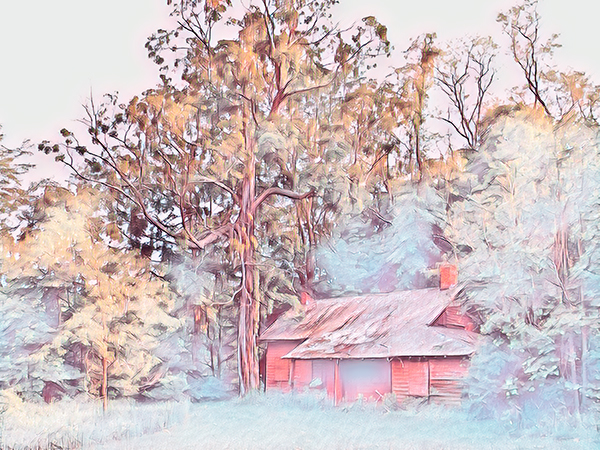
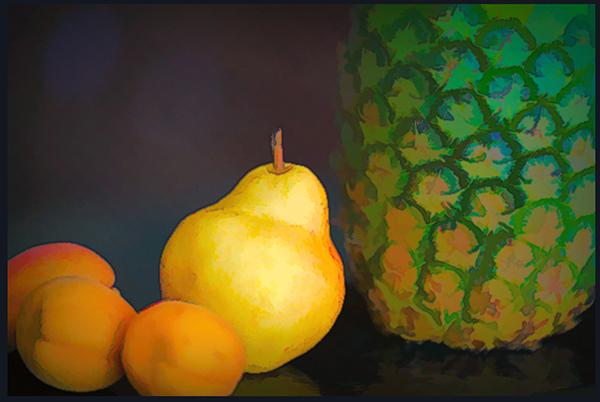
I especially like the AI Remix filter (shown above), a filter that is extraordinarily similar in function to a feature in Corel Painter Essentials. There are multiple preset options, enough to keep you busy for hours—seriously. The preset used on this barn shot is called Well Worn Path.
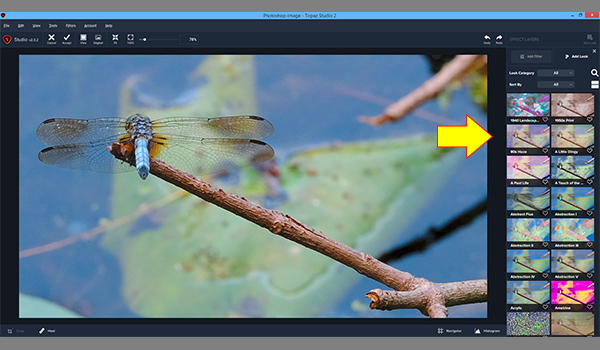
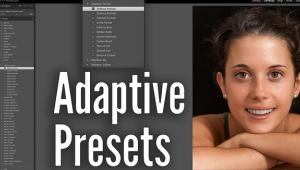
4. Open Looks
Click the Looks button and scroll through what seems like an endless stream of presets.
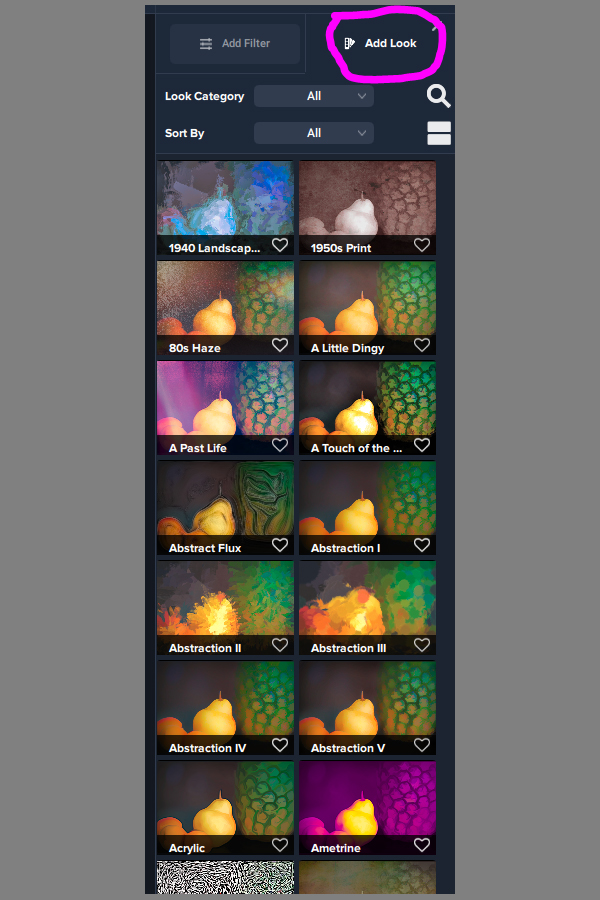
You can view them double-column if you want to move through them faster. And you can Search for a Look you like by name.
5. Select a Preset Look
Choose a Look from the long list of thumbnails and preview its effects automatically. Again, click the edited image anywhere to toggle back to see the original unedited version. Use the Opacity slider within the Preset Look box to adjust. When you find a combination you like, click Apply.

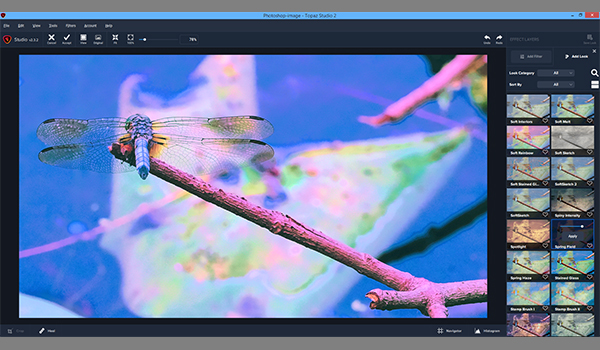
6. Choose Next Preset Look
You can quit now, or you can find and apply additional Looks until you achieve your heart’s desire. You can also return to the Filter menu to tweak the images at any time.

7. Final Result
If you want to use this combination again in the future, i.e., if you want to reuse them as a Preset Look, click the Save Look button before returning to Photoshop.
If you do not plan to use the same combinations as a new Preset Look again in the future, click the Accept button (top left) to return to Photoshop with your edits in place. If you dislike your creation, click Cancel instead.
Remember, if you want to reuse these settings as a Preset Look, you must click Save Look before exiting the plug-in. After saving, click Accept to return to Photoshop with your edits applied.
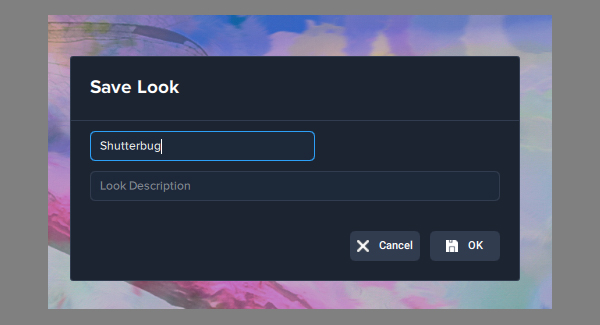
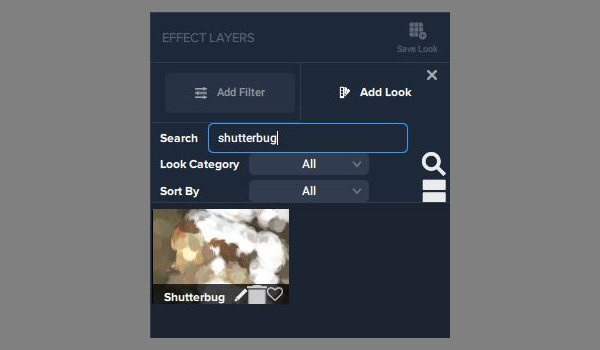
8. Name and Save
To save your newly created Look, click the Save Look button. A dialog box opens and you enter a unique name. We called this impromptu creation “Shutterbug.”
Congratulations. You’ve created a reusable Topaz Studio 2 Preset Look.
9. Apply the Same Look to a Different Image
Repeat steps 1-4 above. When the Looks column appears, open the Search tool and type in the name of the Look you just saved.
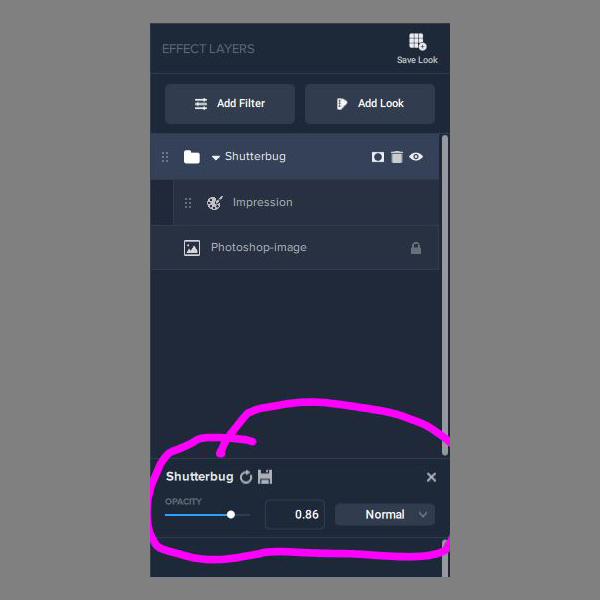
10. Adjust, Apply and Accept
You may want to lower the opacity of the newly-created Look, particularly when editing images of differing resolutions. So adjust the Opacity slider in the Look box before clicking Apply.

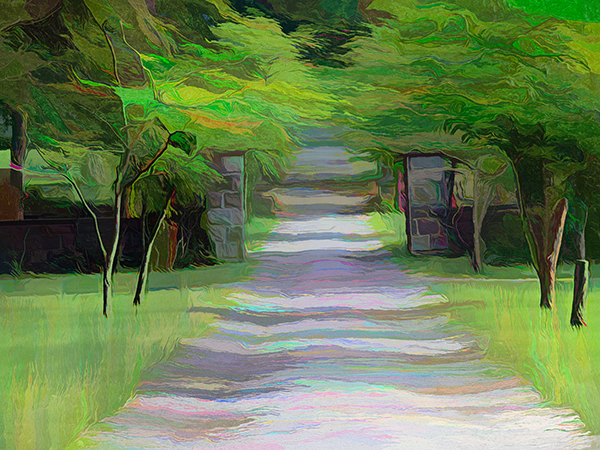
This is what an old image of a lighthouse in Canada looks like using the new Shutterbug filter we just created. You can add further refinements to your image by applying more Filters or more Looks, if you like. If you’re happy with the results, click Accept to return to Photoshop. Alternatively, you can save the newest combination as an entirely new Preset Look, or replace the original version by saving it with the same name.
Gallery below. All images ©Jon Sienkiewicz
—Jon Sienkiewicz


![]()
Get the Latest Photo Tips, News & Reviews from Shutterbug!
| Camera Reviews Other Reviews | Mobile Reviews Photography Reviews Columns | News | Features | How-To | Resources |
 © 2025 Shutterbug
AVTech Media Americas Inc., USA
All rights reserved