- REVIEWS
Camera Reviews 
More Reviews Mobile Reviews Photography Reviews - GALLERIES
- VIDEOS
- BUYER'S GUIDES
Photoshop Basics: A Simple Way to Blur Backgrounds So a Key Subject Stands Out (VIDEO)

When shooting portraits, nature, or other types of outdoor images, one of the best ways to accentuate a key foreground subject is to create shallow depth of field with an out-of-focus background. You can often do that in the camera by selecting the proper focal length and aperture setting, and positioning your subject close to the camera.
Other times, depending on the situation, you’ll need a little help from Photoshop to blur the background. In the quick tutorial video below, you’ll see how easy it is to accomplish this effect and achieve awesome results.

The Photoshop Training Channel has been providing photographers with concise image-editing tutorials since 2012. In this straightforward episode instructor Jesus Ramirez demonstrates how to use a variety of Photoshop tools to quickly and effectively blur the background of any photo.
Ramirez explains everything you need to know about Selections, Layer Masks, Content-Aware Fill, and Photoshop’s Depth Blur Neural Filter. Once you become familiar with these powerful tools, you’ll be able to use them for all sorts of editing tasks.
This technique begins with Ramirez duplicating the original layer twice and removing the background from the top layer. He then selects the foreground and expands the selection. The next step is using Content-Aware Fill to completely remove the foregound.
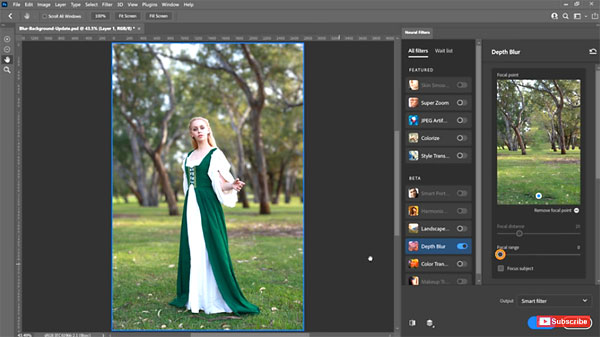
Ramirez then converts the background layer into a Smart Object and applies the Depth Blur Neural filter, does a bit of fine-tuning, removes a few imperfections, edits the layer mask, and the job is complete!
You can find more helpful editing advice on Ramirez’ YouTube Channel, so be sure and pay a visit. And check out the tutorial we posted from another expert, explaining how to save time by bulk-editing photos in Lightroom.
- Log in or register to post comments


![]()
Get the Latest Photo Tips, News & Reviews from Shutterbug!
| Camera Reviews Other Reviews | Mobile Reviews Photography Reviews Columns | News | Features | How-To | Resources |
 © 2024 Shutterbug
AVTech Media Americas Inc., USA
All rights reserved