The Best 1-Minute Photo Fix You'll Learn Today (VIDEO)

There are plenty of post-processing "tricks" out there, but many of them fail to perform as quickly and effectively as promised. This one, however, really delivers the goods, it takes barely a minute to explain, and it's easy enough for Lightroom users of all skill levels to employ.
Today's instructor David is an outdoor photographer based in the beautiful Pacific Northwest whose videos showcase breathtaking landscape imagery and the techniques he uses to get the job done. This episode describes what he calls a "J" Key shortcut for instantly revealing image clipping, and the simple adjustments for making an appropriate fix.
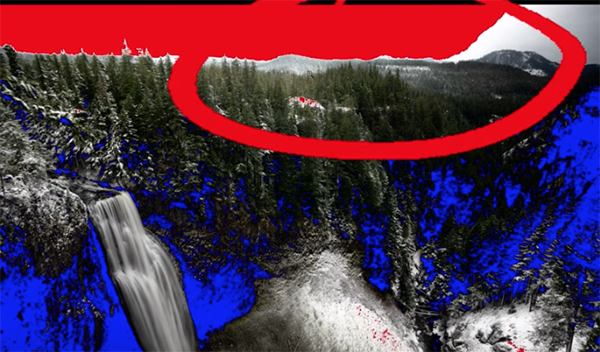
Here's the deal in a nutshell: "This simple trick helps you identify overexposed or underexposed areas within the frame so that you can adjust your highlights and shadows for a perfectly balanced exposure." Clicking "J" on the keyboard activates Clipping Visualization which uses the color red to indicate blown-out highlights and blue to identify crushed shadows where details are lost.
One you're armed with this information it's a simple matter to balance out these tones by following David's advice. The process is so simple that there's no need for us to summarize it here, so just spend 62 seconds watching how it's done. Then be sure to add this insanely easy trick to your everyday Lightroom workflow.
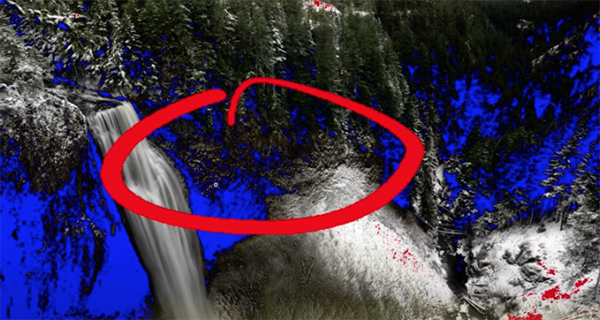
There's a lot more where this comes from, so be sure to visit David's YouTube channel and subscribe.
And don't miss the earlier tutorial we featured with another accomplished landscape shooter who demonstrates the camera settings he recommends so that you don't consistently sabotage the photographs you capture in the great outdoors.


