- REVIEWS
Camera Reviews 
More Reviews Mobile Reviews Photography Reviews - GALLERIES
- VIDEOS
- BUYER'S GUIDES
Lightroom Basics: Fix Ugly Chromatic Aberration in Just 1 Minute (VIDEO)

Even if the nomenclature is unfamiliar, you’ve no doubt experienced ugly color fringing that sometimes appears around the edges of objects in a photograph. Known as “chromatic aberration,” this effect typically occurs in high contrast images because premium lenses can’t always focus wavelengths of all colors at a single focal point.
Of course terminology is less important than knowing how to get rid of this unsightly distortion that can ruin an otherwise great shot. And that’s exactly what you’ll learn how to do in just one minute by watching the video below.
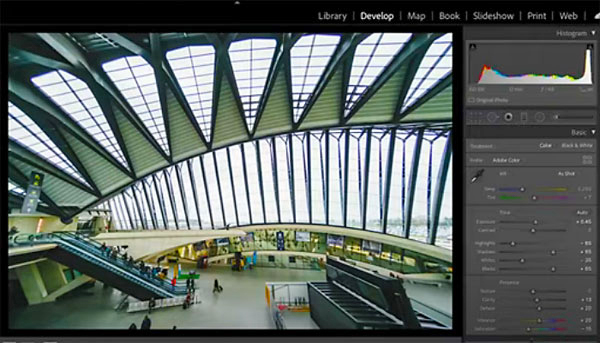
In this episode from the Adobe Photoshop Lightroom YouTube channel, Lightroom Ambassador Tobi Shinobi demonstrates how easy it is to correct color fringing in high contrast images and achieve a clean result.
Sometimes making the fix is as simple as going to Lightroom’s Lens Correction panel and checking the Remove Chromatic Aberration box. Once you do that, it’s as easy as moving the Fringe Control sliders until you like what you see.

For more complex color distortion you may have to take a different approach, but as you’ll see, this method is still extremely quick and simple to accomplish. So spend a Lightroom minute, and you’ll never have to worry about chromatic aberration again.
You can find other helpful editing tips on the Adobe Photoshop Lightroom YouTube channel. We also encourage you to check out another Lightroom tutorial we posted, with five simple tips for getting the best out of your photos.
- Log in or register to post comments


![]()
Get the Latest Photo Tips, News & Reviews from Shutterbug!
| Camera Reviews Other Reviews | Mobile Reviews Photography Reviews Columns | News | Features | How-To | Resources |
 © 2025 Shutterbug
AVTech Media Americas Inc., USA
All rights reserved