Automatically Colorize Black & White Images with Adobe Photoshop Elements 2020

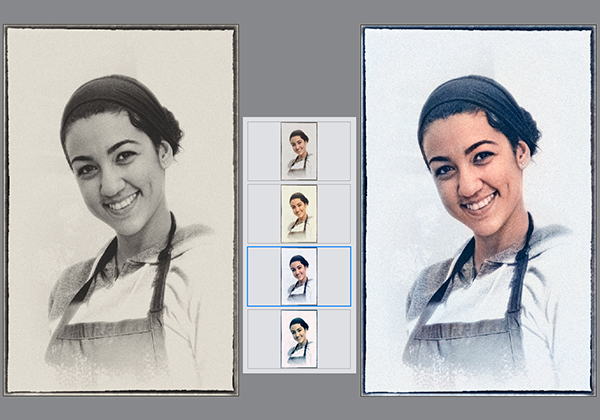
Guaranteed, you will be amazed how quickly and easily you can colorize old black and white snapshots, add life to classic public domain images, convert color infrared images into amazing works of art and more – automatically – with Photoshop Elements 2020. Here are step-by-step directions plus several examples to get you started immediately.

Adobe just released Photoshop Elements 2020. You can read our review here. It’s the most powerful derivative of Photoshop ever made, and it’s chock-full of sensational features and special effects that can be fully applied by beginners, advanced amateurs and seasoned pros alike.

PSE2020 delivers high levels of automation powered by Adobe Sensei, the company’s remarkably sapient AI engine, and provides three access levels based on user skill level, so it’s easy to get great results right away. Of course, you can do everything manually too, if that suits you better.
Adobe Photoshop Elements 2020 is available for $99 (or $149 bundled with Adobe Premier Elements, its video-editing cousin). And you can download a fully-functional 30-day trial version from Adobe.

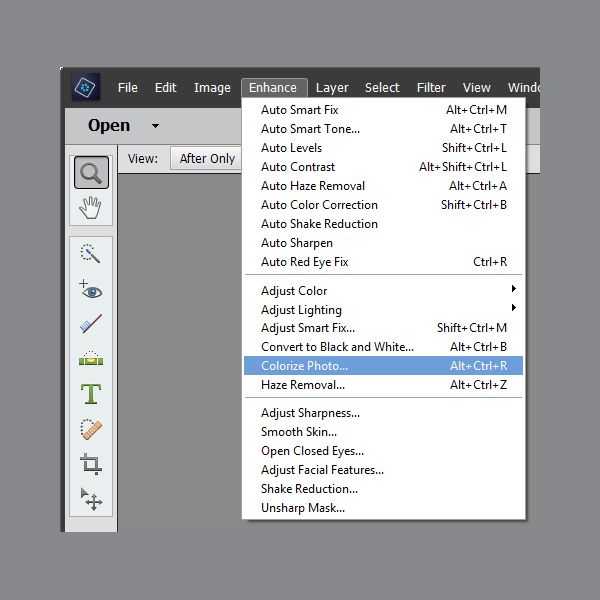
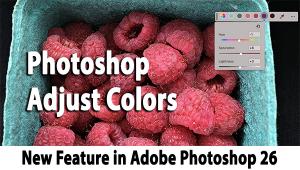
In this writer’s mind, the most exciting feature of PSE2020 is the Colorize Photo effect which is found under the Enhance tab.

Colorize monochrome images automatically or manually—or a combination of both. In this example we begin with an image that started life in standard RGB color. It was toned sepia and then set aside and forgotten about for months, until given new life in PSE2020. ©Jon Sienkiewicz


Using any of the three access levels of Photoshop Elements 2020, select Colorize Photo under the Enhance tab as shown here. Note that there are also nine automatic adjustments that can be selected from this drop-down menu. The three access levels of PSE2020 are Quick, Guided and Expert and they equate (roughly) to Beginner, Intermediate and Experienced.


Execute the Colorize Photo command and four options appear on the right for you to choose from. Select the option you prefer and the effect is automatically applied to the image. Don’t see anything that’s just exactly right? No problem: you can colorize manually or start with an auto conversion and tweak it later in manual.


Here’s a closer look at the four options that appear on the right side of the GUI.


The eyes have it. Can you see the detail and accuracy of the colorized eyes? Amazing. ©Jon Sienkiewicz


Here’s a Before and After look at an old image. Transformation was done with one click. I composited the four options down the center for easy reference. ©Jon Sienkiewicz


Manual colorization can be performed with precision. The top panel contains the original monochrome. The colorization process converted all of the flowers to yellow, so I reopened the image in Manual mode, selected the top two flowers, and colored them with a hue selected from the palate shown at the right. The trick is to colorize in Auto and then reopen the image in Manual and adjust till your heart’s content. ©Jon Sienkiewicz


The Bronx Braves, around 1948. Black and white 4x5 negative scanned using a FilmToaster (link below) and colorized automatically in Photoshop Elements 2020. Tell me this doesn’t add new life to this 70-year-old image. ©Jon Sienkiewicz


Top panel is a color infrared image shot with a Fujifilm X-Pro1camera that was converted to Super Color IR by LifePixel. (A full review of this IR-only camera conversion process is in the works – stay tuned.) Bottom panel is the same image that has been automatically colorized in PSE2020. Usually, color IR images are manipulated in Channel Mixer to achieve the desired color rendition. Experienced IR shooters probably don’t believe that the bottom image was automatically corrected—I don’t blame you, it’s just short of miraculous. So—try it yourself. Download the Trial Version of PSE2020 (it’s fully functional and doesn’t cost you a dime to try) and prove or disprove it to your satisfaction. ©Jon Sienkiewicz


The color IR image in the top panel was painstakingly Channel Swapped, color balanced and tweaked in Photoshop Creative Cloud. I got it just the way I want it. And then I colorized it in PSE2020 just for the hell of it. Results are awesome! ©Jon Sienkiewicz


Exactly the same deal as above. This is a color IR image that was fully processed in Photoshop and then quickly colorized in PSE2020.Note that this was processed automatically in Elements; I did no tweaking whatsoever. ©Jon Sienkiewicz


The master himself, Mr. Samuel Langhorne Clemens. Downloaded this image from the Library of Congress database of free-to-use public domain images (URL at the end of this article) and colorized it in PSE2020. What’s your favorite Mark Twain quote? Mine is: “A man’s character may be learned from the adjectives which he habitually uses in conversation.” Damn straight.


Jennifer Lopez and Shakira rehearsing for the Super Bowl 2020 Halftime Show with their understudies at a secret location in France. Image source same as previous (Library of Congress). No tweaking, but I do wish the sky were a bit more saturated.

Public Domain Image Access
The Library of Congress curates an extensive collection of public domain images. They’re located under the headline Free to Use and Reuse Sets and are supported by our tax dollars. These sets are just a small sample of the Library's digital collections that are free to use and reuse. This is an excellent source of images for us photography enthusiasts and a valuable resource for teachers, content creators and bloggers.

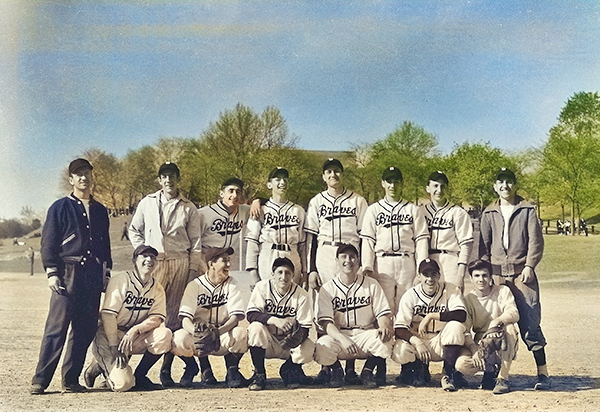
Link to our review of the FilmToaster used to scan the 4x5 negative of the Bronx Braves in one of the examples above.

Link to trial version of Photoshop Elements 2020. Try for free for 30 days.

Adobe Photoshop Elements 2020 is a bargain at $99 (Win and Mac). For you video shooters, it’s available for $149 bundled with Adobe Premier Elements 2020.

—Jon Sienkiewicz

X