Auto FX Software Photo/Graphic Edges 7.0, Platinum Edition: Use It For That “Finishing Touch”
Photo/Graphic Edges (PGE) from Auto FX Software has been with us for many years and the company recently released their latest version, 7.0, Platinum Edition ($249, stand-alone and plug-in; $129, upgrade for owners of Version 5 or 6). The interface is identical to that used by all Auto FX Photoshop plug-ins. If you already use another Auto FX plug-in, such as Mystical Lighting or Mystical Focus, learning to use PGE should be easy. Even if you’re not familiar with Auto FX products, you’ll likely find the interface to be very straightforward and uncluttered, with plenty of room to work on your images.
File, Edit, and View menus are located on the left side of the screen, along with a large set of tools that are unique to each effect. A set of buttons near the top of the screen is used to open and save presets, compare your current image to your original, and (in the Photoshop plug-in version) to save your changes to Photoshop. The floating Layer Palette (seen in the upper right corner of #1) is used to control effect layers (each effect occupies a layer, enabling multiple effects to be applied to the same image).

All Photos © Anthony L. Celeste
The effects in PGE 7.0 are divided into four categories: Edges, Effects, Frames, and Adornments. Edges are used to create unique patterns with alpha transparency blends around the edges of photos. Effects are variations on Edges, with paintbrush-styled tools for fine-tuning, such as adding and removing transparency. Frames are exactly what you’d expect: digital photo frames that range in variety from abstract to realistic. Adornments are used to add various preset items to photos, such as a flower in the corner of an image.
I feel that the Effects and Adornments categories will likely appeal to graphic designers, while the Edges and Frames categories will appeal to photographers. The variety of Edges and Frames is truly impressive. There are a total of eight Edges (Darkroom, Grunge, Painted, Montage, Geometric, Digital, Abstract, and Vignette), and there are 12 Frames (Film, Grunge, Natural Media, Storyboards, Thin Borders, Artistic, Classic, Dual, Quad, Scrapbook, Traditional, and Watercolor). Each filter style contains literally dozens of variations, along with a unique set of controls for creating the exact look and feel for your photo.
“Darkroom” Edges
The Darkroom Edges filter provides a massive selection of over 350 edges. Basic controls are provided for selecting, moving, rotating, stretching, and skewing both the original photo and the edge effect. For the most part, these are the only tools you’ll need on a typical photo. However, if you’re into hard-core fine-tuning, a wealth of additional options are available, such as Edge Border Color, Edge Softness, Feathering, Opacity, and Lighting and Shadow controls.
I thought some of the more interesting Darkroom Edges included the various film edges, #2.

As with most of the Edge effects, the filter applied to the photo in #2 required adding transparency, #3. PGE does this without any difficulty. However, if your photo is a background in Photoshop, the transparency in PGE does not automatically transfer back to Photoshop when you click OK. When PGE closes, and your photo opens in Photoshop, the transparent areas will be filled with the last background color you were using in PGE.

Fortunately, there’s a simple workaround for this issue: before opening the photo in PGE, convert the background image in Photoshop to a layer (click Layer>New>Layer from Background>OK). This is a very simple process that literally takes just a couple of seconds, but Auto FX really should have programmed it as automatic behavior. In any case, I was still quite pleased with PGE’s ability to accurately apply transparency, and create an impressive Darkroom Edge.
“Film” Frames
The Film Frames filter provides 127 different film-based frames for your photos; #4 displays four samples.
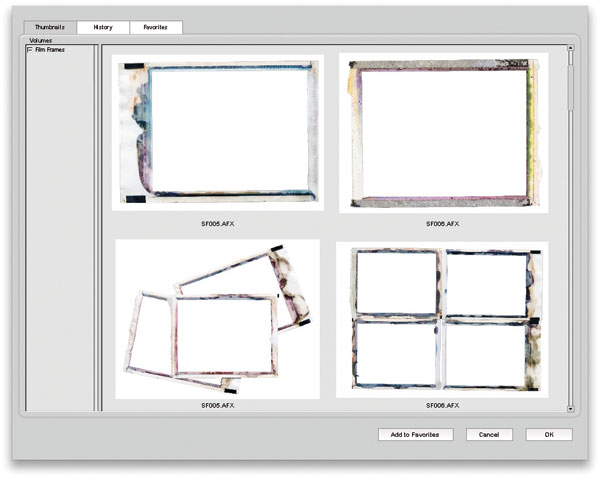
Many of the Film Frames portray old-school Polaroid film edges. To demonstrate, I found an old picture of my father and I, and framed it with a PGE photo frame, #5.

“Classic” Frames
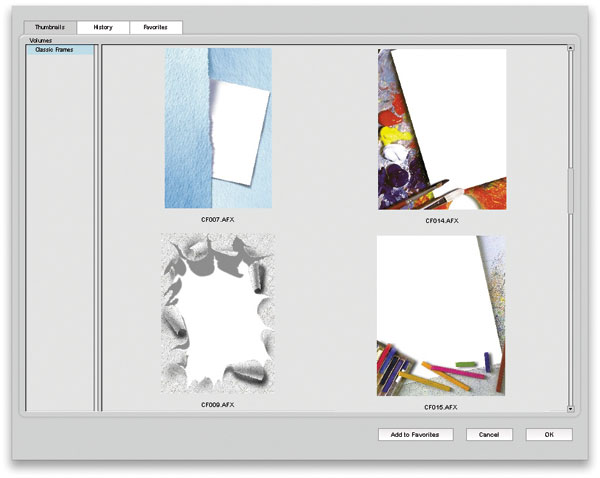
I’m not quite sure why the Classic Frames are called Classic, they’re more of a mix of 3D and artistic frames, #6. Still, the Classic Frames provide a unique and versatile collection. I felt that the various artistic-style frames would be particularly useful for children’s photos. The assortment of artistic styles includes colored pencils, chalks, and paints.
“Storyboard” Frames
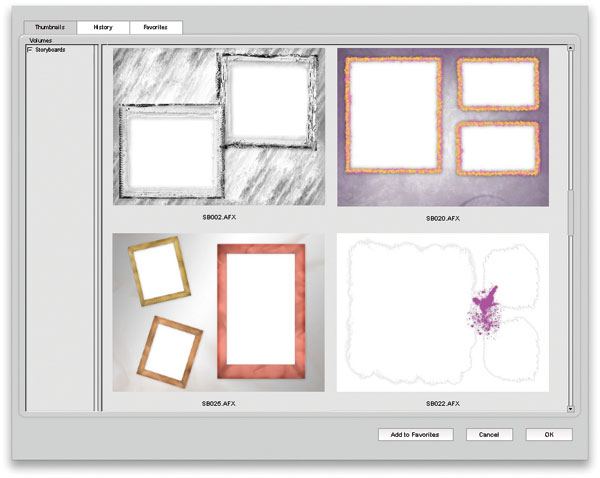
The Storyboard Frames fall into two broad-style categories of effects. Some of the frames display the same photo at different resolutions, and others display the same photo with varying degrees of transparency. You can also use the Place Photo tool (located on the right side of the Storyboard’s Control Tab) to add different photos to each of the mini frames inside of the Storyboard Frame, #7.
In the example here, #8, I started out by using the varying transparency settings in one of the Storyboard Frames. In addition, I used the Place Photo tool to add four different versions of the original photo, each with hue variations. The hue variations were created in Photoshop. However, in addition to opacity and resolution changes, it would be nice to see the option to make hue changes to the individual mini frames in a future version of PGE. The final change I made to this image was to apply one of the many gradient backgrounds available from within PGE.

“Traditional” Frames
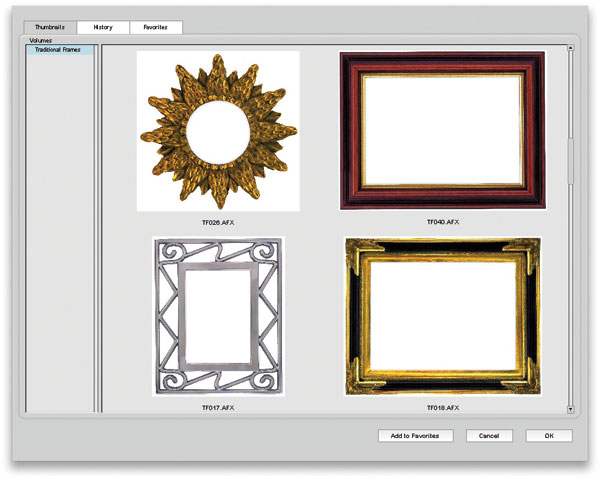
The Traditional Frames filter provides a set of frames with the look and feel of traditional wall frames. The styles vary from simple to ornate, #9.
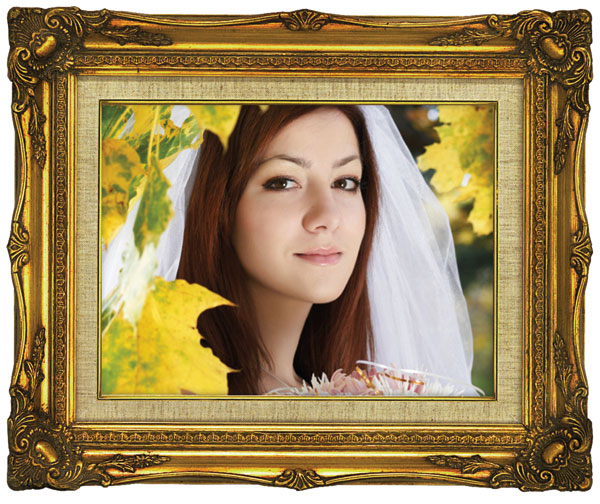
Some of the more complex frames just seem to be a natural fit for special occasion photos such as wedding photos. Note that even with the more elaborate frames, such as the frame used in #10, PGE still enables complete control over a variety of settings, including hue, saturation, luminance, opacity, and softness.
Conclusion
I did have some issues with the installation process. When I chose both the Photoshop CS3/CS4/CS5 and stand-alone options, the installer created separate 4GB folders for each installation. Given the vast amount of content in the program, I feel that the 4GB size is completely acceptable. However, creating two separate 4GB folders seems to me to be a waste of drive space, particularly since I was able to run the plug-in as a stand-alone application by simply finding the application icon in the Photoshop plug-ins folder and double-clicking the icon. Overall, the installation process doesn’t do anything truly disturbing, such as locking up the operating system, or causing problems with other programs. All things considered, the issues experienced were minor, and the results achieved with the program were quite impressive.
Photo/Graphic Edges 7.0 Platinum Edition provides a massive set of edges and frames. Further, the frames have an impressive degree of realism, and are packed with just about every fine-tuning option imaginable.
System Requirements
• Windows: XP/Vista/7
• Mac: OS X 10.4 and higher
For more information, contact Auto FX Software at: www.autofx.com.
