- REVIEWS
Camera Reviews 
More Reviews Mobile Reviews Photography Reviews - GALLERIES
- VIDEOS
- BUYER'S GUIDES
X-Ray Photography: An Unusual Type Of Close-Up Work
Gaining Access
The biggest challenge, of course, is getting permission to use someone’s x-ray machine. Doctors always have this kind of equipment, so that’s where I started. Initially, my intention was to shoot flowers, and I had read online that the type of x-ray machine required to image the soft tissues of plant material is rated between 10 and 40 kilovolts (KV). This is not terminology that relates to normal photography, but at least that gave me a starting point.
The x-ray machine my dentist uses has a minimum voltage setting of 60 KV, so I looked elsewhere. I tried my veterinarian, but the machine she uses is designed to x-rays bones, which are very dense, and this wouldn’t work for flowers. We tried it and the result was a solid black image with no detail. I then contacted a friend of mine who is a dermatologist, and it turns out that his wife is a radiologist. She works at a woman’s breast center, and their x-ray machines are designed to take mammograms of soft tissue. They were kind enough to allow me access to their equipment on a Saturday, and when we made the first few images the doctors got really excited about the artistic possibilities of what I was doing. It was a great experience for everyone.
I’m sharing this with you because you will have to do networking yourself to find a clinic or a doctor in private practice who will help you gain access to the right kind of x-ray machine. I didn’t operate the x-ray equipment myself. These images were made in Florida, and it’s against state law for anyone other than a doctor to operate the machine. Besides, this equipment is too expensive to mess around with and possibly damage. If you think camera equipment is expensive, you should go shopping for x-ray machines!
Safety
I’m sure everyone reading this magazine has had an x-ray, and you know that patients are always partially covered with lead-lined aprons or pads to prevent damage to vulnerable parts of the body. During my x-ray session all day Saturday, I made about one hundred exposures. The operator—one of the doctors—stayed behind leaded glass for protection, and I left the room for each exposure. The machine makes a tone a few seconds before the picture is taken so you know when to protect yourself. This is important because over time repetitive exposures can cause damage to the thyroid, skin, an unborn fetus, reproductive tissues, etc.. Simply leaving the room and placing a wall between you and the x-ray machine will protect you.
The Technique
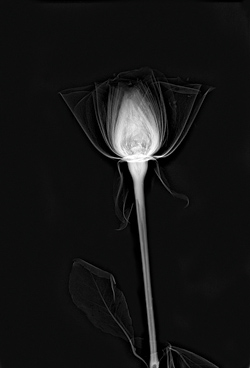
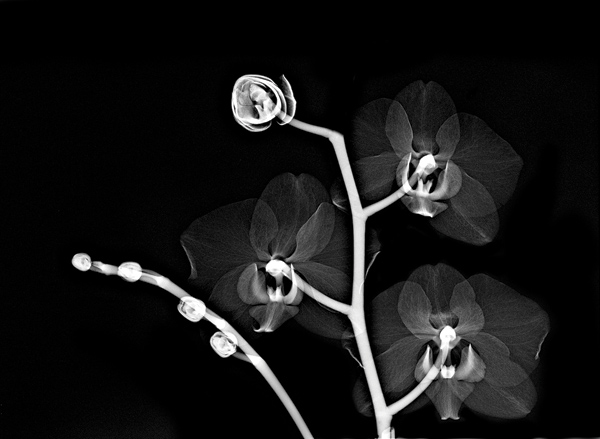
All of the flower images you see in this chapter were taken with an exposure of between 24 and 29 KV. Another factor that must be determined is the milliamps (MAS). Through trial and error, I decided that four milliamps was the best choice on this machine for the flowers, and except for the dense center of the flowers, the x-rays were able to penetrate the petals and show their beauty.
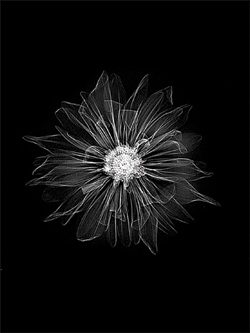
The black and white images were usually not as contrasty as I wanted, so later in post-processing I tweaked the contrast to make the images more dramatic, as you can see in (#1 and #2).
All Photos © Jim Zuckerman
In photo (#3) you can see flowers on the x-ray machine. This is the simple setup I worked with, and all I did was arrange the flowers or peal back some petals so they appeared more spread out. When working with the low voltage necessary for imaging flowers, the actual exposures are very brief—somewhere in the range of 1/8th second.
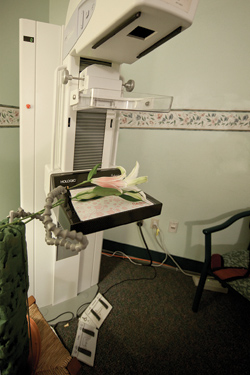
Depth of field isn’t relevant in this kind of image making, and it doesn’t matter if the room lights are on or off.
Subjects To X-Ray
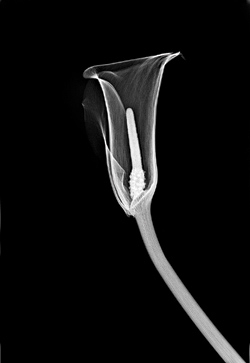
When I made arrangements to spend an entire day at the x-ray machine, I thought about what kinds of flowers as well as other objects that would look good as x-ray images. The rose and the orchids (#4 and #5) respectively, turned out quite well. I also tried various fruits, like kiwi, papaya and pineapple. I didn’t like any of those pictures at all.
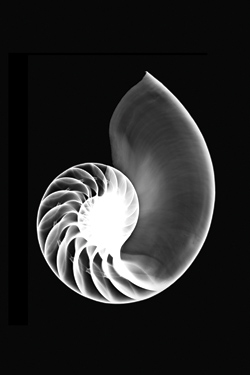
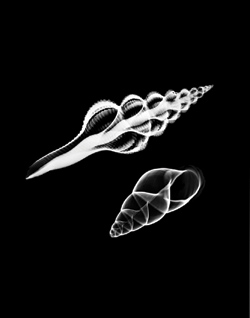
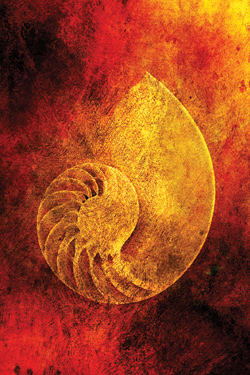
I had purchased quite a few seashells, and I really liked how they were imaged. The x-ray machine used in the woman’s clinic could only handle thin-shelled species, though. The thicker shells need to be imaged on another machine capable of a higher KV. The nautilus seashell (#6) is a classic example of design and form, and it looks good as a straight photograph and as an x-ray. I x-rayed two shells together (#7) and both of them are quite intriguing. On an x-ray machine, you don’t have the same kind of macro capability that you do with regular photographic lenses.
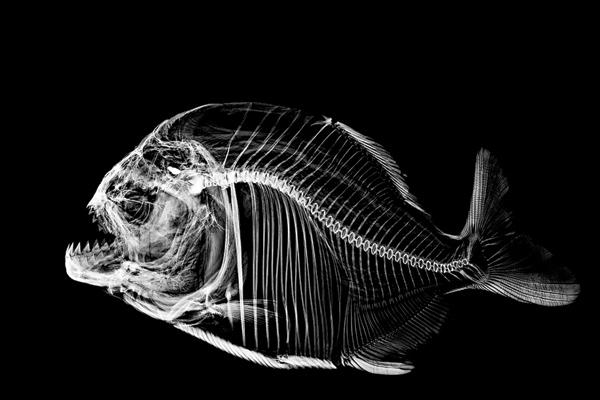
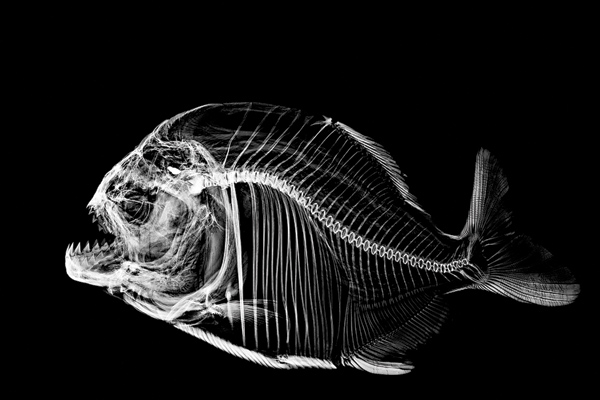
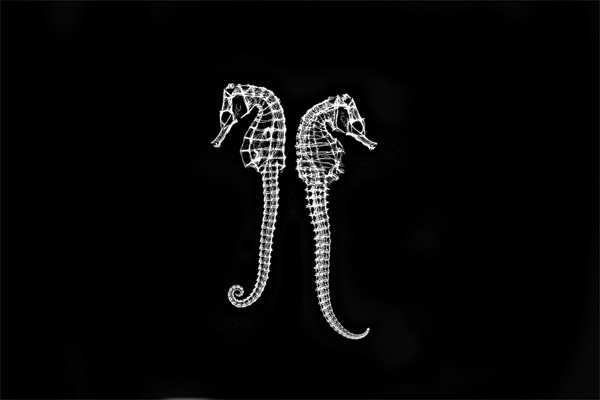
Various animals look amazing when they are x-rayed, and two images from this session were especially exciting to me. My favorite is the piranha (#8). I bought this from a vendor on Copacabana Beach in Rio de Janeiro, and I thought it might be interesting. It really knocked my socks off. The other image that I like a lot is an x-ray of two seahorses (#9) that I bought online when I purchased the seashells. The exquisite forms of these ephemeral creatures turned out to be striking in high contrast black and white.
When I x-rayed a starfish (#10) it was too large to fit on the platform that supported the object I was shooting. Therefore, I took two exposures of it and pieced it together in Photoshop (www.adobe.com).

Post-Processing
The type of images that come out of an x-ray machine are dicom files. They can be converted into tif and psd files only with Photoshop CS5 Extended. Once you convert the dicom images (I couldn’t double click on the files—I had to drag the files to the Photoshop icon and that opened them), you can leave them as grayscale images and they will look like typical x-rays. That is an end in itself. However, you can do some very artistic things with them using some of your Photoshop skills. I like combining black and white with color and texture, and this can be done using the Blend modes found in the Layers Palette. Using the same textures I bought from Flypaper Textures Productions (www.flypapertextures.blogspot.com) I was able to produce some very unique and beautiful images.
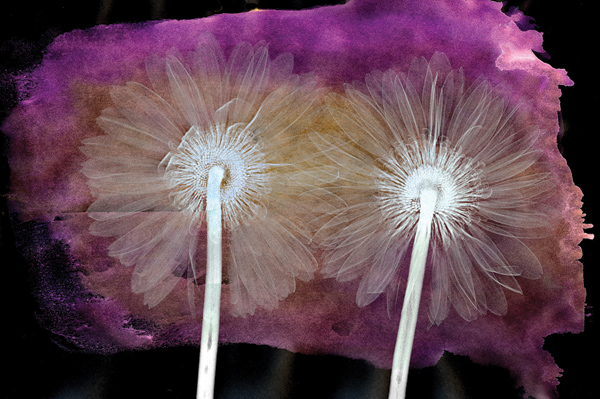
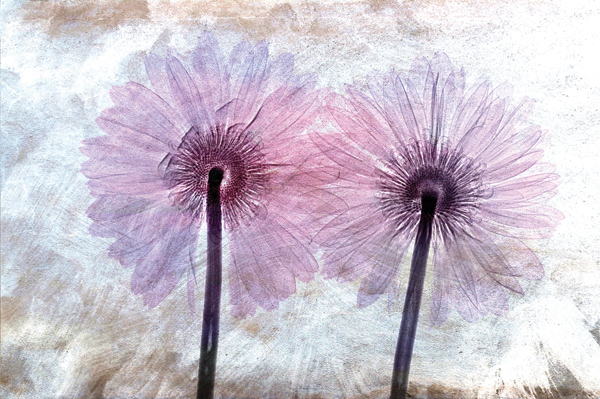
For example, I combined an x-ray of Gerber daisies with a texture from Flypaper’s Summer Painterly set, and I used the Overlay Blend mode to combine the images. The result is (#11). Using the Invert command in Photoshop (Image>Adjustments>Invert), I reversed the light and dark tones and then combined the same image of the daisies with another texture from the same set. This produced a very different type of image, (#12). The same flower x-rayed from the front was combined with yet another texture, and again this resulted in a completely different painterly photograph, (#13).

I x-rayed three roses together and, using the Hard Light Blend mode, (#14). How did I know this particular Blend mode and combination of images would produce something artistic? I didn’t. I had to experiment and use trial and error just like you have to do in order to come up with a winning combination.

There is nothing to prevent you from using more than one texture. The nautilus seashell x-ray turned into a work of art, (#15) by applying three different textures and choosing the Blend mode that appealed to me. After combining the first texture and choosing the Blend mode, I would then flatten the image (Layer>Flatten Image) before adding another texture.


![]()
Get the Latest Photo Tips, News & Reviews from Shutterbug!
| Camera Reviews Other Reviews | Mobile Reviews Photography Reviews Columns | News | Features | How-To | Resources |
 © 2025 Shutterbug
AVTech Media Americas Inc., USA
All rights reserved