- REVIEWS
Camera Reviews 
More Reviews Mobile Reviews Photography Reviews - GALLERIES
- VIDEOS
- BUYER'S GUIDES
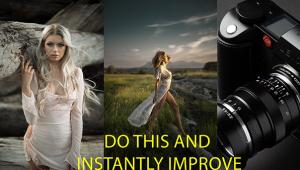
A Pro’s Portrait Processing Workflow: Keeping It Simple Gets The Work Done

When I’m looking at ways to do a specific task my brain often reverts to Occam’s razor. (Occam was a logician and Franciscan friar in the 14th century.) The way I interpret it, is that if there are many ways to do something the easiest and most direct method is usually correct. It’s the KIS principle and keeping it simple works best for me. Like most people, especially those of us who are self employed, there aren’t enough hours in the day, so I’m extremely concerned about workflow and just how much time each project is going to take. If I have a task, like organizing and editing my work, that I can do one way that takes an hour and another that takes 30 minutes, I’ll take the 30 minute option every time. With all that said, I’ll explain how I handle a portrait session, from the original shoot to ordering the final images. It may or may not fit your way of doing things, but just keep my buddy Occam in mind and remember there’s more to life than sitting in front of a computer.

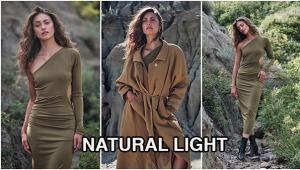
All Photos © Steve Bedell
The Session
First, you have to decide on the format you’re going to shoot with. Raw or JPEG? Both? I can tell you that I shoot about 80 percent of my sessions in JPEG and about 20 percent in Raw. I do this because if I am in complete control of all the variables, such as in the studio, I usually just look at the Raw file, don’t make any changes and save it as a JPEG to send to my lab. Even in many outdoor situations I’ll shoot JPEG. Why? As a portrait shooter, I have the time to hand meter every scene, check the white balance, etc. so the file is very accurate. The times I use Raw are usually when I get in low light and even a custom white balance looks way off. When that happens I shoot a gray card in the scene and correct the color later. I’ve often noted that a perfect file is made up of 3 elements: accurate exposure, correct white balance and a controlled brightness range. I usually have complete control over these elements and get it in the camera.
Downloading The Files
I’m a PC user. After shooting, I download the files as soon as possible. I keep things by year. Under Windows Explorer I go to Libraries>Pictures/2012 Pictures. Then I have subfolders for High School Seniors, Portraits, Personal Work, etc.
Let’s say I just did the Fox family portrait. Before downloading it, I’d make a Fox subfolder under Portraits. I never edit in camera, I’d be afraid to delete the files I wanted. Immediately after all the files are in the computer, I burn a CD/DVD of all the unedited files and put the disc in an order envelope. I immediately take the CF card, put it back in the camera and Format it. There’s nothing that strikes fear into my heart like picking up a card and finding images on it that I wonder if I’ve backed-up, making me afraid to format it. I format at once so I don’t have to worry about it.
Editing
Adobe Photoshop Lightroom (www.adobe.com) has changed the way I edit. I used to use 2 or 3 different programs to resize, rotate, dupe files, add copyright, etc. Now I only need Lightroom, and it has sped up my editing a great deal.
The first thing I do is make a subfolder under Fox called “FoxEdited”. Then I import the Fox files into Lightroom and pick the ones I want to show to my client. Then I export the edited files to the “FoxEdited” folder. Under my exporting options, I rename the files “Fox” and reduce the file sizes to about 2000 pixels on the long side. The files rotate automatically as long as I’ve chosen that in my camera menu. I use these files at the projection appointment where we project the files for our client and make the selections using a digital projector and Autoframe software from The Levin Company (www.levinframes.com). That’s another matter that I can go into in a future article.


Lightroom also gives me the ability to add preset looks, like a toned or black and white image, while still keeping the original file. There are many other goodies that can really save the day in Lightroom. I recently did a shoot on a white seamless background at f/8 and found a pesky little spot on my sensor. I was able to batch correct it in Lightroom, saving me a great deal of time as opposed to fixing each file individually.


Depending on the session and what I’m trying to achieve, I’ll use other software programs and plug-ins. I use Portrait Professional Studio 10 (http://studio.portraitprofessional.com) for a very fast retouched/enhanced look. I use the Effects section of onOne Software’s Perfect Photo Suite 6.1 (www.ononesoftware.com) because it allows me to mix and match different effects in layers until I get one that I like and then save it as a Preset so I can create my own “signature look” on an image with one click. And for the times I go into Photoshop my favorite plug-ins there are Imagenomic Portraiture (www.imagenomic.com) and LucisArt 3 (www.lucisart.com).
My workflow after the shoot is simplicity itself. I make a subfolder for the images that the client has ordered from, copy the ordered files into it and retouch the dupe files in Photoshop. All I do is retouch blemishes/eye lines and run a layer of Portraiture over the file. A single person probably takes me 3-4 minutes. I then open LabLink Plus from LustreColor (www.lustrecolor.com), my pro lab, and place the order. I do no color correction—that’s handled by my lab—and that’s it!
So, my advice to you is to carefully look at all aspects of your workflow, from the shoot through editing to enhancing, and evaluate each step to make sure it is productive. Photographers love to play with images and spend a great deal of time enhancing them, but if you’re a pro who makes a living with a camera, you need to know what makes you money and what is a time suck. For me, I find anything past basic editing is not a good use of my time. Pros earn money by taking photos, marketing and selling photos. That’s what I try to do.
- Log in or register to post comments


![]()
Get the Latest Photo Tips, News & Reviews from Shutterbug!
| Camera Reviews Other Reviews | Mobile Reviews Photography Reviews Columns | News | Features | How-To | Resources |
 © 2025 Shutterbug
AVTech Media Americas Inc., USA
All rights reserved