- REVIEWS
Camera Reviews 
More Reviews Mobile Reviews Photography Reviews - GALLERIES
- VIDEOS
- BUYER'S GUIDES
An Easy “Reverse Dodge & Burn” Trick to Recover Shadow & Highlight Detail in Photoshop (VIDEO)
Photoshop offers an almost endless array of creative tools for enhancing our images, and depending upon your skills you can make things as complicated or as simple as necessary. The technique explained in the video below falls into the latter category, and delivers amazing results.
Image-editing instructor Colin Smith likes to say, “Sometimes it’s the easiest things that make the most impact.” In this three-minute episode he backs up his claim by demonstrating a “reverse dodge and burn” method that anyone can handle to dramatically improve all types of images by recovering “lost” detail in both highlights and shadows.
This method involves simple painting and blending to achieve a perfect range of tones with maximum detail in a very realistic way. Smith walks you through the quick process from beginning to end, using an image that has overly dark shadows and highlights that are too bright.
Smith calls this “reverse dodge and burn” because the normal approach involves using brushes to lighten and darken areas of an image. His method, on the other had, is sort of the opposite because it’s all about detail recovery.
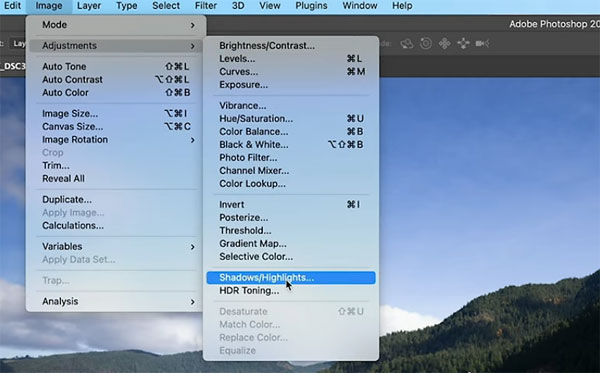
The first step is what Smith calls “creating a base,” and he takes a non-destructive approach by converting the layer to a Smart Object. Next he selects the Shadows/Highlights option from the Adjustments dropdown panel. Then, by clicking on Show More Options, you have everything you need to get started.
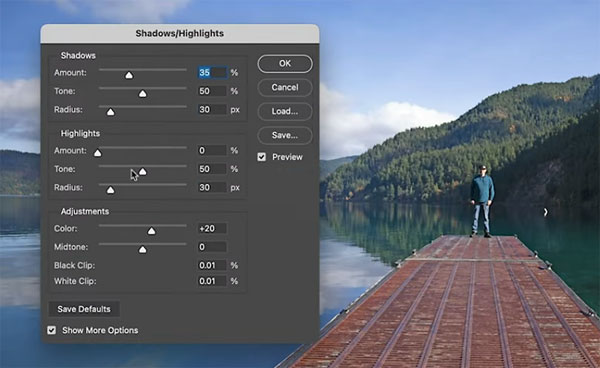
From here is a simple matter to drag the appropriate sliders to do a preliminary job of balancing the original image. You’ll notice a few options on the screen for adjusting both highlights and shadows, and Smith explains what they do and how to use them.
Once the overall tonality is where you want it, you’re ready for Smith’s simple painting and blending technique to refine and perfect the image. The goal is to recover all the detail possible, while maintaining a clean, realistic look. You’ll be surprised by how easy this is to achieve.
You can find more editing tips on Smith’s YouTube channel and in another tutorial we posted, explaining an easy way to convert color images to b&w in Lightroom.


![]()
Get the Latest Photo Tips, News & Reviews from Shutterbug!
| Camera Reviews Other Reviews | Mobile Reviews Photography Reviews Columns | News | Features | How-To | Resources |
 © 2025 Shutterbug
AVTech Media Americas Inc., USA
All rights reserved