- REVIEWS
Camera Reviews 
More Reviews Mobile Reviews Photography Reviews - GALLERIES
- VIDEOS
- BUYER'S GUIDES
Photoshop Basics: Using the INSANE Power of Raw Files for Outdoor Photos (VIDEO)
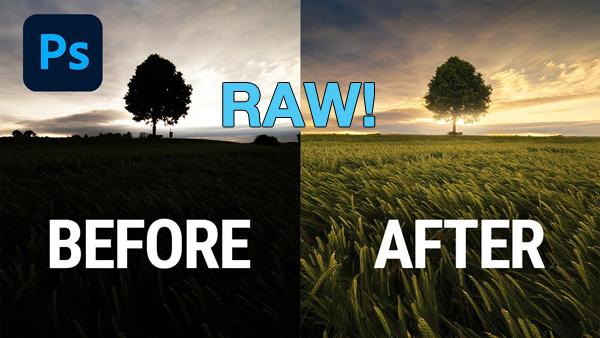
If you’re shooting JPEG photos because you think Raw files “aren’t worth the “hassle,” the video below is likely to change your mind. One of our favorite image-editing instructors transforms a severely underexposed landscape photo into a beautiful image using the power of Raw.
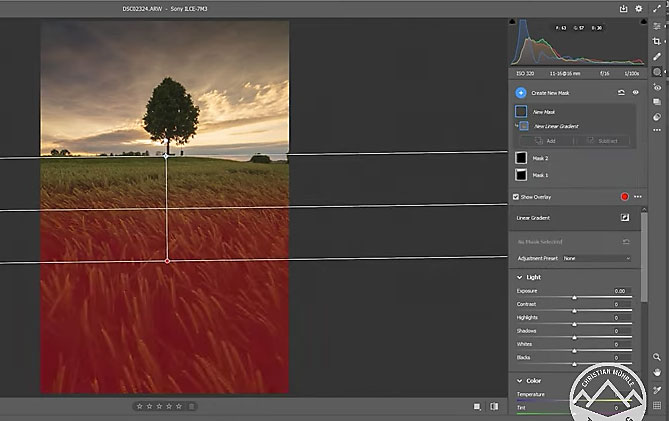
German landscape photographer Christian Mohrle says, “Raw photos from modern cameras come with a huge dynamic range.” This advantage makes it easy for recover maximum detail from improperly exposed images using either Photoshop or Lightroom.
Mohrle’s demonstration is a perfect example because it was shot under “harsh conditions” as the sun was about to set. This caused the beautiful field in the foreground to go almost completely black. We encourage you to download the sample image in the description beneath the video, so you can follow along and make Mohrle’s changes in real time.
It’s true that Mohrle’s intentionally underexposed image could have been better rendered in the camera by using more appropriate exposure settings. But even so, depending upon the dynamic range of your camera, additional editing would still be necessary with this difficult scene.
Mohrle’s point is that Raw files provide far more latitude than JPEG photos for fixings all sorts of mistakes. With this example he restores shadows without overexposing the sky. He then adds warm, vibrant sunset colors, and a subtle glow to bright areas, while cleaning up the horizon.

While watching the video you’ll learn how to make both global and local adjustments, and pick up several valuable color-grading tips. And as you’ll see, the extra effort is well worth it if maximum image quality is your goal.
You can find many more tips and tricks by visiting Mohrle’s YouTube channel, so be sure to take a look.
And don’t miss another important tutorial we shared earlier, explaining how easy it is to use Photoshop’s powerful Free Transform tool.


![]()
Get the Latest Photo Tips, News & Reviews from Shutterbug!
| Camera Reviews Other Reviews | Mobile Reviews Photography Reviews Columns | News | Features | How-To | Resources |
 © 2025 Shutterbug
AVTech Media Americas Inc., USA
All rights reserved