- REVIEWS
Camera Reviews 
More Reviews Mobile Reviews Photography Reviews - GALLERIES
- VIDEOS
- BUYER'S GUIDES
Photo How To: Easily Create Custom Camera Profiles for Adobe Compatible Applications

Yes, YOU can quickly and easily produce custom DNG and/or ICC profiles of your camera’s response to scene lighting for consistent, predictable and repeatable results from image to image and camera to camera.
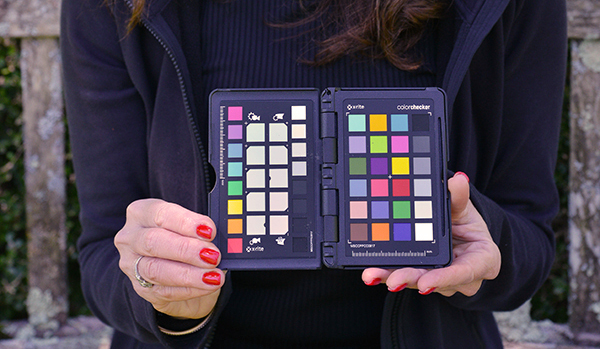
If you thought creating a color profile was difficult or overly technical, think again. This magic journey begins with a shirt-pocket-size ColorChecker Passport Photo 2 from X-Rite, a hardware-software combination that lets you create color profiles with just a couple mouse clicks.
Before you get Budget Panic, the hardware costs only $119 (order from Amazon) and includes indispensible Gray Card and White Balance targets in a virtually indestructible 3.5 x 5 inch hard plastic case.
Why Create and Use Color Profiles?
Using color profiles when post-processing images enables you to produce consistent results from shot to shot. More importantly for many photographers, this process allows you to attain consistent and repeatable colors from different cameras, even different brands. Eliminate the guesswork without sacrificing any creative options, and at the same time produce consistent, predictable and repeatable color output.
How Does It Work?
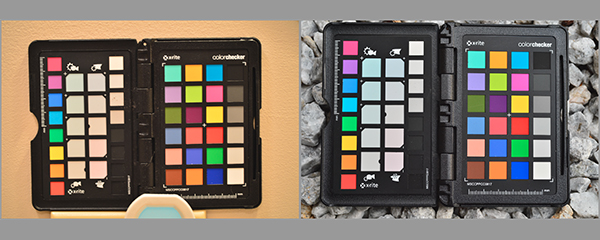
Set your camera to capture Raw files and open the X-Rite ColorChecker Passport Photo 2 to the Classic Target. Shoot two Raw format images of the Classic Target, one under sunlight and one under tungsten. Using Raw images from two different light sources allows you to create a Dual Illuminate DNG Profile.
The Raw format files must be converted to DNG (unless of course, you created the DNG files directly in the camera, a trick most Leica, Pentax and Ricoh cameras can do).

There are two ways to transform Raw format files into DNG files. The first, and most direct, is to use the aptly-named Adobe DNG Converter, which is free and can be downloaded here. This method allows you to batch process groups of files, so if you’re converting more than one single image, this is the only way to go.
The second method is to open the Raw file in Adobe Camera Raw (ACR) and save it as a DNG. Click, click, done.
Although the Color Profile that is created, strictly speaking, is a DNG Color Profile, once recognized by Lightroom or ACR it works with any Raw format, so—and we want to strongly emphasize this—creating a DNG file is a one-time-only event.
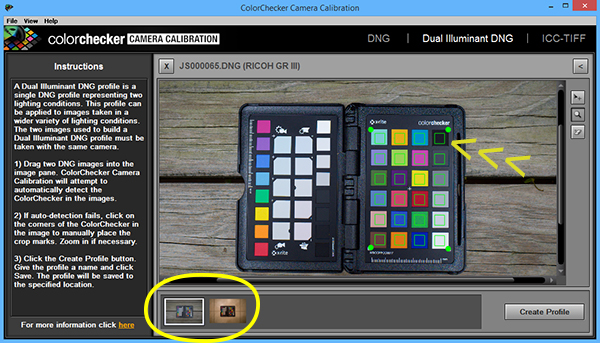
Create the Profile
Open the X-Rite ColorChecker Camera Calibration software. It’s free (Win and Mac) and you can download load it from here. Drag the two DNG files (the images of the Classic Target) into the software interface and stand back.
The software quickly finds and highlights each of the color patches and produces a color profile—which is automatically added to the appropriate folder so Lightroom and ACR can find it.
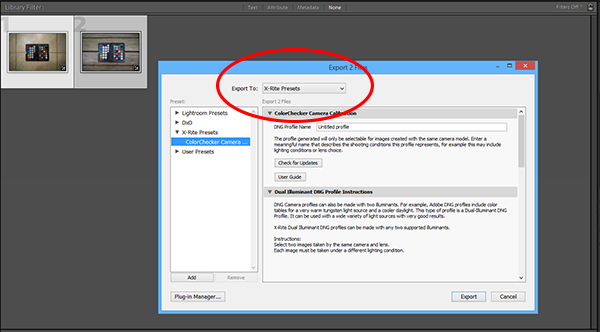
Alternative Plug-in Method
This actually seems like more work to us, but some people think it’s easier. Open Lightroom. Select the two DNG files (the images of the Classic Target) and Export them to the X-Rite Presets. The magic happens and produces a color profile—which is automatically added to the appropriate folder so Lightroom and ACR can find it.
Application
Once you have created the DNG color profile for a specific camera, it will be selected automatically when you open any Raw file from that camera in ACR or Lightroom. If you own more than one camera, repeat the steps above to create a color profile for each.
Colors from two or more different cameras will match if you create and use a DNG color profile for each when editing. Include the Classic Target and Color Enhancement Target (which are on facing pages in the X-Rite kit) in a Raw image that you snap at the beginning of a shooting session. Then make the appropriate color selections from that image during post processing.
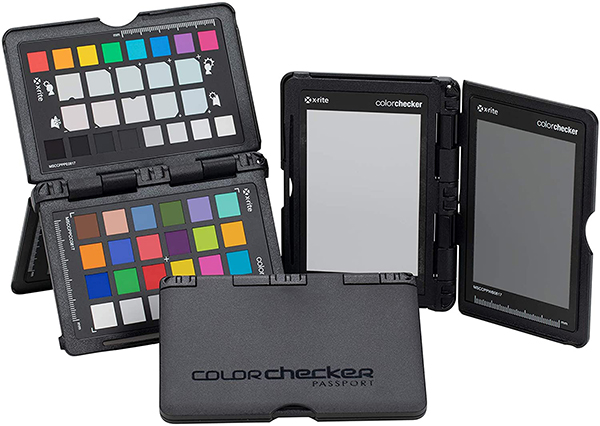
What’s Included For My $119?
The X-Rite ColorChecker Passport Photo 2 has a long name but a very short learning curve. Inside the 3.5 x 5 inch hard plastic shell are four rigid pages. It’s hinged like a book, and each page is a precisely crafted color target, as follows:

Gray Balance
In addition to the color patches, the kit includes an 18% gray patch that is used to set exposure via your camera or handheld light meter.
White Balance
White patch is used to set White Balance. Instead of searching for a piece of white paper, use this target to create consistent, custom White Balance settings as per your camera’s instructions. (BTW, if you usually use Auto White Balance when shooting JPEGs, you’re in for a very pleasant surprise when you adopt custom WB.)
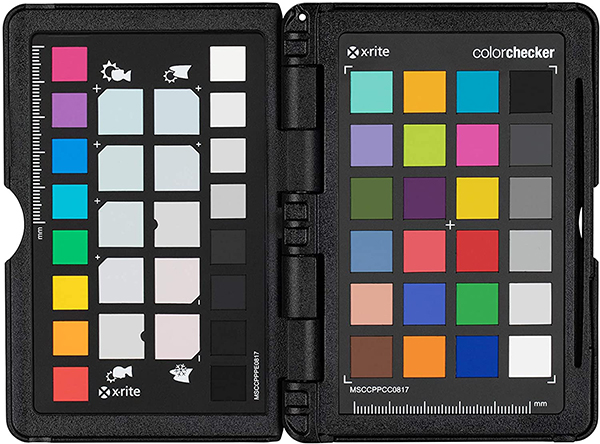
Classic Target
The industry standard 24-patch color reference target that you’ve probably seen many times and wondered how to use.
Creative Enhancement Target
A set of color swatches that differ in small increments and allow you to fine tune color settings and subtly adjust warm or cool tones in consistent and predictable steps.
Software
Download X-Rite’s software. Use it as a super-easy standalone profile creator or as a Lightroom plug-in.
Who is X-Rite?
You’ve heard of Pantone, of course. They introduced the Pantone Matching System in 1963 and changed the way the world defines color. Pantone is the de facto standard for objective color identification.
So who is X-Rite? They own Pantone. They know something about color.
Availability and Pricing
The X-Rite ColorChecker Passport Photo 2 also can be used to create ICC Profiles and is compatible with major third-party software, including Hasselblad Phocus. It’s available today and the cost is $119. Order from Amazon or from your favorite local camera shop.
—Jon Sienkiewicz
(As an Amazon Associate, Shutterbug earns from qualifying purchases linked in this story.)


![]()
Get the Latest Photo Tips, News & Reviews from Shutterbug!
| Camera Reviews Other Reviews | Mobile Reviews Photography Reviews Columns | News | Features | How-To | Resources |
 © 2025 Shutterbug
AVTech Media Americas Inc., USA
All rights reserved