- REVIEWS
Camera Reviews 
More Reviews Mobile Reviews Photography Reviews - GALLERIES
- VIDEOS
- BUYER'S GUIDES
HISTOGRAM Explained: Use it for Perfectly Exposed Photos (VIDEO)

What if we told you there’s an easy-to-used tool that helps nail exposure with every image you shoot? There is, and it’s called the histogram. Unfortunately it’s often overlooked.
In the quick tutorial below you’ll earn how a histogram works, the best way to use it, and why it takes the guesswork out of properly exposing a scene exactly the way you envision. Once you get the hang of this powerful tool you can forget about exposure problems and move on to other imaging parameters.
Instructor Booray Perry is a favorite among Shutterbug readers because of his straightforward lessons that are always infused with a bit of humor. In today’s episode he covers the necessary basics for using the histogram immediately, and there’s a link to a more comprehensive, illustrated tutorial on this topic in the description beneath the video.
As you’ll see, there are two ways to harness the power of this tool. One is to configure your camera’s display so the histogram always appears on the rear LCD while you’re shooting. This way you can make any necessary adjustments to get things right in the camera.
Another way to employ the histogram is when processing your images, because this feature is available in most editing programs. Regardless of which approach you prefer, Perry says this: “The truth is that everyone who understands and uses the histogram swears by it,” and you will too.
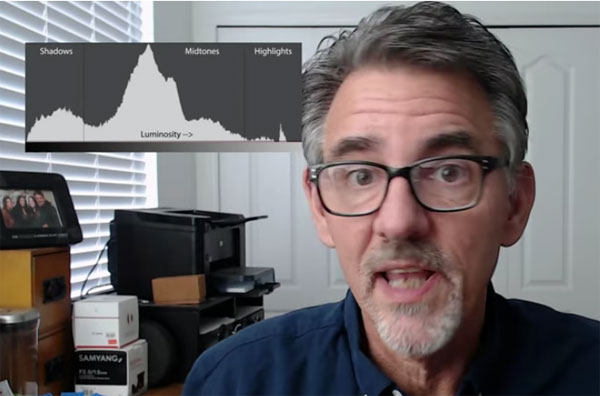
In simple terms the histogram is a chart that display how much of an image is dark, how much is bright, and everything in between. In other words, the left side of the graphic represents pure black, the right side displays pure white, and the middle indicates the intermediate tones.

When looking at a histogram you’ll notice peaks and valleys in the graphic indicating the amount of any particular brightness level within an image. Armed with this handy information you can instantly tell if the scene on your screen contains blown-out highlights, crushed shadows, or both. And this enables you to quickly resolve the problem by modifying exposure settings or using EV Compensation.
Perry demonstrates how to get the job done in barely eight minutes, and it’s super simple to do. You can find more straightforward tips like this on Perry’s popular YouTube channel, so be sure to take a look.
And speaking of exposure, we encourage you to take a look at our recent post featuring a beginners guide to long-exposure photography.


![]()
Get the Latest Photo Tips, News & Reviews from Shutterbug!
| Camera Reviews Other Reviews | Mobile Reviews Photography Reviews Columns | News | Features | How-To | Resources |
 © 2025 Shutterbug
AVTech Media Americas Inc., USA
All rights reserved