- REVIEWS
Camera Reviews 
More Reviews Mobile Reviews Photography Reviews - GALLERIES
- VIDEOS
- BUYER'S GUIDES
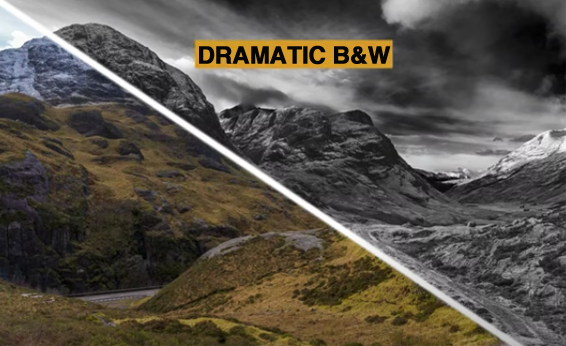
Create DRAMATIC B&W Conversions in Photoshop With This EASY Method (VIDEO)
By now you’ve probably realized that some images look better in b&w than they do in color. You can always set your camera to monochrome, but most photographers prefer shooting in color, and making the conversion during the editing process, so they have a choice of which look they prefer.
There are a number of ways to convert color images to b&w—some more complicated than others. In the video below you learn a simple approach, designed to deliver dramatic results.

Dave Kelly is a successful photographer and instructor with a passion for helping others improve their work with straightforward image-editing techniques. The conversion method he demonstrates in today’s episode takes a non-destructive approach with four adjustment layers.
Kelly begins with a beautiful color image of the “Three Sisters,” an iconic trio of peaks in the Scottish Highlands, captured by Peter Allum. The original shot looks pretty great, but it’s similar to those captured by other photographers, while Kelly’s b&w version is even more compelling and unique.
There’s a link beneath the video for downloading a JPEG version of the image, so you can follow along with Kelly and make the adjustments yourself in real time. Kelly says he added a bit of saturation to the sample image because that proves helpful in making the conversion—especially if you’re going for a contrasty, dramatic look.
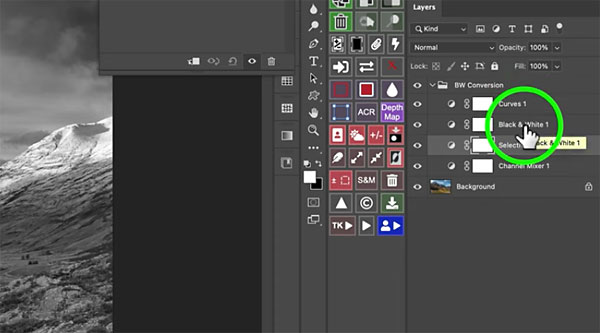
Kelly walks you through the step-by-step process from beginning to end. which uses simple tools like Selective Color, Curves, and Photoshop’s Channel Mixer to get the job done. And because this method is a non-destructive one, you can always go back and refine your results.
There’s much more to see on Kelly’s YouTube channel, to be sure and pay a visit.
And check out an editing tutorial we posted last week from another expert, with a beginners guide to creating composite images in Photoshop.


![]()
Get the Latest Photo Tips, News & Reviews from Shutterbug!
| Camera Reviews Other Reviews | Mobile Reviews Photography Reviews Columns | News | Features | How-To | Resources |
 © 2025 Shutterbug
AVTech Media Americas Inc., USA
All rights reserved