- REVIEWS
Camera Reviews 
More Reviews Mobile Reviews Photography Reviews - GALLERIES
- VIDEOS
- BUYER'S GUIDES
Create BOLD B&W Photos with a Simple Lightroom Edit (VIDEO)

One of the great appeals of b&w imagery is that by stripping away color it’s possible to achieve very dramatic photos with high contrast, deep blacks, and properly exposed highlights. If your monochrome images are bland and disappointing, this tutorial is for you.
New Zealander William Patino is an accomplished landscape photographer and instructor who is very popular among Shutterbug readers. As you may already know, there are a number of ways to make b&w conversions—some more effective and easier than others.
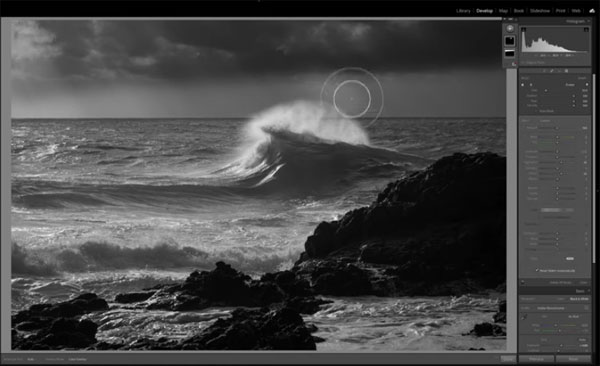
In the video below Patino demonstrates his preferred method “for taking a photo that’s isn’t amazing and turning it into a dramatic b&w image.” He uses Lightroom to demonstrate this technique, but the process also works just as well in Photoshop’s Adobe Camera Raw.
Before watching the video we recommend downloading the Raw file in the description beneath the video, so you can make the changes yourself as they are explained. Patino says that by doing so “you can better learn these techniques for use with future images.”
Patino begins with some subtle cropping, followed by adjustments to highlights and shadows to better balance the overall exposure. He does so in a manner intended to guide a viewer’s eyes through the scene. Next comes the b&w conversion that he does in an instant.
There’s a clear discussion of how Lightroom’s b&w sliders work, and Patino also explains a simple way to improve the sky using Lightroom’s Adjustment Brush. You’ll see how he built contrast into the foreground, and how to make mid-tone adjustments using the Lightroom’s Tone Curve.

Patino finishes the job with a gradient filter “to make the image pop,” and some final sharpening for a truly dramatic result.
You can see much more from Patino by visiting his instructional YouTube channel.
And don’t miss another editing tutorial we posted recently, demonstrating three foolproof methods for removing distracting elements in Lightroom.


![]()
Get the Latest Photo Tips, News & Reviews from Shutterbug!
| Camera Reviews Other Reviews | Mobile Reviews Photography Reviews Columns | News | Features | How-To | Resources |
 © 2025 Shutterbug
AVTech Media Americas Inc., USA
All rights reserved