- REVIEWS
Camera Reviews 
More Reviews Mobile Reviews Photography Reviews - GALLERIES
- VIDEOS
- BUYER'S GUIDES
Aurora Orion 400: Taking It On The Road
The Aurora Orion light kit arrived on my doorstep at the busiest time of the year for me. At the end of the summer I take hundreds of high school seniors and thousands of “one shot” photos of the underclass students at high schools. So while it has taken me a while to get around to writing the report, I have used these lights to take thousands of pictures, and I was really glad to have a light kit that I could just pick up and walk out the door with and have all I needed in one really nice travel bag.
Photos courtesy of Aurora
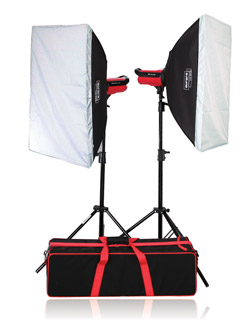
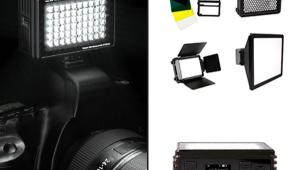
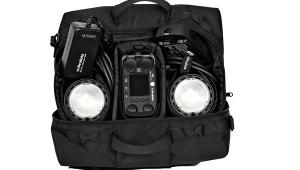
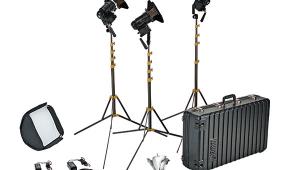
The kit comes with either two 200 watt second (ws) or two 400 ws units; I tested the 400 ws units. My kit also came with two identical small softboxes. You can purchase the lights individually or buy the kit minus the case, but I’d strongly suggest purchasing the case because it’s lightweight, nylon covered, and has both a strap to throw over your shoulder or a handle to grab. Total weight of the packed kit is about 22 lbs, light enough for just about everyone. Unzip the top of the case and you’ll find two monobloc lights, two softboxes, two lightweight air-cushioned stands, two speed rings, two 100 watt (w) modeling lights, power cords, and a sync cord—all you need for many jobs. And while the case is nice, I’m sure you want to hear about the lights and how they perform.

All Photos © Steve Bedell
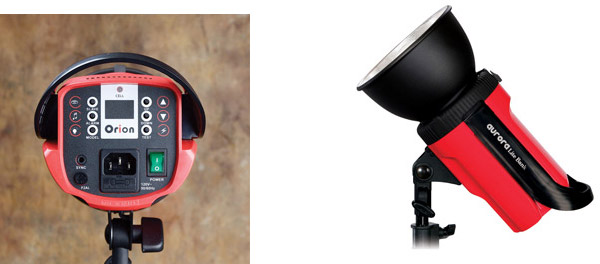
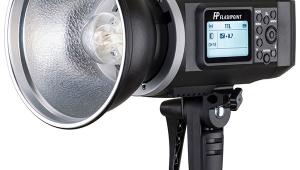
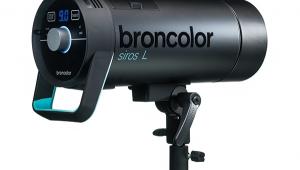
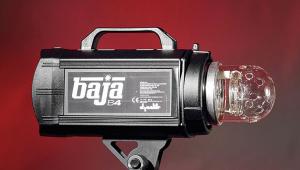
The flash heads have a sleek, modern design and are made of ABS plastic, which appears like it can take a beating. They are bright red with a swoopy handle that allows you to easily pick them up or adjust them on a light stand. For the most part, controls are logically laid out and anyone familiar with studio strobes will be able to use them without consulting the instruction manual, although there is a very good reason to do so. You’ll immediately notice the very moderate fan noise; there are vent holes on the top of the unit for heat escape. A 100w light bulb that comes with the kit serves as the modeling lamp, although you can use any standard light bulb up to 150w. Let’s look at the rest of the controls before I get to a couple of things that you’ll only find in the manual.

A built-in slave sensor sits at the top of the back panel. While I had no trouble firing with it, I have to wonder why they just don’t put all sensors at the top of the unit for a 360˚ view of things instead of hiding them on the back panel. To be fair, quite a few other manufacturers have this design as well. The power switch, test button, sync socket, and fuse also reside on the back. There is an audible alarm to confirm firing and the test button is green when the unit is fully charged. Up and down buttons increase/decrease power. If you power down, the unit will auto-dump the power when you’ve settled on your output.
That’s all pretty straightforward, but here’s what you may have missed if you bypassed the manual. First, the modeling lamp. Push the control once for maximum, again for proportional, and once again for off. To get to the power display you hold both the up and down power buttons down for about 10 seconds, and you can switch the power display between watt seconds and f/stops. Using watt seconds, the display starts at 12 and goes to 400, with increments from 1 ws at the lower end to about 25 at the high end, as more is needed to provide a significant change in power.

I found that the f/stop display is both convenient and confusing. The f/stop reading at 12 ws is f/8.9. Then it goes to 11, then 11.1, 11.2, etc. until f/16 all the way to f/45.8. If this doesn’t appear to make much sense to you, as it didn’t to me, you’re probably asking yourself why the readout starts at such an odd number. Why not start at f/2 or f/2.8 or some smaller number that we’re all more familiar with?
To find out, we went straight to the manufacturer. It seems like f/8.9 was determined as the starting point because that’s the output of the unit using an ISO of 100 and a standard reflector at a distance of 1 meter (3.28 feet). This is the first time I’ve ever seen this method of determining power output. As far as I know, this is unique to Aurora. I’d suggest they get on board with many other manufacturers and use a 10-point scale, with 10 being the lowest output, 20 being a stop more, etc. throughout the power range. The current f/stop method will be confusing to some in the US market because unless you’re taking photos 1 meter away, it’s not very helpful.
I did find the f/stop reading to be very accurate and started with a light meter reading of f/5.6 at the lowest power setting and went right through to f/32 for a five-stop range. Checking recycle times on my iPhone stopwatch it appeared to be about 1.3 seconds on full power even though the manual says 1.6 seconds. This may be because many lights will fire when they are at 90 percent power, so to be safe give yourself the other 3/10.
If you’re wondering how the watt second readings translate to real world power, with no reflectors and a measured distance of 10 feet, I got a flash meter reading of f/11 with the unit set to 400 ws. With a reflector I’m guessing we would have gotten about a third of a stop more light from the focused beam but with none that works out to a Guide Number (GN) of 110. (GN is determined by distance multiplied by f/stop, thus 10 feet x f/11 equals 110.) Given that the price for the kit with the 400 ws lights is only about $100 more than the 200 ws lights, I see little point in buying the smaller units.


Turning our attention to the front of the unit, we find a circular flash tube that rings around the modeling light socket and the Unilever system for mounting the softbox and other accessories. Note that the softbox kit does not include the standard reflectors but the umbrella kit does.
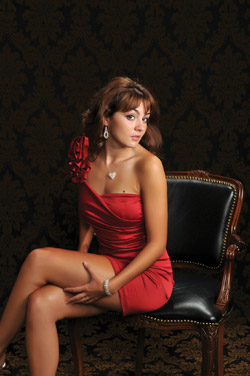
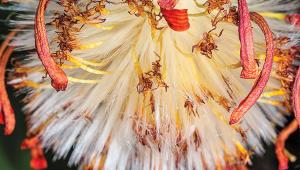
The softbox is mounted by assembling the box and then attaching it to the light with the supplied speed ring. The Unilever means there is one lever on the outside of the front of the unit to push down. This retracts two pins inside. Turn the speed ring until the slots line up and release the lever for a secure mount. Since these supplied softboxes are rather small (about 23x33”), I did use the supplied internal diffusion baffle to further soften the light for portraits. I did one school of about 700 kids shooting Green Screen and using the softboxes, one on each side and about 7 feet away with the stands as high as they go (about 6.5 feet), and the results looked great. With school photos, shadows are a bad thing!
If you’re looking for a small, portable light kit with reasonable power, I can highly recommend this set. They’re well made, rugged, dependable, and give consistent, repeatable results. The kits have a retail price of $1306.45 and are available through participating dealers found on the Pakor website. For further information, go to www.pakor.com/pages/aurora-lighting-products.cfm.
Steve Bedell has been a portrait photographer for over 25 years. To subscribe to EPhoto, a free e-mail newsletter with tips for photographers, contact Bedell via e-mail at: sb@stevebedell.com. Also ask about his lighting DVDs.


![]()
Get the Latest Photo Tips, News & Reviews from Shutterbug!
| Camera Reviews Other Reviews | Mobile Reviews Photography Reviews Columns | News | Features | How-To | Resources |
 © 2025 Shutterbug
AVTech Media Americas Inc., USA
All rights reserved