- REVIEWS
Camera Reviews 
More Reviews Mobile Reviews Photography Reviews - GALLERIES
- VIDEOS
- BUYER'S GUIDES
Add Impact to Landscape Photos with Pro-Quality Vignettes (VIDEO)
Professional photographers often add vignettes to their photos to create impact and direct a viewer's eye to the most important part of a scene. Less-experienced shooters tend to ignore this powerful technique that is actually very simple to accomplish.
Adding a vignette in Lightroom is a great way to create depth and dimension in an image and make a photo really stand out. Whether you're a beginner, or just want to add a little magic to your outdoor images, this quick tutorial from the Behind the Tripod YouTube channel explains how it's done.
The instructor named Steve introduces the eight-minute lesson like this: "A vignette is a lovely effect that can easily be created in Lightroom." He says he prefers to take a subtle approach and tends to include a vignette in many of his superb images. Today he demonstrates an effortless step-by-step method that you can begin using today.
There are several reasons for creating this effect. One is that it mimics the look of older lenses that create images in which the outer portion of the frame is darker than the center. So if you're after a vintage look, this is a great way to go. Steve says that a subtle vignette can also help accentuate objects in the middle of a composition, thereby creating a photo with more cohesion.
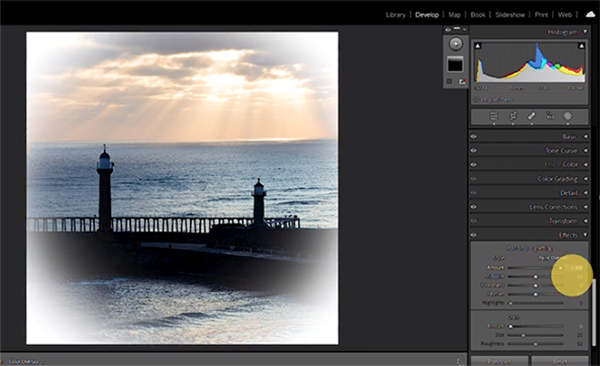
Vignettes can be created in a variety of ways, some more complicated than others. Steve keeps things simple in this lesson by explaining two basic techniques that anyone can accomplish. The begins with a nice seaside shot, turns to the Vignettes panel, and chooses Paint Overly from the various options available.
As you'll see, there are a number of possibilities from a white vignette to one that's black, and you can quickly control the size, midpoint, and amount. Steve says he's very careful with these three parameters—especially with when the vignette is dark. You also have the option of making the vignette round or square. Feathering options are available too.
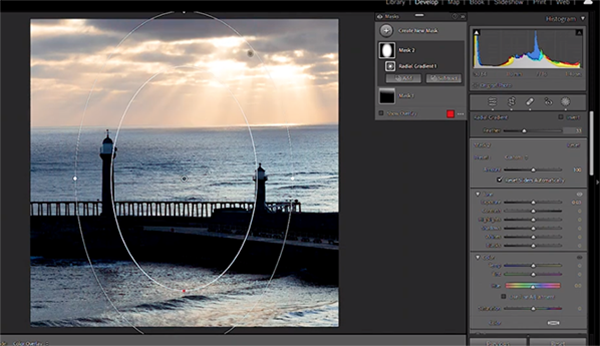
The second technique is the one Steve prefers. That's because it's just as simple, but it offers far greater control. This approach involves adding a mask with a Radial Gradient and sizing it appropriately in the proper position for the task at hand. Then he demonstrates how to use this selection for a very refined mask and feather it to perfection.
Both of the techniques are non-destructive, meaning you can always go back if a do-over is necessary. So give one or both of these methods a try, and you'll be impressed by the improvements to your images. You can find more helpful tips and tricks by paying a quick visit to Steve's instructional YouTube channel.
And don't miss the earlier video tutorial we posted from another expert, explaining how to shoot eye-catching landscape photos by using the power of balanced compositions.


![]()
Get the Latest Photo Tips, News & Reviews from Shutterbug!
| Camera Reviews Other Reviews | Mobile Reviews Photography Reviews Columns | News | Features | How-To | Resources |
 © 2025 Shutterbug
AVTech Media Americas Inc., USA
All rights reserved