Blur Your Backgrounds For Better Candid Portraits
All Photos © 2004, George Schaub, All Rights Reserved
 Software
Used: Photoshop Elements 2
Time: 3 Minutes
Degree Of Difficulty: Moderate
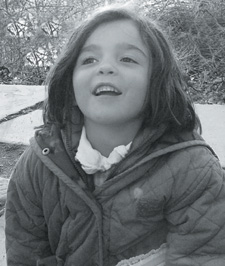
When you make candid portraits you don't always have the time or the disposition to use aperture settings for a shallow depth of field (where the subject is in focus and the background unsharp). But sometimes candids can have distracting backgrounds that can detract from the subject, either because they are too "busy" or there are objects and forms that would be better eliminated. In this snapshot of Emma Polgrean we want to soften the background to create more dimension in our subject.
 |
Blurbegin: This photo was made in color but converted to black and white using Enhance>Remove Color. This keeps the image as an RGB file in case we want to add color tone later. (Figure 01.)
 |
|
|
Blurlayer: It's always best to work on a Layer when doing corrective work, as this gives you the most control. Go to Layer>Duplicate Layer. Then open the Layers box by clicking on the Layers tab in the upper right of the software window. You'll see that you've created a duplicate Layer; the blue highlighting shows it's "active." (Figure 02.)
 |
|
|
Gaussian: Next we want to blur the image. The idea here is to cover it with a blur and then to remove the blur from parts of the image. The way to do this is via Filter>Blur>Gaussian Blur. When you do this you'll get the Guassian Blur dialog box. You can move the slider back and forth and the preview will show you how much blur you've added. (Figure 03.)
 |
|
|
- Log in or register to post comments
