- REVIEWS
Camera Reviews 
More Reviews Mobile Reviews Photography Reviews - GALLERIES
- VIDEOS
- BUYER'S GUIDES
Pro Editing Tips for Cleaner, Sharper Outdoor Photos (VIDEO)

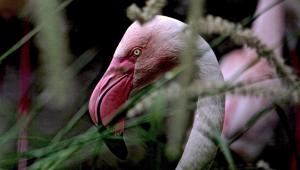
We've featured post-processing tutorials for cleaning "dirty" photos, and others explaining various sharpening techniques. This helpful tutorial from the PHLOG Photography YouTube channel does double duty by demonstrating a Lightroom workflow that tackles both tasks in one quick-and-easy edit.
Instructor Christian Mohrle is a notable pro who's been committed to making great outdoor images since 2009 when he set his sights on becoming the one of the best landscape photographers in Germany. Some would agree that he's met this goal and has become equally proficient behind the computer.
Today's 14-minute episode demonstrates seven time-proven editing techniques that anyone can use to create super clean and realistically sharp images with a bit of help from Lightroom. There's a link neath the video for downloading Mohrle's sample Raw file so you can follow along and make the changes yourself in real time as the simple steps are explained.

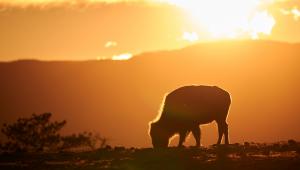
Mohrle begins by expanding Lightroom's Basic panel where he changed the profile to Adobe Standard. This step has nothing to do with sharpness or "cleanness," but he says it's the best starting point for getting the job done. He then explains the concept of sharpness like this: "Sharpness is essentially contrast, meaning that by introducing contrast to this image we can make look sharper and cleaner."
The next step involves slightly increasing exposure to reveal more details in the darkest portions of his shot, while dropping highlights to accentuate details in the brightest part of the background. These adjustments require refining contrast once again, this time with the Contrast slider, to balance out the tones with precision.
Mohrle then turns his attention to Lightroom's Presence panel where you'll find simple sliders for controlling Texture, Clarity, and Dehaze. He demonstrates his approach with these simple tools and explains the difference between Texture and Clarity, and when you should use them both despite the similarities in what they accomplish.
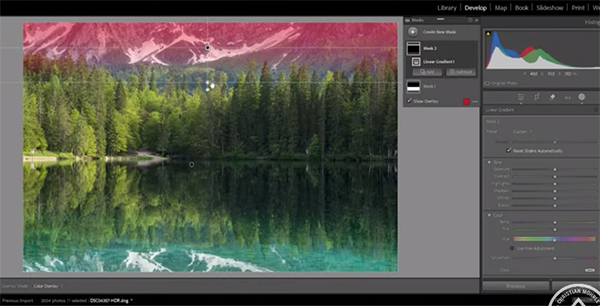
The image now appears significantly more compelling and Mohrle walks you through additional local adjustments that improve the photo further. And this point you're only halfway through the transformation and the remainder is where the Lightroom magic really occurs.
The transformation proceeds with adjustments to Color Luminance, employing Lens Corrections, and a final bit of cleanup and sharpening. Take a look at Mohrle's before/after images and you'll be duly impressed. Then pay a visit to his popular YouTube channel where there's an abundance of instructional videos of interest to everyone who shoots in the field.
And speaking of the great outdoors, don’t miss the related tutorial we featured with another accomplished pro who demonstrates why and how every landscape shooter should experiment with telephoto lenses to capture unique photographs in the field.
- Log in or register to post comments


![]()
Get the Latest Photo Tips, News & Reviews from Shutterbug!
| Camera Reviews Other Reviews | Mobile Reviews Photography Reviews Columns | News | Features | How-To | Resources |
 © 2025 Shutterbug
AVTech Media Americas Inc., USA
All rights reserved