Image Quality Shortcuts; Quick Tips For Photo Enhancement Page 2
Step 7
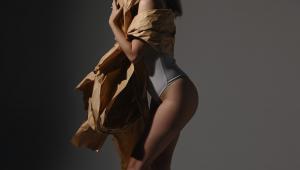
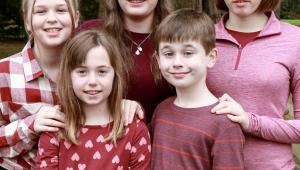
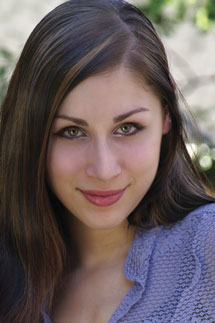
The final step is to move the Opacity Slider on the top right of the Layers palette all the way to the left and then slowly back until a pleasing blend is found. For this image of Distler we’ll use 65 percent opacity.
Kira Distler’s quick and easy make over.
 |
“Supersaturated” Color
This Quick Tip will show you how to supersaturate the colors in your images.
 |
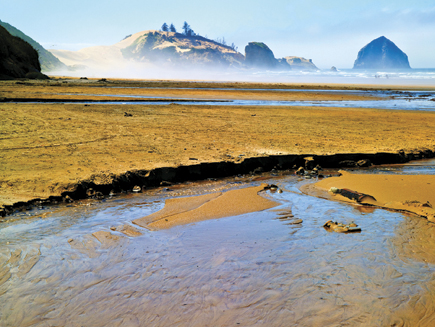
This is a photograph of a beach just north of Pacific City, Oregon. The color isn’t bad but it’s nothing special.
Step 1
We’ll start by converting the image to Lab color space, Image>Mode>Lab Color.
Step 2
At the bottom of the Layers palette we click on the black and white circle to bring up adjustment layers selections and choose Curves.
Step 3
For this technique we will only be using the A and B channels so we pull down the Channel menu and select the A channel. We then click on Curve Display Options and enable the detail grid with 10 percent increments, which is on the bottom right side of the Curves dialog box.
 |
 |
Step 4
Using the mouse cursor we hold and drag the upper end of the linear curve one square to the left and the bottom end one square to the right. We can move the curve 1-3 grids or anywhere in-between. The more squares we move the curve the more saturated the color will be.
Step 5
Next we select the B channel and repeat Step 4, by pulling the two ends of the linear curve right
and left the same distance as we did with the A channel.
Step 6
Finally, we’ll convert the color space back to RGB, Image>Mode>RGB. A warning box appears which reads “Changing modes will discard an adjustment layer; change mode anyway?” Selecting flatten will save our work. Saving the file with a different name will prevent the original from being overwritten.
The final Color Enhanced image.
 |
Diffuse Glow Effect
This technique creates a soft overall glow to an image. It is a way to take a good image and make it great and a so-so image and make it...interesting.
This image of a tin lizzie rusting away taken at midday is interesting from an archeological standpoint but rather dull otherwise. By adding a diffused glow we’ll try to restore some of her original luster.
 |
 |
Step 1
We start by duplicating the background layer, Ctrl/Cmd +J, and renaming it Blur. Next we apply a Gaussian Blur, Filter>Blur>Gaussian Blur with a radius of 30 pixels.
 |
Step 2
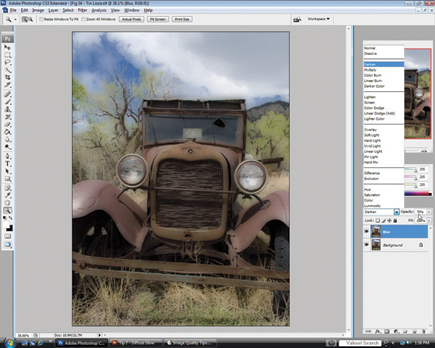
This is where we determine how the image will finally appear by choosing between one of the Blending modes on the pull-down menu at the top of the Layers palette: Darken, Multiply, Lighten, Screen, Soft Light, or Overlay. Each will give a different glow effect and it is a matter of personal preference which to choose. For the tin lizzie we’ll choose Darken and then back the Opacity down to about 70 percent.
 |
Step 3
At this point we have created an overall diffusion to the entire image. We can control what is, and is not, affected by the diffusion by using the Blend If option in the Layer Style dialog. Quickly open the Layer Style box by double clicking on the thumbnail to the right of the All-Seeing Eye in the Blur layer. We’ll use the This layer slider to limit the amount of glow in both the highlights and shadows. For this image we’ll move the black triangle to 25. Anything to the left of the black triangle will not be effected by the blur.
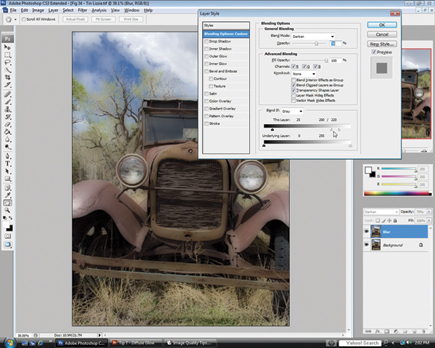 |
We’ll then move the white triangle to 220. We’ll split the white triangle in two, Alt/Opt Click, and move the left half to 200. This defines a range of partially blended pixels which helps to smooth the transition. Anything to the right of the white triangle will not be effected by the blur.
This shows the tin lizzie with a new lease on life. The diffuse glow creates a dream-like reality around her. And the land of dreams is where she lives.
- Log in or register to post comments
