- REVIEWS
Camera Reviews 
More Reviews Mobile Reviews Photography Reviews - GALLERIES
- VIDEOS
- BUYER'S GUIDES
Bowens Mosaic LED Light Panels: Big & Bright LEDs
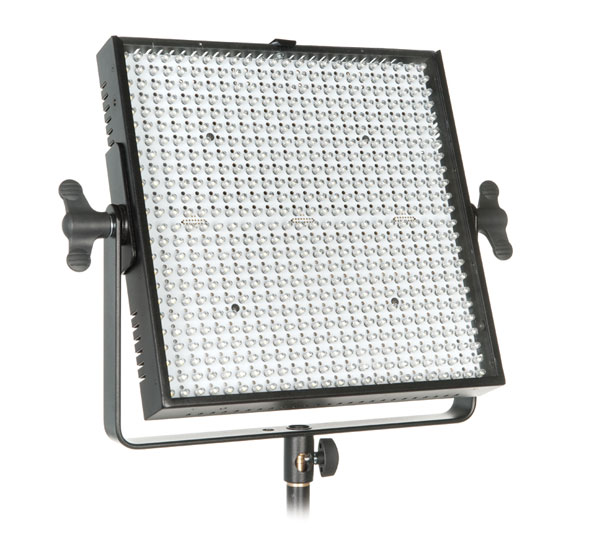
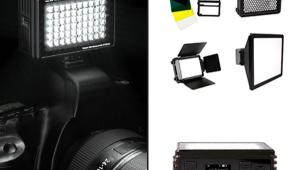
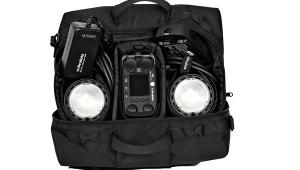
These days it seems that using LED lighting systems for studio portraiture is like puppies and kittens—everybody loves them, and why not? All you need to do is turn on an LED light panel and shoot, right? While there’s obviously more to it than that, the WYSIWYG nature of LED lighting is especially helpful for new or aspiring pros who want to get up and running quickly or in applications where the lighting needs to be consistent so lots of portraits can be made in a short amount of time, something event photographers will take to heart. With that in mind I recently tested Bowens’ Mosaic LED light panels (#1). Originally developed for film and video use, they are available in models designed for mounting on traditional light stands for portraiture, so I put them to work in my home studio.
What’s New
The Mosaic LED system consists of three different models that are part of Bowens’ Limelite series. The Daylight version contains 576 LEDs that produce up to 4200 lux of output at 5600˚Kelvin (K) daylight. If you’re not familiar with these terms and how they relate to exposures needed for making portraits, check other reviews I’ve written about LED lighting systems on Shutterbug’s website. Better and faster, take a look at the exposure data—especially ISO settings—used for the example photographs accompanying this review.
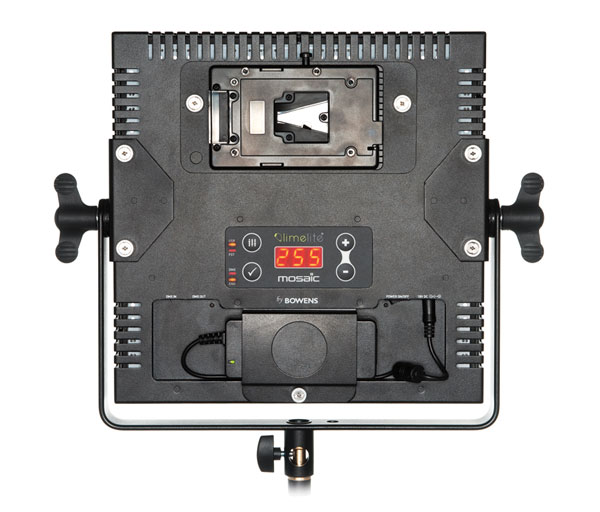
The Tungsten model uses the same number of LEDs to produce tungsten-balanced 3000˚K light, while the Bi-Color model uses a mixture of white and yellow LEDs to produce output from 2400 to 5200 lux that can be adjusted from 2800˚ to 5600˚K. The controls on the back of every Mosaic light panel include a digital display, making on-the-fly adjustments relatively quick and easy (#2). The Mosaic can also be operated remotely via built-in DMX (Digital Multiplex) in and out controls. Optional mounting kits let you attach two or four Mosaic panels together, creating a large bank of LED lights, although at a thousand bucks per panel that might be something only specialized applications might require.
Power Controls & Filter Kits
The light panels can be powered by AC, as I used them, or with a battery that uses a V-lock or Anton/Bauer-standard battery mount. In the US, the Mosaic is shipped with the Anton/Bauer mount but Bowens can deliver it in either mount. If you want to be able to use both mounts, you can order the Mosaic with the Anton/Bauer mount and get the V-lock mount as an option for $176.
Not tested were two optional ($96 each) filter kits for Color FX and Color Control that contain sets of filters allowing you to adjust the intensity, color, and color temperature of the Mosaic LED panel’s output. You can control light direction and spill using the optional two-leaf ($176) and four-leaf ($150) Barn-Door Sets that are available for single panels or banked groups. Bowens tells me they expect a grid to be added to their accessories list real soon now and as I write this Chimera offers a 14.75x14.75x7” TECH light bank for the Mosaics.
Setup
Bowens says, “The panel is capable of producing output three times brighter than more expensive lights of similar size.” Out here in the real world, it was obvious that the Mosaic is bright. How bright? If lux doesn’t mean much to you in photographic terms, I used a Gossen Luna-Star F2 meter set at ISO 100 to measure a Mosaic Daylight’s maximum output at 10 feet and it produced an exposure of 1/15 sec at f/2.8 at ISO 100.
The nicely produced but slightly vague—written in the Queen’s English—user’s guide gets you up to speed in a relatively short time.
The recessed panel on the Mosaic’s back made plugging in the industrial-strength power cord a snug fit for my US Medium-sized hands. Fortunately, there is no separate transformer that you have to hang on a light stand or trip over; everything is built inside the Mosaic’s beautifully constructed housing. All of the panel’s manual controls are soft touch (Chiclet) buttons; you may like or hate ’em but they didn’t bother me.
Most photo studios probably don’t have DMX controllers in-house, but the Mosaic has a User (“USR”) mode to manually adjust light output. To switch between modes press a button whose icon looks like sliders; USR is the default mode. Daylight and Tungsten models have an f/stop mode allowing you to adjust power output while the Bi-Color model features a Preset “Colour” mode. On the Bi-Color model you can adjust the output of its white and yellow LEDs by pressing the Save button with the display showing “dAy” or “tun.” In f/stop mode on Daylight or Tungsten models pressing the plus and minus buttons increases or decreases light output in 1/10-stop increments. To save the displayed output, press Save and when the light is next powered up it will go to the saved setting instead of the default. It’s not much different than some studio flashes and takes some getting used to, but you’ll catch on fast.
Color Balance
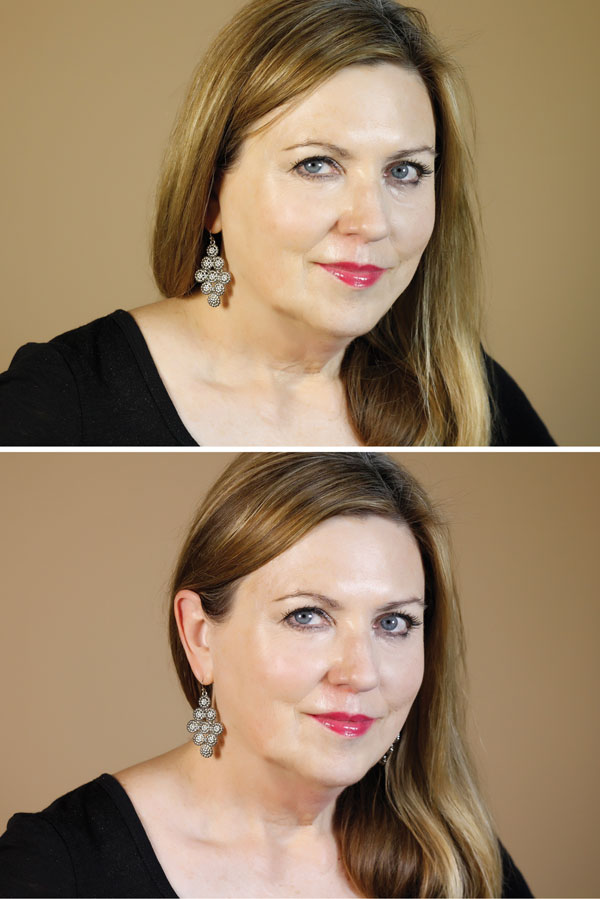
All LED lights that I’ve tested claim to be daylight-balanced but we know that daylight comes in all kinds of colors. Bowens says its Daylight model is 5600˚K and the color in my first tests with a Canon EOS 60D set in Auto White Balance looked good on the camera’s LCD, but when I set a custom color balance, using the flip (white) side of a Kodak Gray Card, it produced precise color, accurately rendering Mary’s skin tone and Savage’s Mocha Seamless Paper background photographed exactly as it looks in the company’s catalog (#3). Next, I used a pocket spectrascope to analyze the quality of the Mosaic’s light and found a smoothly reproduced spectrum with no spikes or missing color bands.
Light Modification
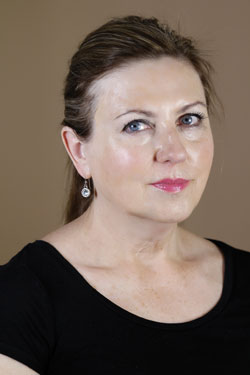
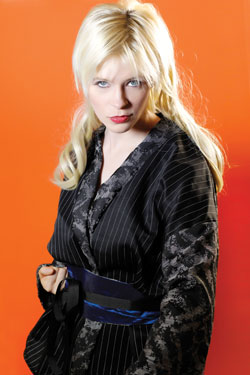
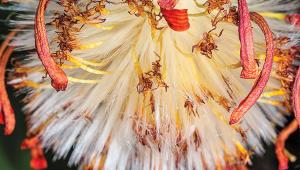
I drafted Mary to help me with initial testing and noticed the Mosaic created specular highlights with certain kinds of makeup (#4). A specular highlight is the reflection of the light source on the object you’re photographing whether it’s a person or a widget. In this lightly retouched test shot of Mary, each Mosaic panel was placed at 45 degrees to the subject, creating lots of specular highlights, and while one or two may be fine, this may be too many.
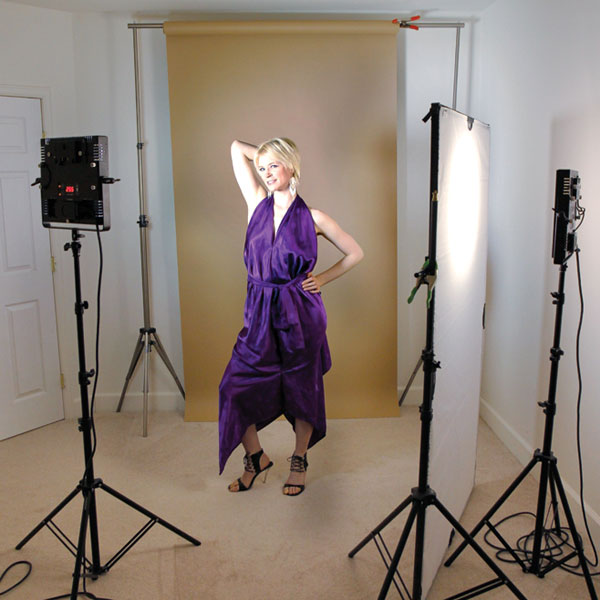
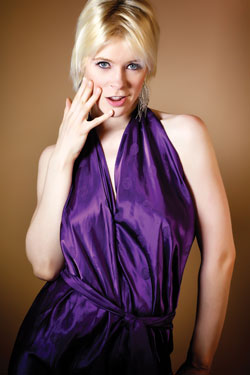
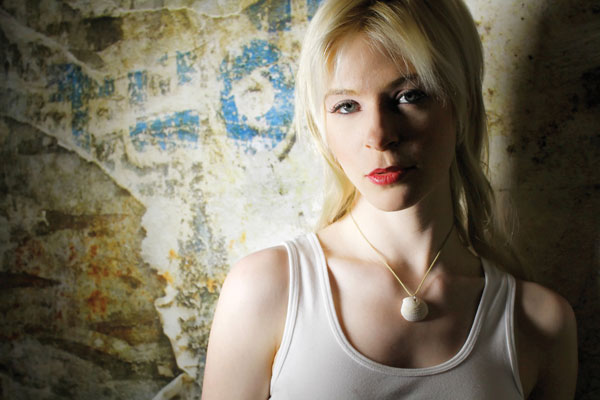
As a result of this test, for my shoot with cover girl Pam Simpson (March, 2013, issue of Shutterbug) I added one of Westcott’s Scrim Jims into the lighting setup. At camera right, I used a 42x72” Scrim Jim with Full Stop Diffusion fabric (#5), which diffuses the light while producing no color shift. A Daylight Mosaic was used at camera left because it gave me maximum control over its five-stop variable output. Big thanks to designer Francis Roces of KimonoDragons (www.kimonodragonsfdr.com) for the fashions Pam wore during the shoot (#6). Exposure on this one with a Canon EOS 60D with an EF 85mm f/1.8 lens was 1/320 sec at f/4.5 and ISO 640.
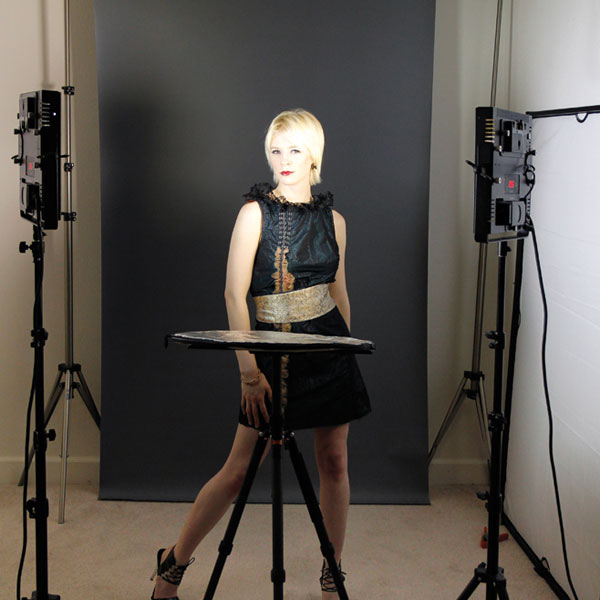
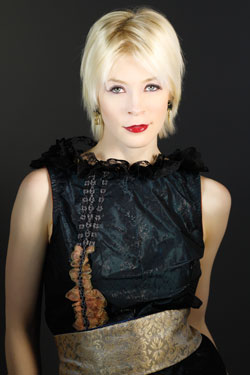
Next, I set up a loosely constructed headshot box with a Bi-Color Mosaic LED at camera right and a Daylight Mosaic at camera left with both set at maximum output. A 22” reflector was placed on a Savage Tech Table to kick light under the subject’s chin (#7). The background is Savage’s Photo Gray Infinity Vinyl but because of how the lights were aimed—more from the side than might be considered “normal”—and the LED’s 40-degree coverage, the middle gray background photographed almost black (#8). Exposure: 1/320 sec at f/4.5 and ISO 640.
The angle of the LED’s coverage also shows up in coverage so when working with an active subject any movement out of the sweet spot of perfect exposure created slight over- and underexposure. That wasn’t a problem with the headshot setup, which confined the subject to a small area. Nevertheless, using a single, unmodified LED light panel can produce a contrasty look and even a reflector may not be enough to soften it. Contrasty lighting is not usually flattering to even the most beautiful subject so I used Imagenomic’s Portraiture retouching plug-in when processing some of the images.
For the Honey West hapkido outfit I placed the Daylight Mosaic as the main light at camera left and the Bi-Color Mosaic behind the subject acting as a backlight (#9). Using a Mosaic LED light panel as a backlight without the optional four-leaf barn doors kinda worked but they would have given more control. Camera was a Canon EOS 60D with an EF 85mm f/1.8 lens and an exposure of 1/320 sec at f/4.5 and ISO 800.
At the end of Pam’s session I decided to shoot with a single Mosaic LED panel to see how little light I could use to make a portrait and ended up creating something different. To simulate a low available light shot, I placed a Daylight Mosaic LED panel at camera left with the output set at 1/8 power (#10). To simulate a real world lighting situation, no reflector was used. To compensate for the overall lack of light I bumped the Canon EOS 60D’s ISO setting to 800 and attached a fast Sigma 30mm f/1.4 DC HSM lens. Exposure was 1/125 sec at f/5. Lastolite’s Distressed Paper collapsible background was used.
There is some light falloff at the bottom of portraits made with a single Mosaic light panel, especially when doing full-length shots in my studio space, so for my session with Danielle Nicole, who is 6’1” in her bare feet, a different lighting setup was required. For this shoot I placed two Mosaic panels at camera left set at two different heights—one high and one low—to fully light her dress (#11). A 42x72” Westcott Scrim Jim with white fabric was placed at camera left for fill. I used a Canon EOS 60D with an EF-S 15-85mm f/3.5-5.6 IS USM lens (at 50mm) with an exposure of 1/80 sec at f/5.8 and ISO 640. Background was a 53” roll of Savage’s Ocean Blue that was extended to the edge of the frame using Photoshop’s Content Aware Scaling feature.

Quick Specs: Bowens Mosaic
Daylight
Output (Lux): Up to 4200
Lamp Type: 576 Power LEDs
Angle: 40˚
CRI: >85
Color Temp: 5600˚K +/- 300˚K
Size: 13.7x14.7x3.34”
Weight: 3 lbs
Price: $959
Bi-Color
Output (Lux): 2400 to 5200
Lamp Type: 576 Power LEDs
Angle: 40˚
CRI: >85
Color Temp: 2800˚K to 5600˚K
Size: 13.7x14.7x3.34”
Weight: 3 lbs
Price: $1119
LEDs And Color Balance
Every time I tell a photographer I’m shooting LEDs they always say, “I hear there are all kinds of color balance problems with them.” I hate to be the one to break it to you but there are color variations in every light source. No light source is perfect and not all LEDs are the same. And using LEDs has the advantage of being “what you see is what you get,” but it’s not without some downsides. Some LEDs have narrow angles of coverage and problems with some lights, such as Pulse Width Modulation, can cause flickering, giving the appearance of a continuous light when it is not. Then there is the question of what the spectrum of light being produced by the LEDs actually is, which is why I have started using a spectrometer to test these kinds of systems. Top it all with the fact that some LED lighting systems that I’ve tested are not all that bright, causing me to use higher than normal ISO settings, which can result in increased image noise.
Mounting An Umbrella
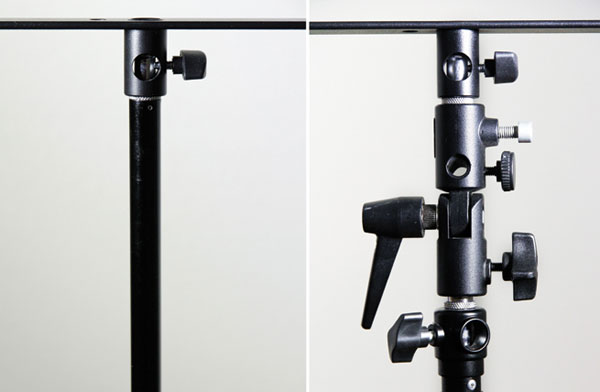
(Below) At left is the way a Bowens Mosaic light panel attaches to a typical studio light stand. Mounting an umbrella is no problem when using a Manfrotto Lite-Tite Swivel Umbrella Adapter (right). This adapter attaches between the light panel support bar and light stand, providing a receptacle for an umbrella. The adapter also tilts, allowing multiple positioning of the light head and umbrella.
Conclusions And Recommendations
Although not inexpensive, the Bowens Mosaic LED light panels might just be the solution for when you want to shoot using continuous light. Like a light bulb or the sun, it’s “on” continuously, enabling you to use your in camera meter and allowing you to see how the light—shadows and highlights—is falling on your subject better than some studio flash modeling lights. Continuous light also provides a more relaxing environment for your subject. There are very few blinks, especially from contact lens wearers, because there’s no flash.
The Bowens Mosaic may require a few operational changes in the way you work—no change is easy—but in the end it will make shooting easier for you and for your subjects as well, which sounds like a win-win situation.
For more information and full specs, contact Bowens USA at www.bowensusa.com.


![]()
Get the Latest Photo Tips, News & Reviews from Shutterbug!
| Camera Reviews Other Reviews | Mobile Reviews Photography Reviews Columns | News | Features | How-To | Resources |
 © 2025 Shutterbug
AVTech Media Americas Inc., USA
All rights reserved