- REVIEWS
Camera Reviews 
More Reviews Mobile Reviews Photography Reviews - GALLERIES
- VIDEOS
- BUYER'S GUIDES
Want Better Landscape Photos? Use this Curves Adjustment Trick That You Don't Know (VIDEO)

Most outdoor photographers know that using a Curves adjustment in Photoshop or Lightroom is one of the best ways to add contrast and boost the tonality in an image to make it more compelling. But there's a unique trick for using Curves in Photoshop, and it works wonders with one simple adjustment.
Austin James Jackson is a young, professional landscape photographer based in Southern Utah, whose shooting and editing skills belie his age. In this quick tutorial he demonstrates a method for using Curves that he relies upon for "almost every single photo that I edit," and it's easy enough for anyone to use.
James says that even if you've used Photoshop's Tone Curve in the past, "I'm going to show you something you don't know that will make any photo look amazing." While this technique is a no-go in Lightroom, it can be replicated with any photo-editing software that lets you fully adjust the tone Curve.
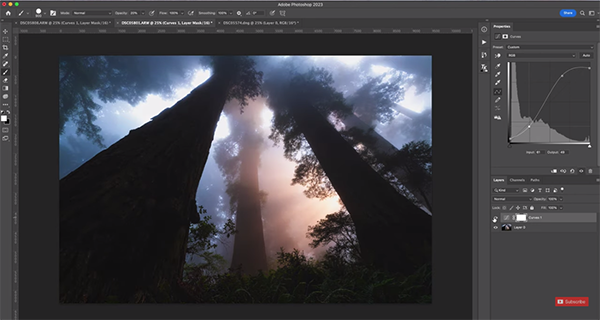
James begins with a pretty forest scene on his screen and grabs the Curves adjustment tool. Before jumping into his trick, he provides a quick overview of how the Curves graph works to lighten or darken an image—simply by dragging and moving the diagonal line in the box. He also illustrates why the "S-Curve" is so commonly used.
Now it's time for James' favorite quick Curves adjustment that he prefers to a standard S-Curve that often results in bright areas that are too bright, and dark portions of scene that are overly dark—often obscuring details in both portions of the frame. His technique works because you can make as many points on the Curve as you want.
James drags up the bottom left point and drags down on the right point. As you'll see, this essentially protects the highlights and shadows while enhancing details and interest in both areas of the shot.
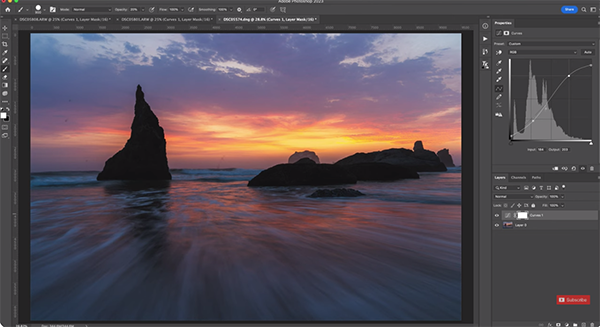
These simple adjustments take less than 20 seconds, and a quick glance at the before/after images reveals the effectiveness of James' unfamiliar trick. He repeats this quick maneuver with two more landscape photos, one of a stand of redwoods and another of a seaside scene, just so that you're convinced. In all cases his results are impressive.
You can find more straightforward editing techniques by paying a visit to James' YouTube channel, and by watching a tutorial we posted earlier that explains a simple technique for fixing any photo with a skewed perspective or converging vertical lines.


![]()
Get the Latest Photo Tips, News & Reviews from Shutterbug!
| Camera Reviews Other Reviews | Mobile Reviews Photography Reviews Columns | News | Features | How-To | Resources |
 © 2025 Shutterbug
AVTech Media Americas Inc., USA
All rights reserved