- REVIEWS
Camera Reviews 
More Reviews Mobile Reviews Photography Reviews - GALLERIES
- VIDEOS
- BUYER'S GUIDES
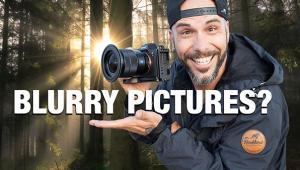
Turn Boring Daytime Photos Into Epic Nightscapes (VIDEO)

We've all captured photos during the day that didn't make the grade, either because of flat lighting, unimpressive colors, or a variety of other considerations. Rather that tossing these images into the trash, how about transforming them into dramatic nightscapes that really grab attention?
This tutorial from the Lou Imag'in YouTube channel demonstrates a three-step process for getting the job done. It's easy enough for Photoshop users of all skill levels, and only takes four minutes to explain.
Instructor Lou, namesake for the channel. is an accomplished shooter and image-retouching expert with experience in fashion, commercial, and other styles of photography. She kicks of this episode by explaining what type of photos work best for this straightforward technique, and others that do not.
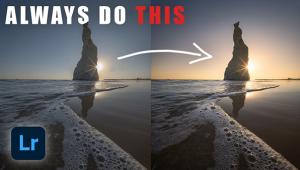
If you want optimum results Lou explains why you should avoid applying this technique to images shot under harsh light. Instead she recommends using photos like the dull foggy scene in her example, captured with flat illumination and subdued colors. In other words, boring images are a great fit for a conversion will be both compelling and realistic.
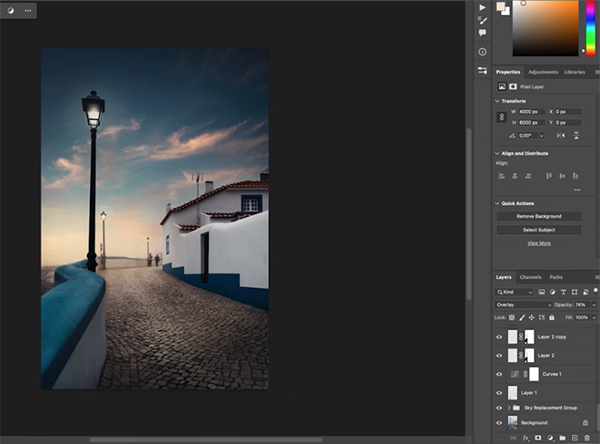
As you'll see, there's a simple method for "turning on" streetlamps. She provides a link beneath the video to her previous lesson that explains how easy this is to do. She also discusses the importance of enhancing a daytime sky and making other important adjustments that turn on a viewer's eyes.
Once you've selected the right photo, Lou's second tip is to add a moon and stars to the image, because these elements are important symbols of the night. In other words, "even if your image isn't very dark, in people's minds a moon and stars mean this is a night image." She includes another link to her earlier tutorial that explains the simple process for adding these "essential" elements.
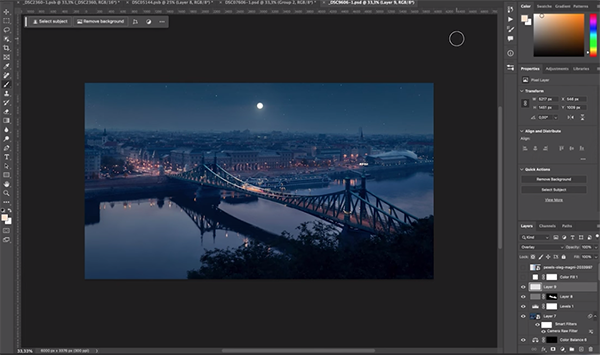
Lou's final tip has to do with the importance of careful color grading when converting a dull day scene into a nightscape. In this regard she says, "if you add blue tones to an image you'll greatly intensify a convincing nighttime mood. She demonstrates how to accomplish this process by using Lightroom's Adjustment Layers sliders.
These modifications rely upon simple Lightroom tools like Color Balance, Selective Color, Hue/Saturation, Gradients Maps and a few others. Obviously, you needn't employ all these tools, but only those that are appropriate for the image at hand.
After watching the video head over to Lou's informative YouTube channel where you'll find a variety of great tips and tricks for elevating your post-processing skills.
We also recommend watching an earlier tutorial from another image-editing expert who explains how to sharpen soft, blurry images with Photoshop's easy-to-use Unsharp Mask tool.
- Log in or register to post comments


![]()
Get the Latest Photo Tips, News & Reviews from Shutterbug!
| Camera Reviews Other Reviews | Mobile Reviews Photography Reviews Columns | News | Features | How-To | Resources |
 © 2025 Shutterbug
AVTech Media Americas Inc., USA
All rights reserved