- REVIEWS
Camera Reviews 
More Reviews Mobile Reviews Photography Reviews - GALLERIES
- VIDEOS
- BUYER'S GUIDES
Here Are 3 Easy Steps to Back up Your Photos so They're Safe
Are all of your digital images safe? If your computer fried today and your cloud service vaporized, would you still have immediate access to all of your photo and video files? If you quickly answered “yes,” you may be kidding yourself—and false confidence could lead to disaster.
A proper backup system is based on careful work practices, not a miracle hardware solution. External components play a role, but success comes from what I call “Image Safety Habits.” Let me break it down into three steps.
Step number one, create two independent backup copies as soon as possible.
As soon as you finish shooting for the day, download the contents of the memory card(s) to a minimum of two totally separate storage buckets. For example, download to your working/editing computer’s internal hard drive and to an external hard drive. Or download to your PC and upload to your cloud storage service. Three storage locations are better, because in the backup game, the secret to success is redundancy.

Evaluate and decide what two (or three) types of storage locations are most appropriate. If disaster strikes one location, does it impact the others? If so, your storage location choices need reconsideration. And don’t be mislead by cool, trendy names. Saving images to the cloud might sound heavenly, but remember that in reality the “cloud” is an array of servers in a warehouse somewhere. Ironically, some cloud servers are located underground.
If you have a RAID (Redundant Array of Independent Disks) storage device in your computer system, confirm that it is configured as RAID 1. When configured as RAID 0, disk read/write operations are souped up but there is zero redundancy. However, in a proper RAID 1 setup, identical data is simultaneously written to two physically different hard drives. So even if one drive goes kerfluie, you have another copy—always.
RAID drives are nice and seem to nail down step one. The problem with this approach is that the data is still in (or attached to) the same computer, even though it is written to separate physical drives. If lightning strikes that PC, metaphorically or in another guise, you risk losing everything.
Along similar lines, some cameras—my Nikon D800 for instance—have two memory card slots and allow you to save identical images to two cards simultaneously as an option. The other options for the second slot are Overflow and Raw file storage.
Time is of the essence. The longer the interval between shooting and downloading, the more opportunity for mishap.

Rest your SD cards. Given the miniscule price of memory cards these days (e.g., top quality 32GB SD cards are currently available online from big name camera shops for around $13) consider “resting” each card for six months after you download it. That means you have an additional copy of an original set of images safely and securely stored for 180 days, just in case the monkey sticks his tail in the fan.
Second step, configure backup software to perform scheduled automatic backups.
Once you have created a minimum of two independent and secure storage locations, use automated technology to keep all current work and works in progress backed up. There are several roads to this end. Personally, I use backup software to save important files to internal and external hard drives at frequent intervals. Separately, I perform periodic backups to a cloud storage space based on my own schedule.
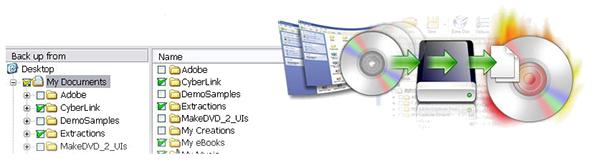
One affordable option is PowerBackup from CyberLink, whose artwork is shown at the top of this column. It’s efficient, reliable and costs just $39. Or you can use the backup software routines that are part of your computer’s operating system, depending upon what platform you use.
Finally, create and rigorously maintain a Grab-and-Go storage device that is not connected to the internet.
By Grab-and-Go I mean a physical storage device that can be rescued at the last minute if the stuff hits the fan. I like the LaCie Rugged family of external drives for these three reasons. First, I have enjoyed perfect, error-free performance from these drives which I have been using for several years. Second, the Rugged drives are enclosed in environmentally-sealed cases that are crush resistant (up to one-ton) and drop resistant. Third, this affordable series is identifiable by its durable orange jacket, making it easier to locate in a panic-filled emergency.

LaCie Rugged drives are available in a variety of configurations (storage capacities up to 5GB) and range in price from $79 to $499. Higher end models include LaCie Rescue Data Recovery Services which protects your data against loss caused by anything from accidental file deletion and viruses to damaging malware, power surges, water damage and more. The LaCie 4TB Rugged USB 3.1 external hard drive is Mac and PC compatible and can be purchased from stores like Adorama, Amazon and B&H for $159.
To help ward off malware and to hide from prying eyes, do not connect your Grab-and-Go drive to the internet. How might that be possible? Easier than you think. When you’re not saving data to it, keep it turned off and disconnected from everything. Close your PC or Mac’s firewall or otherwise disconnect it from the network when you write data to this special, protected drive. Yes, I realize that this method is not 100% foolproof, but it does provide an extra layer of protection and sometimes that means everything.
—Jon Sienkiewicz


![]()
Get the Latest Photo Tips, News & Reviews from Shutterbug!
| Camera Reviews Other Reviews | Mobile Reviews Photography Reviews Columns | News | Features | How-To | Resources |
 © 2025 Shutterbug
AVTech Media Americas Inc., USA
All rights reserved