- REVIEWS
Camera Reviews 
More Reviews Mobile Reviews Photography Reviews - GALLERIES
- VIDEOS
- BUYER'S GUIDES
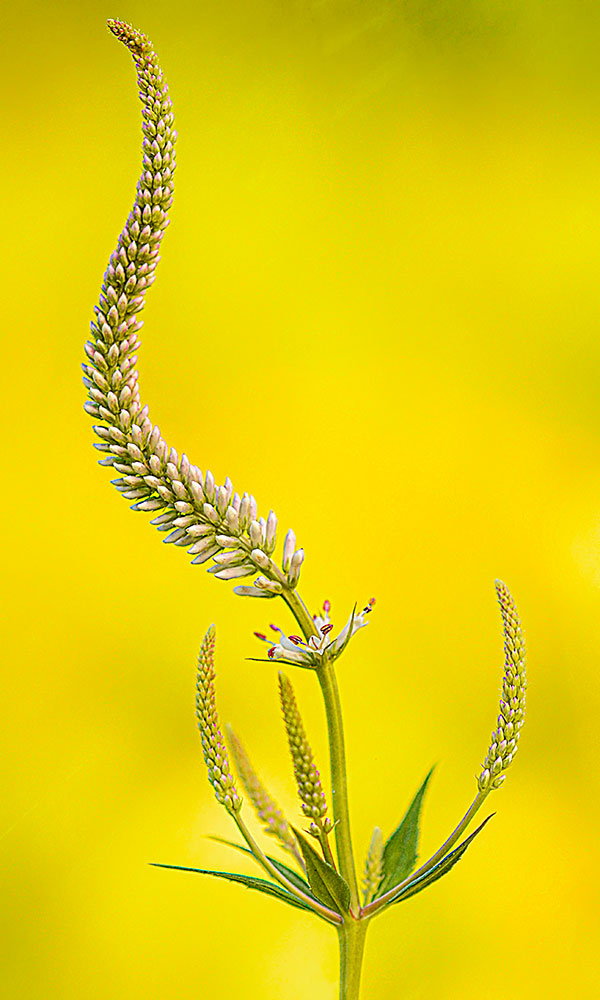
Tales of the Tiny: 8 Tips for Macro/Closeup Photos with Dedicated Macro & Telephoto Zoom Lenses

One of the most appealing aspects of macro photography is that you can find subjects virtually anywhere: local parks, in your yard, even inside your garage or home.
A few of my best-selling photos were taken right in my backyard. This convenience saves me money and fuel (no need to travel far!), as well as time when I have just an hour or two available to take some pictures.
I use both dedicated macro lenses, including the Tamron SP 90mm F/2.8 VC, as well as ultra-telephoto high-power zooms like the Tamron 18-400mm VC. The 18-400mm offers me the flexibility I need for sites like botanical gardens and nature preserves, where I might be tight on space on a narrow path. Plus, with its maximum magnification ratio of 1:2.9, I'm able to capture some amazing tele-macro photos. Both the 18-400mm and 90mm offer stellar sharpness, ensuring I'm able to showcase every unique detail of my subjects.
Here are some of my tried-and-true tips to ensure you, too, can capture compelling macro photos, whether you're using a dedicated macro lens or an ultra-telephoto zoom.
1. Use a tripod.
A nice, sturdy one, if possible. Inexpensive, low-end tripods tend to be unstable. When you're taking macro photos and working at such high magnifications, as well as being extremely close to your subjects, it doesn’t take much to show softness in the details due to camera movement.
2. Don't feel constrained by the time of day.

I prefer the early morning because the temperatures are cooler, and because I can take advantage of the early morning sun if I want to backlight my subjects. There's also usually less wind. Still, because of the small subjects I'm working with, I can control the light by using diffusers and reflectors—meaning all day is fair game. I carry a 12-inch diffuser that controls harsh overhead light from hitting my subjects, as well as a 12-inch silver/gold reflector to bounce light into a subject's shaded areas. I'll also sometimes handhold a special LED box light that's tuned for daylight to add light where I need it.
3. Look for complementary backgrounds.

Seek out for backgrounds that emphasize your subject, either with a color or texture contrast or with a clean simplicity that doesn't distract from your subject. You can also create custom printed backgrounds of your own: Head outside to take pictures of grass and other natural subjects, blurring them out of focus and then printing them on matte paper. I'll use printed backgrounds like these in botanical gardens, where it's often really cluttered and congested with plants. Another thing I'll do in those "busier" situations is pick up my subject, if possible, and "relocate" it to a better place so it has a more appropriate background.
4. Get a handle on the wind.

Even the tiniest breeze can mess with macro, blowing flowers or leaves out of place and causing insects to take flight. If the wind gusts aren't too intense, raise the ISO on your camera a bit higher, which will speed up your lens and help stop the action. Macro photography clamps are also available to attach to flower stems so you can steady the flower. Finally, I've gone so far as to construct a plexiglass windbox (I've got a YouTube tutorial here on how to do this yourself) to keep plants from swishing around in the wind; you photograph the flower right through the box's clear backside. Sometimes, depending on the angle of the sun, there might be a reflection, but simply place a diffuser or reflector on top to cut down on light hitting the back. You can also add a backdrop to the back of the windbox to do the same trick.
5. Seek out subjects that most people can easily ID.

One thing I've picked up over the years is that there are particular macro subjects, like flowers and insects, that draw viewers in, mainly because they know exactly what they're staring at. Having such easily identifiable subject matter creates an automatic connection between your subject and the viewer—and once you've established that initial bond, it's simply up to you to guide them through the image by arranging the image's elements the way you want them.
6. Still, don't be afraid of going for an abstract.

Gravitating toward more abstract images can be especially useful in bad weather, when you might be holed up inside and looking for a way to make creative macro photos. That's when I'll play around with depth-of-field. When you have a subject with interesting lines and textures, you can set your F-stop to the highest numbers to bring everything into focus. But if I want to really leave my subject to the viewer's imagination, creating a soft-focus, dreamy-looking image, I'll shoot in the lower F-stop range for a shallower depth-of-field.
7. Use supplementary props to create visually compelling images.

It gets cold here in Michigan during the wintertime, so I tend to do more of my macro photography indoors. I'll purchase flowers from my local florist and also order from websites that sell feathers, mounted butterflies, seashells, and agate slabs, which I can then arrange into artistic compositions—whether that's putting a seashell in a bowl on my kitchen table or whipping a subject out of my pocket to place on an outside element, like a brightly colored butterfly on a tree stump that might have an interesting pattern but otherwise be drab.
8. Head out no matter what the season.
Take advantage of our constantly changing environment, which is not only altered month by month, but sometimes day by day. I can revisit the same areas every couple of weeks and find new subjects—it's a never-ending cycle as nature transitions from life to death. If you live in a part of the country where the seasons are significantly different, that offers you even more opportunities to find diverse macro subjects. Learn about the life cycles of the plants and animals in your area, and then get out in the field the season is right for them to flourish and abound.


![]()
Get the Latest Photo Tips, News & Reviews from Shutterbug!
| Camera Reviews Other Reviews | Mobile Reviews Photography Reviews Columns | News | Features | How-To | Resources |
 © 2025 Shutterbug
AVTech Media Americas Inc., USA
All rights reserved