- REVIEWS
Camera Reviews 
More Reviews Mobile Reviews Photography Reviews - GALLERIES
- VIDEOS
- BUYER'S GUIDES
Prints That Pop: 10 Ways to Get Better Photo Prints from Digital Images

When teamed together properly, your image files, monitor, image-processing software, and printer can produce prints that you will be justly proud to show. My aim here is to provide tips that will give your prints that extra touch so you can produce wall-worthy work that displays the characteristics of color, tone, and contrast that fully expresses your vision.
The controls and changes discussed in this how-to article are available with most image-processing programs, from basic to advanced. We’ll start with setting up your monitor and ensuring that what you see on the monitor will match what comes out of your printer.
Tip 1: Monitor Setup and Environment
The first step is setting your monitor up in an area that is not subject to ambient light change; that is, not somewhere where the vagaries of daylight will skew your perception of what’s on the screen. Some monitors have “blinders” that help with this: you can also create a hood of sorts with cardboard baffles if need be, or simply work away from window light. If you work under artificial light, keep the lighting consistent, as different bulbs and angles from lamps, etc. can also skew the look of the image on the screen.
This leads us to the next very important step.
Tip 2: Calibrate the Monitor/Computer
Color calibration simply means that the monitor and computer are on the same visual page in regards to color, brightness, and tonality. This avoids having to “eyeball” and adjust variations between the image on the screen and the resultant proof print. If you get consistently too dark prints, you might be tempted to add brightness or to oversaturate flat colors; these are hit-and-miss corrections that waste time and paper. Making adjustments like this may fix one problem and cause another, a rather maddening course.
Tip 3: Screen Brightness and “Too Dark” Prints
This tip ties in with the previous two. Some monitors are set with a high brightness as a default, a reasonable setup for gaming and streaming, but not for printing. If this is not adjusted, then the values will be skewed and you will have the inevitable “prints too dark” problem. (If it looks right on a too-bright monitor, it will come out too dark in the print.) When you set parameters in the calibration software, target the brightness at 100/120 cd/m2 (candela per square meter). This ensures that what you see on the monitor is what the system “sees.”

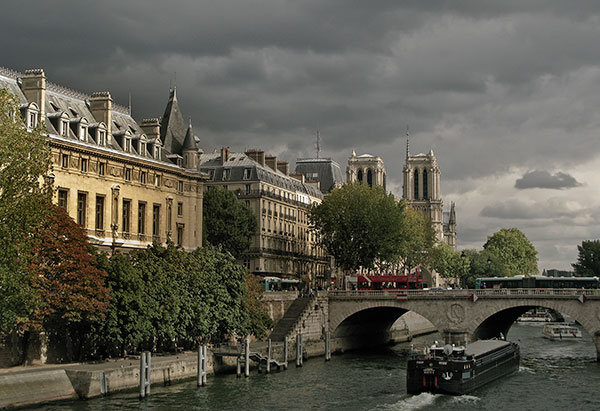
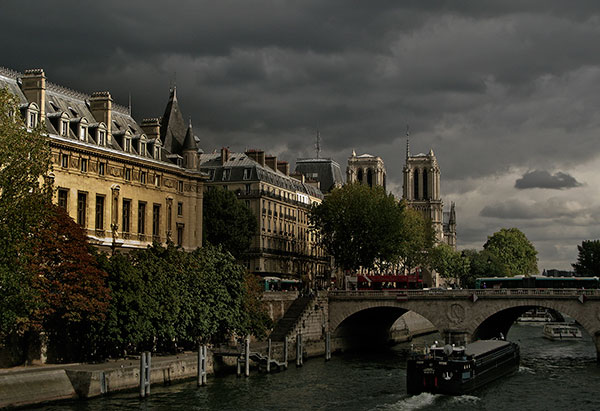
Tip 4: Add Color Richness
Your camera sees and records color based on the settings you have made or simply from the factory default settings that you use: of course, the quality of light in the scene is the most important factor. If you’d like to give the color a boost, an easy way is to use the saturation control in your image-processing software. Even basic image-processing programs have this feature, usually a “slider” control to amp up color richness. Slide it to the right and you’ll see the colors “pop.” Slide it to the left for moderate color richness.
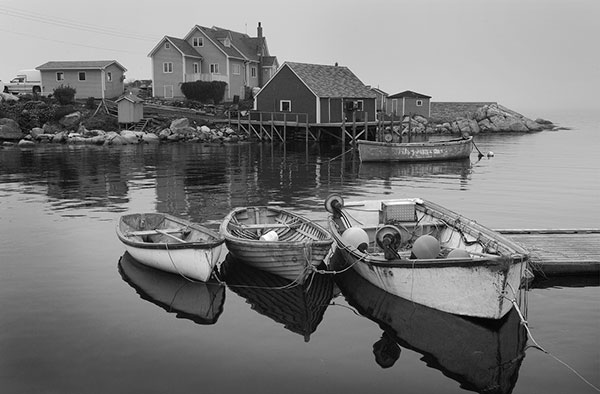
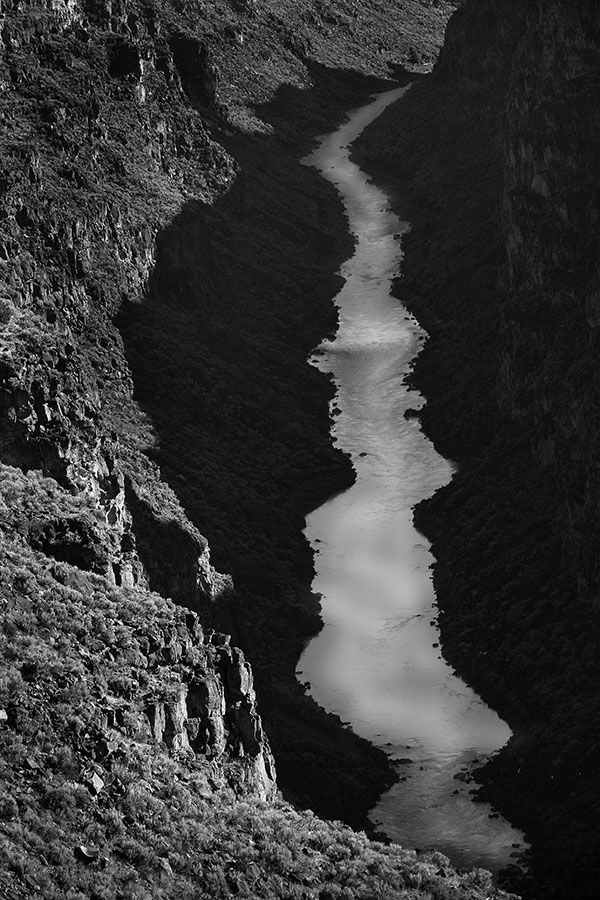
Tip 5: Convert a Color Image to Black and White
Your digital camera records every scene in color. While you can set the camera to “monochrome” to show you the image in black and white, it’s easy to “convert” it when making a print. The advantage of doing it during processing is that you have more control over the tonal quality and contrast of the final black-and-white print. All image-processing programs have this feature: some offer easy, one-click solution presets that offer a menu of different “looks” and styles, while others allow you to fine-tune every nuance of tone and contrast. Programs like Adobe’s Lightroom and Alien Skin’s Exposure make converting and customizing easy, plus offer many presets from which to choose.

Tip 6: Sharpening Your Images
Sharpening is a way to “crisp up” a digital image. Indeed, every digital camera sharpens to a degree when it processes an image before it feeds it to the memory card. You can also sharpen when processing in the computer prior to printing.
However, sharpening is not for correcting an out-of-focus shot: all post-processing sharpening will yield is a sharper blur. And if you go too far you will make the image look harsh and “digital,” making matters worse. In short, don’t over-sharpen.
Experiment with the sharpness control. Use the zoom tool to see if ragged pixel edges show up, or to see if the image looks harsh. Keep in mind that the monitor may not show the full effect of sharpening unless you view the image at 100%. (Note: Some programs have navigators that zoom in for you as you set sharpness.)
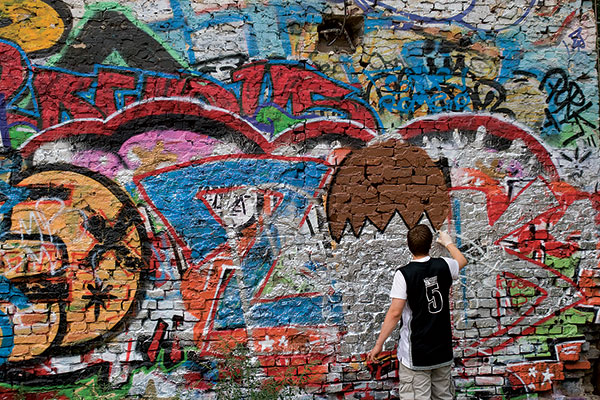
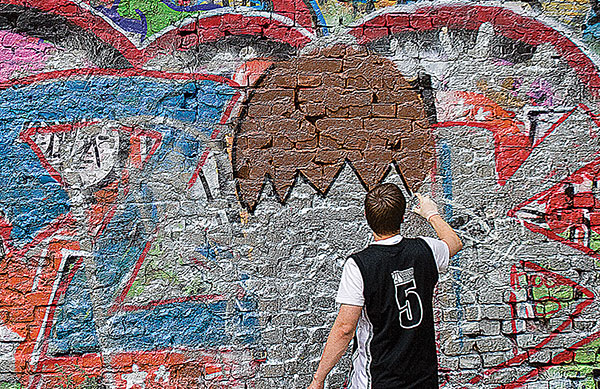
Tip 7: Creative Contrast Control
Contrast is the range of brightness values in a scene and, subsequently, a recorded image. But just because the scene you record is low or high in contrast, you can adjust the contrast in almost any way you like during processing. Of course, some scenes have a “natural” contrast that best serves the work, but changing contrast can bring out exciting elements that you saw when you made the image but that were not fully enhanced by the quality of light when you made the shot.
Tip 8: Printing Profiles
A profile is simply a way to inform the printer and its software how to “see” what paper they are being fed, and each printer and paper is unique in this regard. On the printer side you have ink distribution (which differs according to paper surface and width) and on the paper side you have how that color and tonality is rendered on that surface.
When printing with “branded” papers using Epson or Canon printers, the profile is already preloaded in the printer driver. When you open the print dialog box use “Printer Settings” to choose the paper in the printer setup dialog box and choose “Printer Managed Color” which will then automatically apply the profile.
When using so-called “third-party” papers you must go to the paper company’s website to download the profile that is specific to the printer you use, which, once installed, is included in the profile drop-down menu. This is when you should choose “Photoshop Managed Color.” The option between the two is also available in Lightroom’s Print module and other software programs as well, so you can use any paper you want as long as you go the “profile” route.
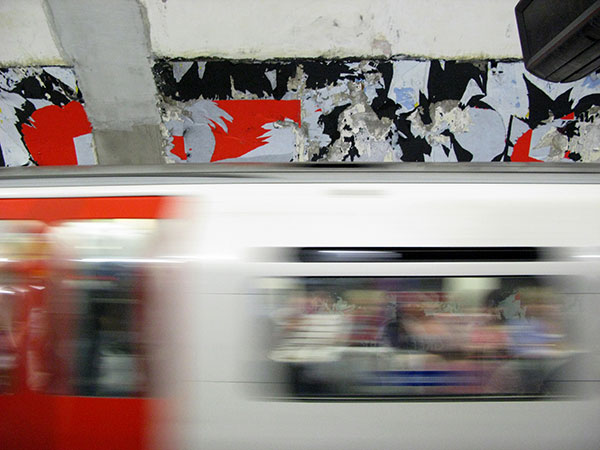
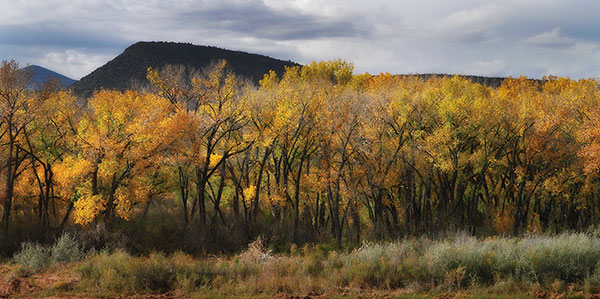
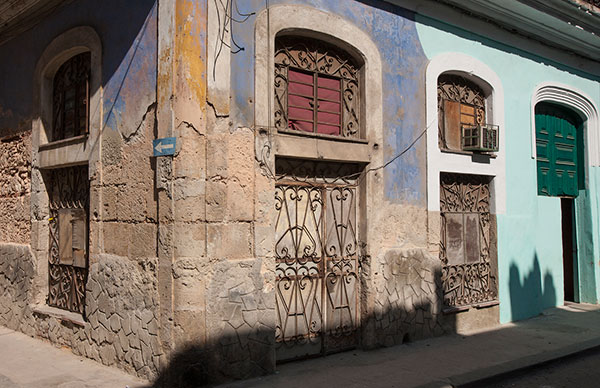
Tip 9: Choosing a Print Surface to Match the Image
The reason to understand how to apply the profiles mentioned in Tip 8 is that we are fortunate to have so many printing surfaces to choose from—glossy, matte, textured, stippled, watercolor, even metallic, and more—and matching paper and printer through the use of profiles is the key to success with each.
The question then becomes: how to match paper surface to the image for the best effect? This is a tough one to answer because we all have our own taste and “look” we want to create. Some folks like matte for nature and intimate portraits; glossy, with its snappy edges, for urban architecture; watercolor for floral and bucolic scenes; and metallic for abstracts. But you could also swap one for the other and describe another person’s taste. Matching surface to image is a key ingredient in creative printmaking and finding just the right paper for your images is how you can create personal, expressive prints that are uniquely yours.
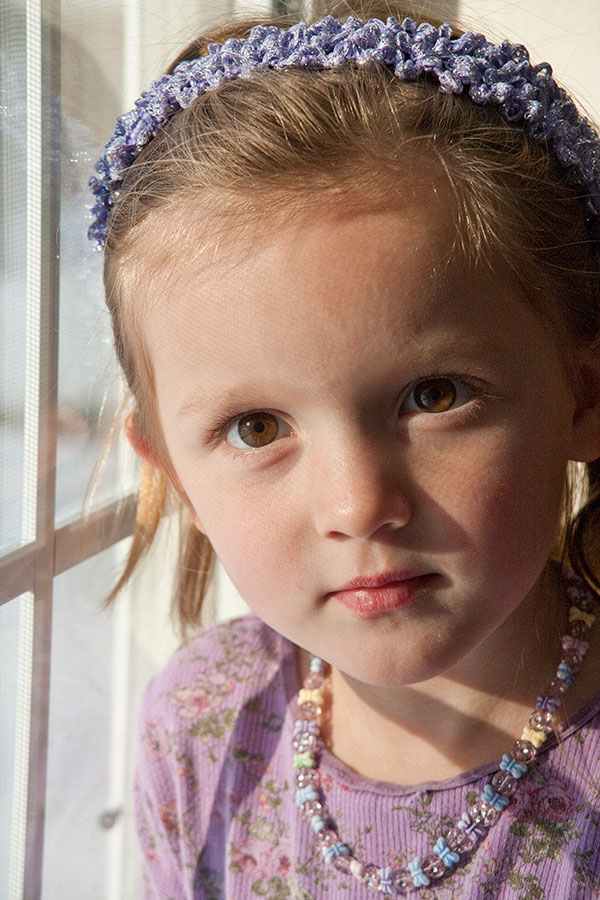
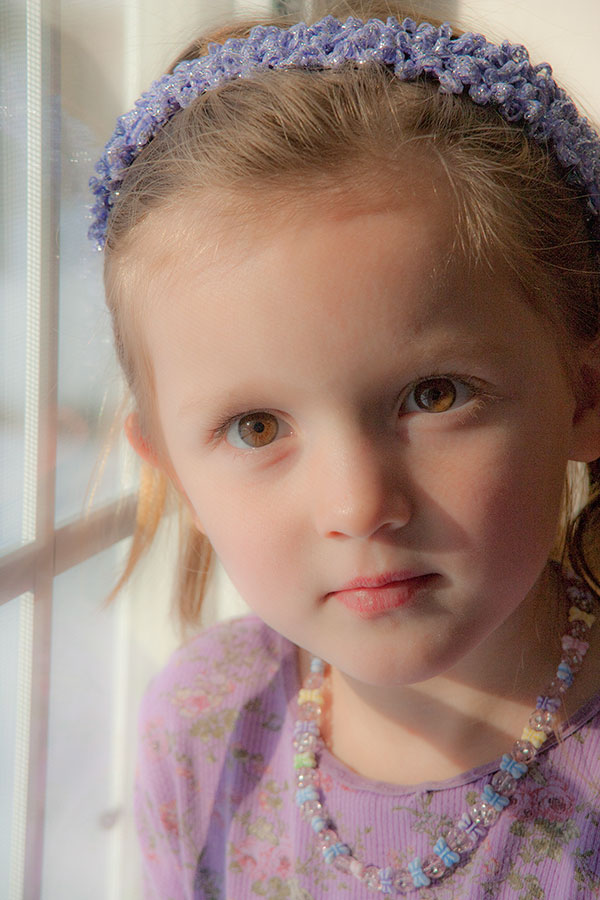
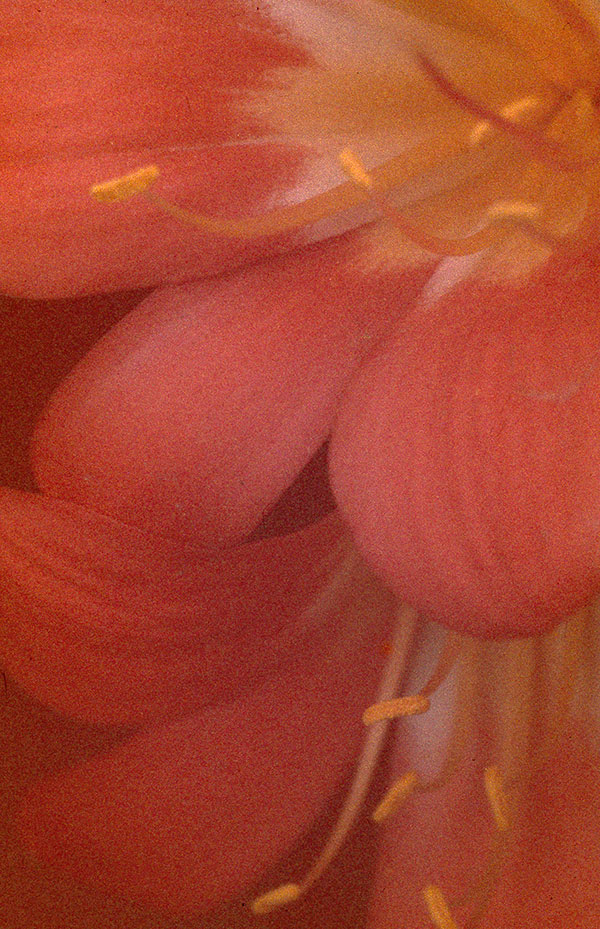
Tip 10: Use Clarity Controls for Portraits
When you process Raw images in most Raw processors you have access to a Clarity slider control. Sliding to the right increases clarity, a type of subtle sharpness enhancer. But when you slide to the left you add degrees of softening, a kind of blur effect. This is an easy and quick way of adding a pleasant glow to portrait images using one control that, given the right lighting and subject, can add just the touch you need for a warm and intimate portrait.


![]()
Get the Latest Photo Tips, News & Reviews from Shutterbug!
| Camera Reviews Other Reviews | Mobile Reviews Photography Reviews Columns | News | Features | How-To | Resources |
 © 2025 Shutterbug
AVTech Media Americas Inc., USA
All rights reserved