- REVIEWS
Camera Reviews 
More Reviews Mobile Reviews Photography Reviews - GALLERIES
- VIDEOS
- BUYER'S GUIDES
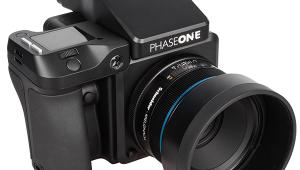
Phase One’s 645 AF With P 65+ Digital Back; The Megapixel Race Is Still On
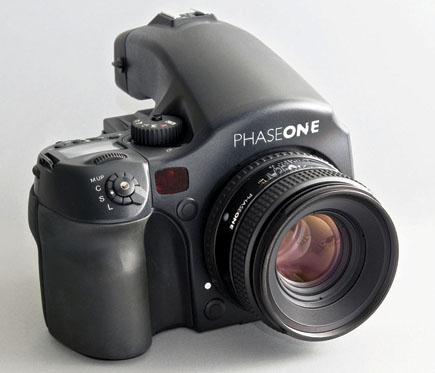
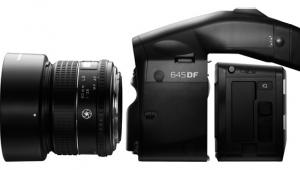
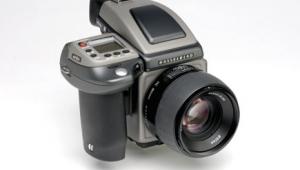
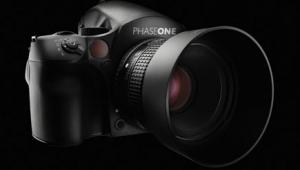
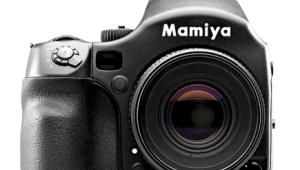
On the surface, the Phase One 645 AF medium format D-SLR is the identical twin to the Mamiya 645AFD III, albeit with the Phase One logo. Step to the rear of the camera and you’ll find what sets them apart. Attached to this body is Phase One’s own P 65+. At 60.5 megapixels, this back, along with those of slightly lesser resolution, marks the turning point between film wannabes and true contenders to the throne. (Just in case, however, this is a Mamiya 645 at heart and supports optional film magazines.)
 |
|
 |
|
|
If it weren’t for the high initial cost, equal to several top-of-the-line Nikons or Canons, I’d say chuck every other camera you own and buy this one. But let’s be practical. Every camera has its limitations, and we can’t simply count our eggs without opening the carton and really seeing what’s inside. Since I’d already tested the aforementioned Mamiya camera in a typical photo studio (see the September 2009 issue of Shutterbug), although with an entirely different back, I thought that I’d take a different tack this time around. So I returned to one of my favorite haunts, the American Museum of Natural History.
 |
|
|
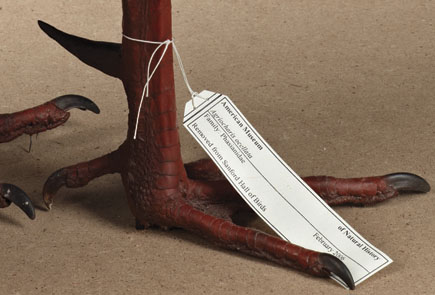
As before, I secured the necessary permissions, particularly for the use of a tripod in the exhibit areas. Once again, I called upon the talents of the museum’s photo department, specifically Matt Shanley and head honcho Denis Finnin. We even had an assist from Paul Sweet and the Department of Ornithology, which provided a turkey for us to shoot—photographically, of course.
We spent much of our time with the dinosaurs, while reacquainting ourselves with that 94-foot-long blue whale model in the Milstein Hall of Ocean Life. I also trekked outside to shoot the Rose Center (home of the planetarium) at “magic hour.” When we reviewed the images, Finnin in particular remarked on the superb details the camera captured. But before we delve further into this shoot, we need to take a closer look at the camera and lenses, and that amazing Phase One back.
 |
|
|
While the camera can also be tethered to a computer, all testing was done with captures recorded to a Kingston Ultimate (266x) CompactFlash card. An 8GB card proved adequate to the task, despite the large storage requirements at highest resolution. Raw conversion and editing were done in Phase One’s Capture One 4.8 PRO on a Gateway P-7807u FX Edition running under 64-bit Windows Vista.
Front To Back
The Phase One 645 handles with aplomb. The rubberized grip is nicely contoured and quite comfy to grasp. The shutter release is responsive and even accepts a standard cable release—a nice touch in the digital age and one that came in handy. All the camera body controls are neatly and logically arrayed, so you don’t have to search for them. The Shooting mode dial, which includes X-sync and custom functions, is housed at the top, adjacent to the LCD data panel, whereas drive functions, including mirror up and off position, are governed by a dial that surrounds the shutter release.
 |
|
 |
|
|
There are additional function buttons, among them exposure override, behind the top panel. Add to that the two dials, front and back, primarily for setting exposure (along with secondary functions), and you pretty much have it—all easily reached with one or two fingers of the right hand. In fact, I don’t recall a camera function that wasn’t readily accessible. All in all, the camera handled superbly. Good to see my opinion of the basic body hasn’t changed since my initial experience with the Mamiya 645.
Now, let’s move to the back. You may recall that the Leaf back on the Mamiya DL28 had a touch-sensitive LCD. The Phase One back is entirely button-controlled. The simple four-button array makes this interface remarkably simple to operate—at least for basic functions. Just follow the on-screen menu prompts. The LCD is large enough to present a clear view of the captured image, although it is no substitute for shooting tethered and using a large monitor for playback.
|
| |||||||||


![]()
Get the Latest Photo Tips, News & Reviews from Shutterbug!
| Camera Reviews Other Reviews | Mobile Reviews Photography Reviews Columns | News | Features | How-To | Resources |
 © 2025 Shutterbug
AVTech Media Americas Inc., USA
All rights reserved