The Mysteries Of Long Exposure
The Mysteries Of Long Exposure
Expand Your Image Imagination
by Art Rosch
The human eye sees light in the moment. Film or sensors accumulate light through an entire exposure, as if it were a memory. Photons continue making impressions wherever they land on the sensor or film. Moving objects leave a distended, time-lapse image of themselves. Should you so desire, you can turn out all the lights in your room, set the camera shutter to Bulb and write your name with a flashlight. This property of film/sensor opens an amusement park of possibilities. Long exposure photography is limited only by your imagination. It’s easy, forgiving, and requires no special gear beyond a tripod and remote shutter release.
Racers |
|
 |
|
|
Golden Gate Bridge At Night |
|
 |
|
|
There are certain classic subjects that turn up in long exposure work: tail lights, waterfalls, ocean water washing over rocks at twilight. One of the important principles of long exposure work is to juxtapose moving and stationary subjects. An example of this is a shot of a subway platform: the train is zooming past, leaving a wavy line of windows, doors and blurred passengers. At the platform, waiting people and empty benches stand still and sharp. The contrast of stationary subjects with moving phenomena gives the image its narrative power.
Dark Ship |
|
 |
|
|
Fiery Curves |
|
 |
|
|
If one is carefully observant, there is a plethora of subjects for long exposure imaging. Clouds are especially rewarding. Fog, bicycles, fountains, airplanes taking off, all of these are worth exploring if they might become colorful streaks or smears. I never know what the result will look like until after I’ve made the exposure. Using a digital camera makes this process much easier—I can check the image instantly, and if I haven’t gotten the effect I seek, I adjust my exposure accordingly.
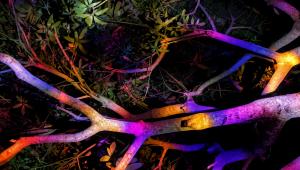
“Light Painting” is a carefully designed form of long exposure photography that requires a lot of patience. Let’s say that I’ve conceived an idea in which I will use different colored flashlights. An example might be a pile of billiard balls stacked in a geometric pattern, atop a black reflective surface. I prepare my scene; I’ve got red, blue, and green gels covering three flashlights. The studio lights go down and I make my passes with the flashlights. Exposure might be 5-10 seconds per flashlight, per each streak. I know that I’m going to make a number of attempts with this technique until I’ve zeroed in on the perfect image. The results will be surprising. The end product of my conception may not resemble my vision; then again, it may be far better.
The Stroll |
|
 |
|
|
Sylvestri Creek |
|
 |
|
|
There is no formula for this kind of work. I frequently rely on ISO 400 as a default setting, with apertures between f/6.3 and f/16. It’s wise to bracket, because there are many situations in which a little Photoshop can be applied to layer elements from one exposure to another.
Tech Tips
If shooting digital, use the raw format if it’s available. There are several reasons for this but perhaps the most compelling is the flexibility of white balance. If shooting in an urban setting, the light is usually compromised by the orange pallor of sodium vapor lights. This is easily compensated by changing color temperature during raw conversion. Take out the offending color cast and bring it to the level that is most pleasing.
The Thousand Year Breath |
|
 |
|
|
VROOM! |
|
 |
|
|
There is a reason why I gravitate toward ISO 400. Shortening an exposure diminishes the risks of a gust of wind or bump of gear to ruin a shot. So much long exposure work is done outdoors so this is a real concern. I find myself frequently shooting in the Golden Gate Headlands, where winds can whip up into fierce gusts. I have an all purpose cape that I carry to act as a windbreak when I shoot outdoors. I’m like Batman spreading his wings; the wind whips in a frenzy, but my tripod is protected. I can go up to ISO 800 when needed, but I think pushing it farther invites too much noise.
It takes only 1-2 seconds to blur moving water or moving tail lights. Since the dynamic range of shooting lights at night is so huge, pay special attention that you don’t overexpose and blow out your highlights. Don’t rule out the use of polarizers or neutral density filters. They can come in handy. Another fun gizmo is a star filter that can turn discrete spots of light into bursts of diffusion spikes.
Zizz! |
|
 |
|
|
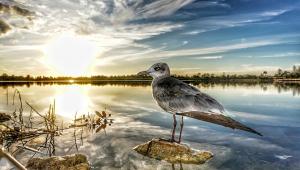
Most exposures tend to land between 1 and 30 seconds. Whatever the length of your exposure, you need to consider the cumulative effect of light. A birthday candle in a room will look like a blown floodlight after 60 seconds. Moonlight is a great boon to night landscape photography. Moonlight on water is enticing. Any light on water is enticing, but the water needs to be fairly still or the results will tend to look chaotic.
Fog Serpent |
|
 |
|
|
End Of The Long Night |
|
 |
|
|
So take your tripod and remote and go out in the low-lit hours. Long exposure photography can be done in the country, the city, at airports, freeway overpasses, almost anywhere. You just need to keep your eyes open.
To see more of my images, visit my website at www.artsdigitalphoto.com.
- Log in or register to post comments


