- REVIEWS
Camera Reviews 
More Reviews Mobile Reviews Photography Reviews - GALLERIES
- VIDEOS
- BUYER'S GUIDES
Make Natural-Looking Zoo Photos with This Easy Automated Photoshop Trick (VIDEO)
Not everyone has an opportunity to go on safari to photograph rare and wild animals, but most of us have a zoo nearby which is often the next best thing. The problem is that most images shot at the zoo look like were shot at the zoo.
While it’s not cool to pass off images of captive animals as though they were taken in the wild, there’s an easy method for improving zoo photographs by deemphasizing artificial elements. As you’ll see in the video below, one way to do that is by blurring unappealing backgrounds.

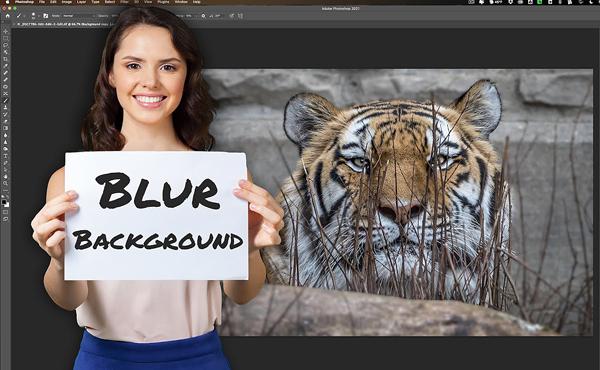
In the quick tutorial below, image-editing expert Anthony Morganti uses a hidden Photoshop automation to significantly improve his image of a captive tiger taken at the zoo. And once you get the hang of this tool, buried in a Photoshop dialog box, you can use it to improve unsightly backgrounds in many other outdoor photographs you shoot.
Not only does this automated technique make the background appear more natural, it also really makes the tiger stand out. Morganti begins by clicking on Photoshop’s Help Menu at the top of the screen, and then he selects the Hands-On Tutorials option. Once you’ve done that, a dialogue box will appear with Quick Actions as one of the choices.
After choosing Quick Actions you’ll see the Blur Background option. From there the magic begins as Photoshop automatically locates the main subject in your shot (the tiger), applies a mask almost instantly, and blurs the background quicker than you can say “blur the background.”

The result isn’t always perfect, as in this instance in which the tiger’s protruding ears were slightly blurred along with the background. But because this method uses a mask, you can make whatever refinements you desire. Morganti demonstrates how easy it is to do that, and end up with a really nice shot.
This quick fix is about as simple as it gets, and you’ll definitely want to give it a try with photos shot at the zoo and elsewhere.
After watching the video pay a visit to Morganti’s YouTube channel, where you’ll find more helpful tips and tricks. And be sure to check out the earlier tutorial we posted, explaining how to use Photoshop’s Apply Image Tool for fast and easy exposure blending.


![]()
Get the Latest Photo Tips, News & Reviews from Shutterbug!
| Camera Reviews Other Reviews | Mobile Reviews Photography Reviews Columns | News | Features | How-To | Resources |
 © 2025 Shutterbug
AVTech Media Americas Inc., USA
All rights reserved