- REVIEWS
Camera Reviews 
More Reviews Mobile Reviews Photography Reviews - GALLERIES
- VIDEOS
- BUYER'S GUIDES
Image Processing Apps: Mobile Editing

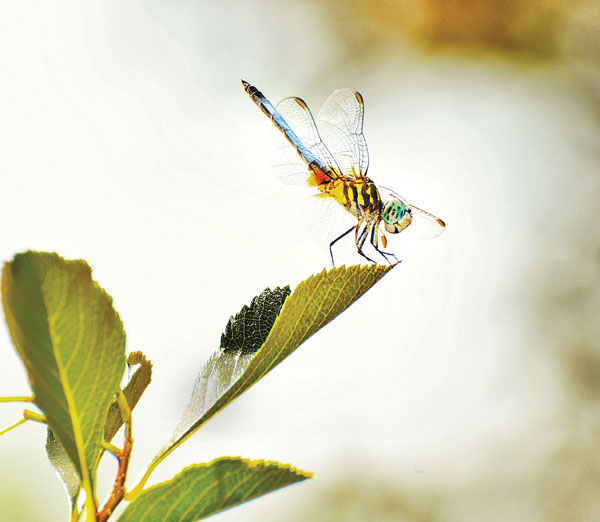
A colorful dragonfly alighted on a tree branch adjacent to the patio, so I went inside to grab my Nikon D300 and attached a Tamron 70-300mm lens. With strong backlighting, flash fill was mandatory, so I added an SB-900 speedlight to the mix.
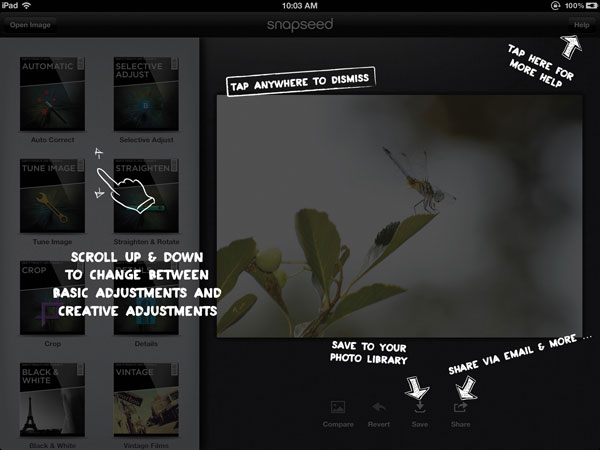
I needed to fine-tune the image in terms of exposure, contrast and saturation. And even with the lens zoomed out to 300mm (equivalent to 450mm in DX/APS-C format); the dragonfly was still fairly small. That meant I’d also need to crop the image. For this article, I decided to do all of this on my Apple iPad (www.apple.com) with Nik Software’s Snapseed (www.snapseed.com). Note that this software can be used on all sorts of mobile devices, or even on your laptop or desktop computer. But I wanted to get a feel for mobile editing, so that’s why I went the iPad route.
Note that I didn’t feel it necessary to use all of the adjustments available in the software, such as Automatic Color and Contrast Correction, Straightening, or Tilt-Shift Modifications, but I had plenty to work with using only a handful of adjustments. Let’s see how it worked out.
Step 1
Open Image
Various apps (available through the App Store) will let you wirelessly transfer images from your Mac to the iPad. Or you can use Apple’s Camera Connection Kit. For the latter, you’ll need an SD card onto which you’ve loaded or captured the images, which is what I did, copying them from my iMac. Once the images are on the iPad, select Open Image, and then Photo Library. I chose this image because I liked the way the dragonfly’s body and the leaf formed a “V” shape, and planned to make that the focus of the picture, [1].
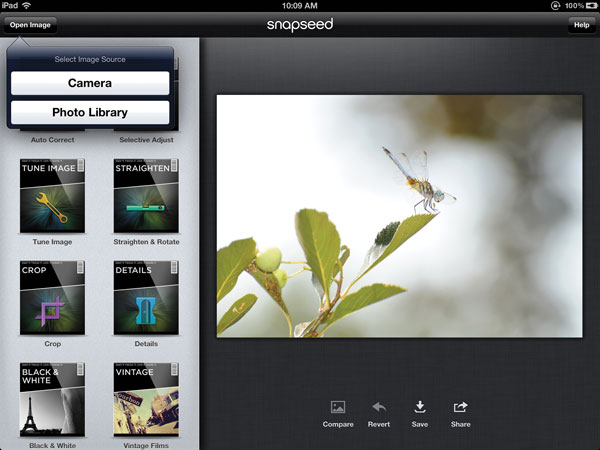
All Photos © Jack Neubart
Step 2
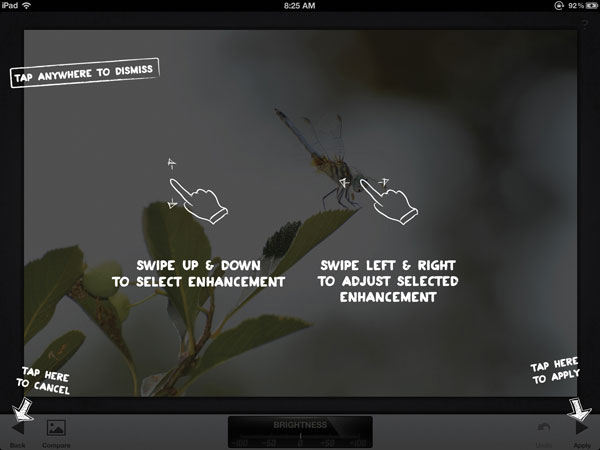
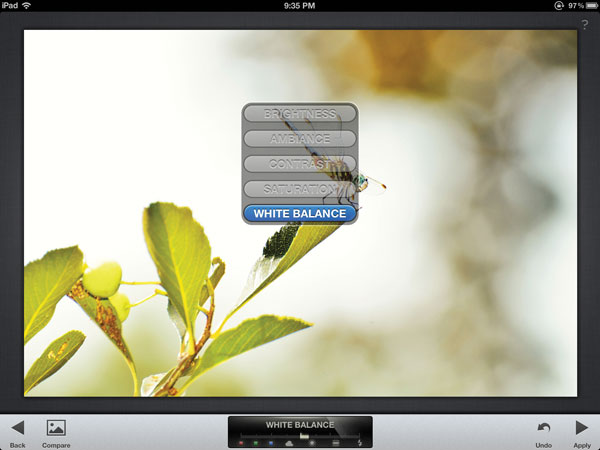
Basic Corrections
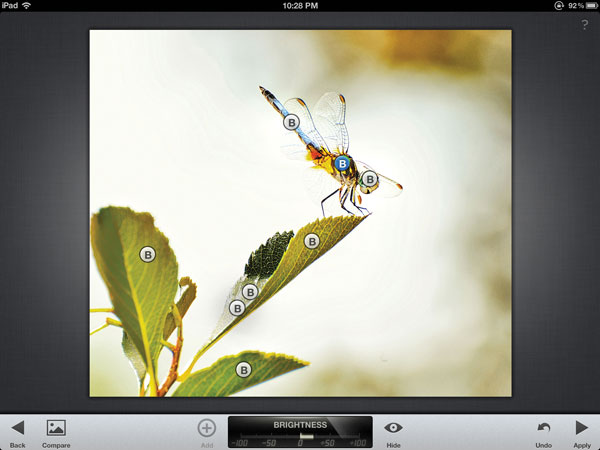
Many of the adjustments in Snapseed are global, meaning they’re applied to the entire image. A good way to begin is to make the most essential corrections first. I bypassed the automatic corrections (although you might like to start there). Instead, I began with Tune Image, where I made the adjustments as needed to Brightness, Contrast, Ambiance (a different twist on Contrast), Saturation and White Balance. I also sharpened the image in Details, where I gave it a bit more punch and grittiness with Structure, [2], [3] and [4]. (Note: you don’t have to follow any specific order when making basic corrections.)
Step 3
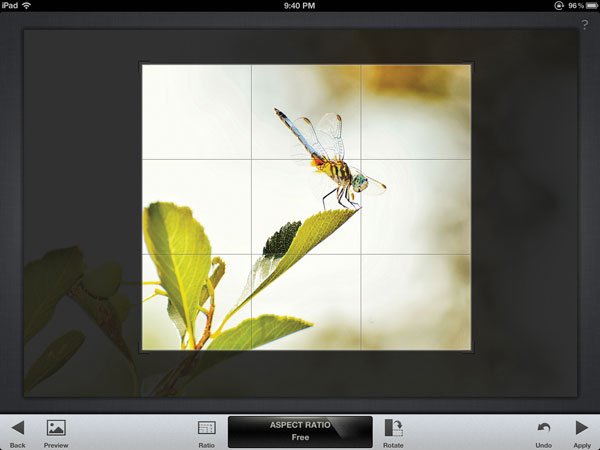
Crop
Then I cropped the image to focus attention on the dragonfly. I wanted the almost calming effect a square image conveys, rendering the dragonfly more approachable, [5]. (Note: you can crop the image at any time, but do so before adding special effects.)
Step 4
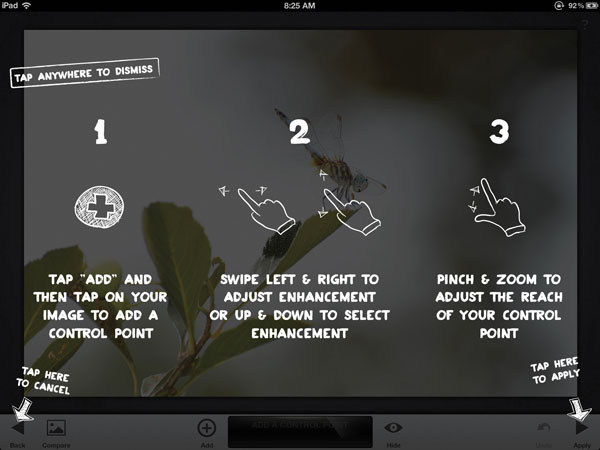
Selective Adjust
With Selective Adjust you can target specific tones and colors, adjusting Brightness (B), Contrast (C) and Saturation (S), using Control Points. This step may at first appear intimidating, but it’s really quite simple after you’ve done it once or twice. And the degree of control this procedure affords over the image is unrivaled, since it lets you adjust highly defined areas.
To start out, tap on the Plus icon (bottom of screen) to add a Control Point, then select the area in the picture that you want to adjust and tap it to add that first Control Point. The active Control Point is blue; inactive Control Points (those you’ve added before or after the one currently being adjusted) are white.
Tap on a Control Point to reveal the options: Cut, Copy, Delete and Reset. If you want to make similar adjustments to many areas of the picture, just Copy and Paste in the appropriate areas, which I did here for one set of corrections on the leaves, and for another set on the dragonfly. You can use Cut to Paste it elsewhere, but it’s easier to move a Control Point where needed.
Press down lightly on the Control Point and a magnifying glass with crosshair appears to help you more accurately place that Control Point. It’s not critical, but having said that, you will detect certain nuances and changes as you move the Control Point even slightly.
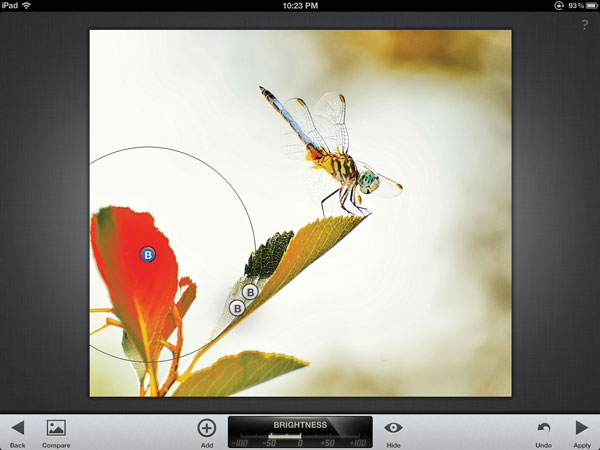
Now, this step is very important: select an active Control Point (or tap on it to make it active), and pinch to resize the selection area. A circle defines the entire zone reached by this Control Point. But the actual area affected is shown in red. You’ll note that it feathers outward, having less and less effect toward the edges. You’ll also note that the selection stops when it hits a discernibly different color or contrasting tone. That means the effect terminates at that point. And keep in mind that Control Points can overlap and reinforce (or weaken) each other. This is helpful when you want to better control the edge of a selection or ensure continuity over a broader area.
You’ll see the letter B, C, or S embedded in the Control Point. Those are the 3 adjustments, showing the last one that you modified. You can always go back and change them—provided that you did not hit “Apply”. If you run out of the allowable number of Control Points, simply Apply the changes, then go back in a second (or third) time.
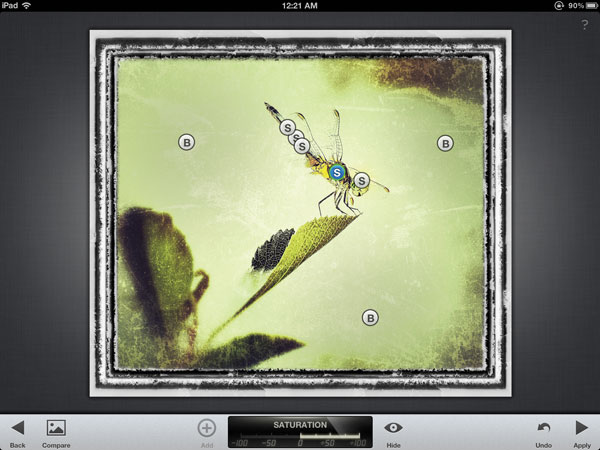
If you momentarily tap on “Hide”, the Control Points are made invisible but the adjustments remain in effect, [6], [7], [8] and [9].
Step 5
Center Focus
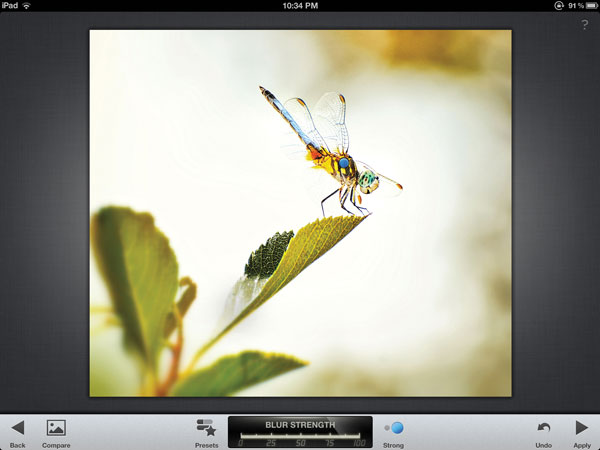
Now we start adding some effects. Here is where I was further able to direct attention to the dragonfly, by blurring the surrounding foliage, particularly the lower part of the branch on which the insect is resting, [10].
Step 6
Adding Effects And A Frame
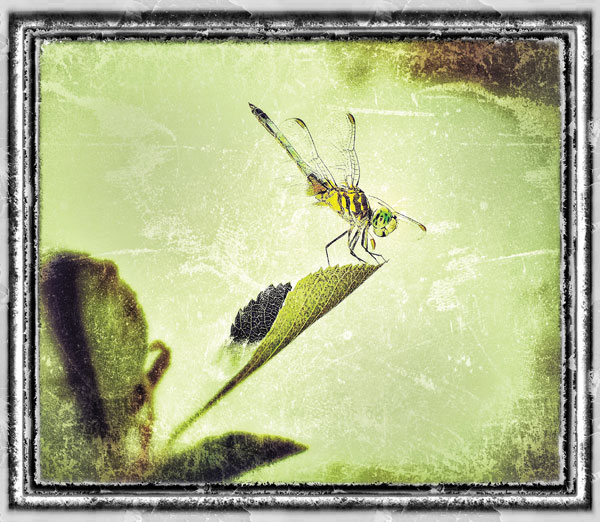
Actually, I’ve combined many steps here. Always add frames last to keep them intact. In this instance, I added Vintage Films and Grunge effects. Then I added the frames, repeating this last step a few times to add several layers of frames for added depth. Each effect has parameters so you can season the image to your taste. A welcome byproduct: I was also able to fill in that white void with color and texture, [11].

Step 7
Finishing Touches
I wanted the image to have a bit more pizazz. So I selectively adjusted specific areas on the dragonfly to highlight them, while toning down the surrounding areas [12]. Then I added Structure for a grittier feel.
Step 8
The Finished Product
I was quite pleased with this result. It really didn’t take that long to achieve an image that I’m proud to share, [13].
Tips On Working With Snapseed On An iPad
Snapseed from Nik Software is a digital enhancement app with an inviting price tag. You can’t use it to paint, draw or create composites. And while a stylus is not absolutely necessary, I found that it does help for added precision and to minimize smudging the screen. As with all iPad touch-screen procedures, adjustments are made by tapping, swiping and pinching. As you may know, you will need 2 fingers to “pinch” the screen. This action helps define what areas of the picture are affected by certain settings.
You can work in Landscape (my preference) or Portrait mode. Menus are found on the bottom of the screen. The key steps in this article are found in the Menu on each screen. Additional options may apply for specific settings.
“Apply” finalizes each step. If you hit “Back”, the adjustments will not be applied.
Press down lightly (don’t tap) on the “Compare” icon to see before and after prior to applying the adjustment/effect.
The “Undo” icon/button serves 2 purposes: undo and redo. Press down lightly and the choice of actions will pop up (tap your selection).
For more information visit www.snapseed.com
Price: $4.99 (via the App Store)


![]()
Get the Latest Photo Tips, News & Reviews from Shutterbug!
| Camera Reviews Other Reviews | Mobile Reviews Photography Reviews Columns | News | Features | How-To | Resources |
 © 2025 Shutterbug
AVTech Media Americas Inc., USA
All rights reserved