- REVIEWS
Camera Reviews 
More Reviews Mobile Reviews Photography Reviews - GALLERIES
- VIDEOS
- BUYER'S GUIDES
How To Buy A Filter For Your Camera Lens

For the legions of photographers who used film cameras in the past, a screw-in type photo filter is as normal as fingerprints on an iPhone. But for those who started their photographic journey with a digital, even the word filter can be confusing. Does it plug into Photoshop or screw into a lens? Are they like the AA filter that covers an imaging sensor, or do they fit in a Mister Coffee? If you don’t own any filters, you’re missing some fun. Here’s a quick guide to buying one for your DSLR camera.
This info will help you make informed decisions about camera lens filters.
Size
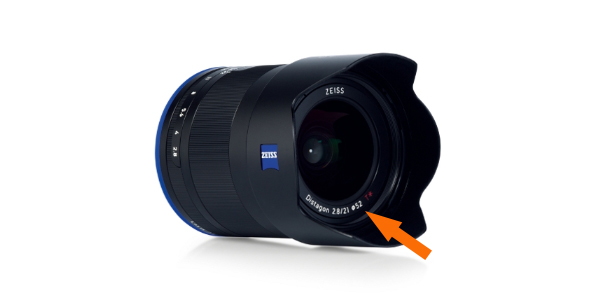
Since filters screw into the threads on the front of the lens, determine the size you need. This is often (but not always) marked somewhere on the lens itself as a number preceded by the ø symbol. If you can’t find it there, check the lens specifications in the owner’s manual. Tip: the filter size is sometimes written on the back side of the lens cap.
Okay, that’s the only hard part. Everything else is just the fun of picking out what effect you’re trying to achieve and selecting a filter that delivers that result.

UV Haze / Skylight 1A
Hands down, the most popular filters in the world are the nearly-clear UV Haze and Skylight 1A filters. They are also the most boring. The UV is very slightly yellow; the Skylight is very slightly pink. Originally intended to mitigate the effects of atmospheric haze (which is scattered blue light) these filters became popularized as “protective filters” and pushed heartily by camera salespeople. We won’t examine the merits of that argument at this juncture. Let’s just say that you won’t see much of a difference with or without this filter in place.

Polarizer PL
Absolutely the single most useful and functional filter you can buy, the Polarizer blocks scattered lightwaves and delivers more natural, nicely saturated colors, without the shiny component (i.e., glare caused by non-parallel lightwaves). That’s assuming that you rotate it to the correct position. Also darkens a blue sky without discoloring the puffy white clouds and lets you see a bit below the surface of water.
Requires more exposure (your camera will calculate the correct setting automatically) so don’t plan to use it in dark situations where it would be of virtually no value, anyway.
If you tried a PL filter in the past and found it challenging, take another look at the current generation. Many are thinner and require less exposure compensation.
Neutral Density (ND)
As the name implies, the color is neutral. Sold in various densities (density = darkness in this case) the ND filter reduces all light that reaches the camera’s sensor equally thereby allowing you to use a slower shutter speed or larger aperture. Useful at the beach on a bright day. Also available in variable density (darkens as you rotate) and graduated (dark on one end, completely clear on the other so you can block strong light from the sky without affecting the brightness of the foreground).
Infrared
If you’re lucky enough to have a camera with a sensor that’s sensitive to IR you can shoot infrared pictures with this filter in place. An IR filter, the Hoya R72 for example, blocks nearly all visible light and allows only IR to pass.
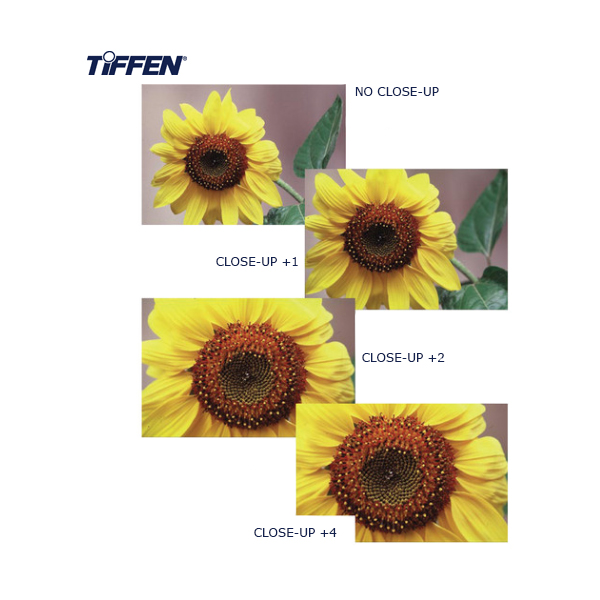
Close-up Filters
Not really filters per se, but they do screw onto the front of the lens, and many camera people refer to them as filters. These allow you to focus closer with any lens. Commonly sold in sets of three, each marked with a number that denotes its strength, they can be used in combination to achieve various ranges. The piece marked +1 is the weakest, +4 the strongest. Used together in a stack they equal +5 which is stronger still, and consequently focuses closer. I do not recommend using more than two at once, but it’s widely practiced.
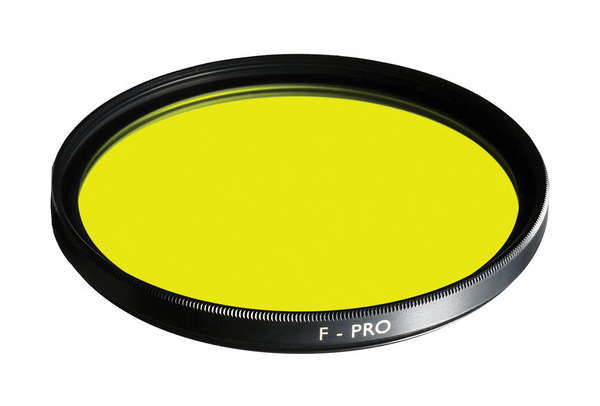
Solid Color
Originally used with black and white film, solid color filters can be used when shooting in Monochrome mode. Each color lightens its own hue and darkens its complement, so a red filter makes green tree leaves darker and apples lighter. A yellow filter makes a blue sky darker and a lemon lighter. And so forth.
If you use a solid color filter without setting your camera on Monochrome, the entire image will be colored. Try it.
Your camera may have some built-in digital color filter simulators when you switch to Monochrome mode, but the effect is never exactly the same as using a real glass filter.
Color Correction (Warming and Cooling) Filters
Back in the day when we used “Daylight” film in the sunshine and “Tungsten” film indoors under incandescent lighting, you’d get bad results if you reversed the two. Daylight film shot indoors produces muddy, reddish-brown images. To counteract the laws of physics, a cooling (blue) filter is used. Likewise, Tungsten film shot in daylight turns out cold and blue, so warming (amber) filters are used to negate the bluish tones. Hence the name Color Correction filters.
In practice it’s much more scientific and precise than that, but that’s the thumbnail. Today you can use warming and cooling filters creatively to make scenes warmer (more amber) or cooler (more blue). Needless to say, these are not terribly popular. But using an 85A warming filter on a sunset produces a dramatically enhanced orange appearance. And an 80B cooling filter can light up a sunrise or make your ex look like a vampire.
A subcategory of Color Correction Filters is the range of magenta filters designed to offset the excessive greens transmitted by fluorescent light. They are appropriately named FL or Fluorescent Light Filters. Fluorescent tubes are available in several types and colors, so there are several different FL filters on the market. Similarly, magenta filters that remove the excessive blue-green of underwater photography are available.
BTW, if you’re stuck in an office that has fluorescent lighting and you have no alternatives, buy a set of 5000 Kelvin tubes. They are approximately the color of daylight and they are not that expensive. They do make a world of difference.
Special Effects
There is an entire subclass of glass filters that fall into this category. Star Effect (or Cross Screen) filters are diffraction gratings that cause point sources of light to appear as tiny stars, as in the image at the top of this column which was shot with a Hoya Cross Screen. Soft Focus filters add mystery to portraits and smooth out troubled skin. Graduated Filters add color to a section of an image but leave the rest undisturbed. The Cokin Creative Filter System, mentioned below, offers the widest range of Special Effect filters imaginable.
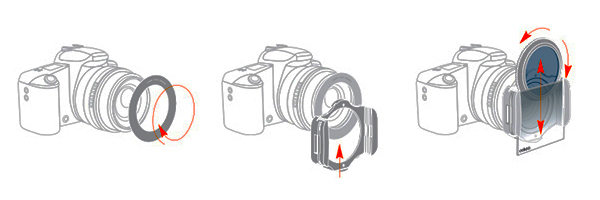 Alternatives to Screw-In
The Cokin filter system uses square filters (and a few round ones, too) that slip into a universal filter holder which is held in place by an adapter ring. The advantages are many, the chief of which is that you can use the same filter on lenses of different sizes simply by buying the appropriate adapter ring—a much lower cost option than buying multiple filters.
As you’ve learned by now the world of camera lens filters is immense. And we haven’t even gotten into the material they are made from, how they work from a scientific point of view, homemade filters (which are easy and fun) and many other aspects. Maybe we’ll revisit this subject. In the meantime, freshen up your summer photography with a Polarizer. You won’t regret it.
—Jon Sienkiewicz


![]()
Get the Latest Photo Tips, News & Reviews from Shutterbug!
| Camera Reviews Other Reviews | Mobile Reviews Photography Reviews Columns | News | Features | How-To | Resources |
 © 2025 Shutterbug
AVTech Media Americas Inc., USA
All rights reserved