- REVIEWS
Camera Reviews 
More Reviews Mobile Reviews Photography Reviews - GALLERIES
- VIDEOS
- BUYER'S GUIDES
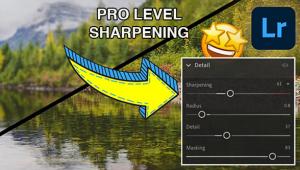
Give Outdoor Photos More Drama & Depth by Shaping the Light (VIDEO)

We regularly post editing tutorial that help you enhance promising images that fall a bit shott, and this one from the popular PHLOG Photography YouTube channel is both quick and very effective.
German landscape photographer Christian Mohrle is a regular on this page, and today's episode demonstrates how to manipulate and "shape the light" in photos captured under less-than ideal conditions. All it takes is a few simple tools in Lightroom to keep drab photographs out of the trash. As always, we suggest downloading Mohrle's Raw file with the link beneath the video so that you can make the adjustments yourself as they're explained.
Mohrle typically begins his edits with a few basic global adjustment to create a solid starting point for the powerful selective enhancements that follow. The first step for today's flat, contrastless shot is changing the profile from Adobe Color to Adobe Landscape. As you'll see, doing this instantly boosts saturation.
Other preliminary modifications are dropping exposure to darken the base image, lowering Vibrance, and increasing color temperature to neutralize an unwelcome color cast, balance the tone, and warm up the photo.
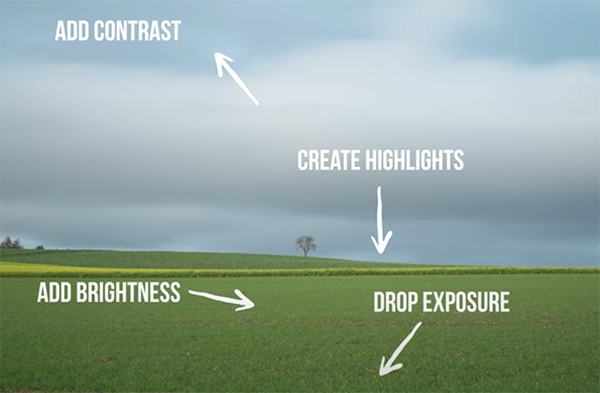
The image is definitely improved, but it still appears far too flat, and here's where the meat of the tutorial occurs. Mohrle rectifies this problem and others with Lightroom's Masking tool and the light shaping process begins. His first target is the sky where his goals include adding drama to the top area the shot, accentuating details in the clouds, and further boosting Saturation in this portion of the shot.
The next target is the foreground that's still lacking in contrast, and Mohrle walks you through a few selective enhancements that make a very impressive difference. Here he uses a Linear Gradient to raise exposure, "to make it appear that sunlight is falling right on the field." He also adjusts White Balance to add a very subtle Golden Hour effect.

The final steps in the remarkable transformation, include careful color grading, a bit of sharpening, and a quick cleanup to remove several distracting dust spots that detract from the photo. It's quite a big improvement in less than 10 minutes, and one you can easily accomplish yourself.
If landscape photography is your thing be sure to check out Mohrle's popular YouTube channel where there are many more post-processing tips and tricks to learn.
We also suggest watching the earlier tutorial we posted from another accomplished pro who explains two common editing mistakes that ruin landscape and wildlife photographs. Then he provides straightforward tips for doing things right.
- Log in or register to post comments


![]()
Get the Latest Photo Tips, News & Reviews from Shutterbug!
| Camera Reviews Other Reviews | Mobile Reviews Photography Reviews Columns | News | Features | How-To | Resources |
 © 2024 Shutterbug
AVTech Media Americas Inc., USA
All rights reserved